
How To Hatch Chicks With A Broody Hen And How To Build A Brooder Box Out Of One Piece Of Plywood6/23/2020 
If you are trying to learn how to hatch chicks with a broody hen, you are in the right place! My first year of owning chickens I started with day-old chicks. Let me tell you it was a lot of work caring for those chicks (I don’t know how people do it who don’t work from home to be honest). Keeping poop out of the waterer, checking on chicks for pasty butt, adjusting the heat lamp, making sure they had enough food - it was constant work.
In this post I am going to teach you:
Don’t get me wrong, I loved having the hands-on experience and I adore my hand-raised hens. The thing is, once I let my very first hen go broody and raise her own clutch of chicks, I realized I am never going to raise chicks myself again. Why? Because broody mama hen was one thousand percent better at it than me! 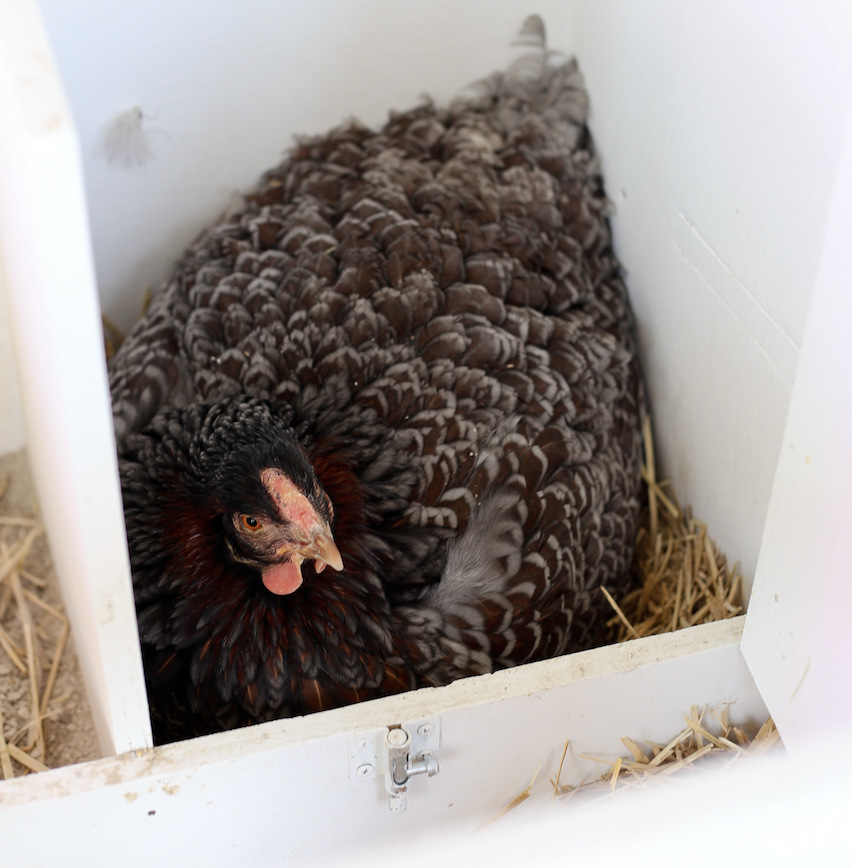
What are the benefits of letting a broody hen hatch eggs?
Hatching your own eggs in an incubator is definitely an option (click here to learn how!), but your broody hen is nature’s incubator, and one that won’t suffer technical glitches that could leave your hatch DOA.
When a hen goes broody, her fluffy bottom heats up to the absolute perfect temperature for incubating hatching eggs. The humidity that her body naturally creates and the insulation that her feathers provide are the ideal environment for properly developing fertilized eggs. Broody mama hen will also turn the eggs exactly when needed so the embryo doesn’t stick to the side of the egg (something you have to do manually with certain types of incubators). Essentially, this environment is what incubators are mimicking. Unfortunately, once your eggs hatch in an incubator, it’s up to you to raise them. This means checking on chicks multiple times a day, watching for pasty butt, constantly replenishing feed, the list is exhaustive! So I say - when you are given the gift of a broody hen - accept it and let her hatch some fertilized eggs. 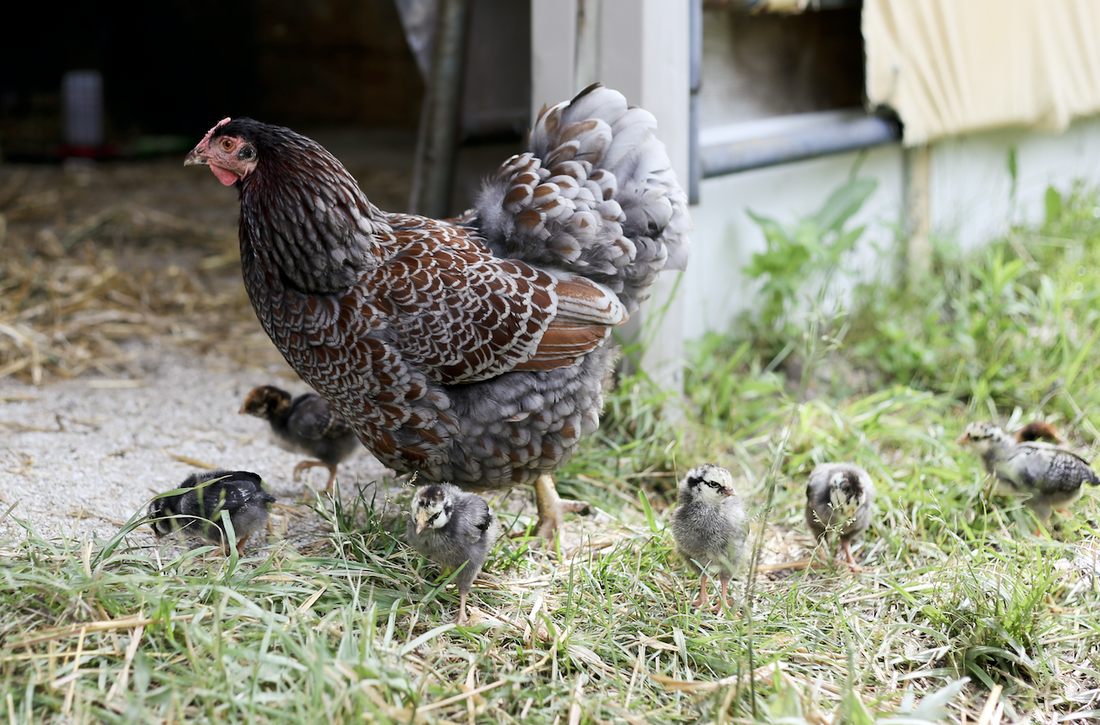
How do you encourage a hen to go broody and are certain chicken breeds more prone to go broody?
In my experience on our farm, hens typically go broody after the spring equinox. The day length is growing, the weather is warming up, and certain hens will start to feel that broody itch.
Certain breeds are more inclined to go broody than others. Typically heritage breeds sourced from small ethical hatcheries or farms have the best chance of inheriting the broody gene. Most mega hatcheries breed the broodiness out of their blood lines. The best breeds that anecdotally go broody are:
I will be the first to say that we’ve had our own random barnyard breeds (the chicks we hatch from random roosters and hens) go broody from time to time. Once a momma hen proves herself to be a broody, she will most likely go broody every year for you. The best way to encourage a hen that is inclined to go broody is to leave eggs in the nesting box. When a hen is just on the tipping point of broody territory, that clutch of eggs is going to be the thing that sends her over the edge. As soon as she spots a safe, secure, and quiet spot with 8-12 eggs - she’s going to hunker down and let her broody flag fly. So leave 8-12 eggs in a nesting box for your hens after the spring equinox and cross your fingers. Be sure to swap the eggs out every seven days and replace them with fresh eggs so you don’t have an exploding rotten egg situation on your hands (don’t ask me how I know). These eggs are called decoy eggs and they are *not* the eggs you want to hatch. That comes later. 
What are the signs of a broody hen?
A hen is broody if she is hunkered down on the nest and refuses to get off. If you approach her or try to get the eggs out from under her, she will puff her feathers up and make an angry velociraptor noise that rivals Blue from Jurassic World. She may try to peck your hand and shift her weight from side to side to snuggle the eggs more tightly beneath her.
Your freshly minted broody hen may take a few days to settle into broodiness. Don’t be alarmed if she exhibits the signs above, but gets off and on the nest at first. I recommend letting a broody hen settle in for three days before you move her. 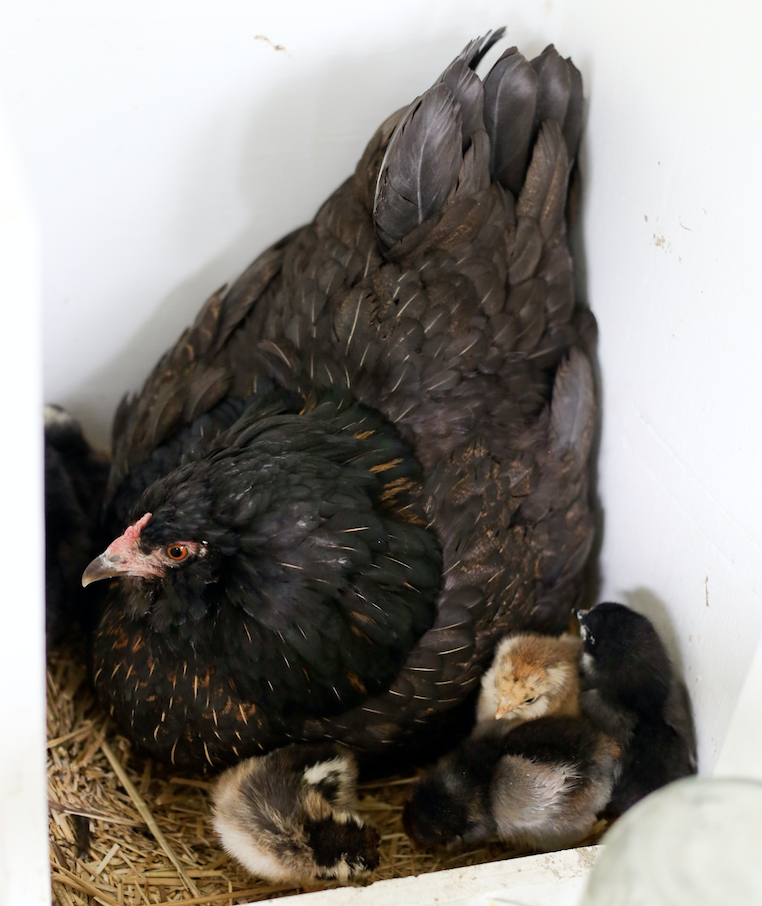
Do I need to move a broody hen out of the coop to hatch chicks?
Speaking of moving your broody hen! The number one question I get from chicken keepers is - do I need to move my broody hen to a different spot for her to hatch chicks?
The answer is a huge YES! You can kiss your perfect cute baby chicks goodbye if you decide to leave your hen to brood in her coop with her flock. Why?
I seriously cannot shout this enough from the rooftops - you have to move your broody hen to her own space to hatch eggs. 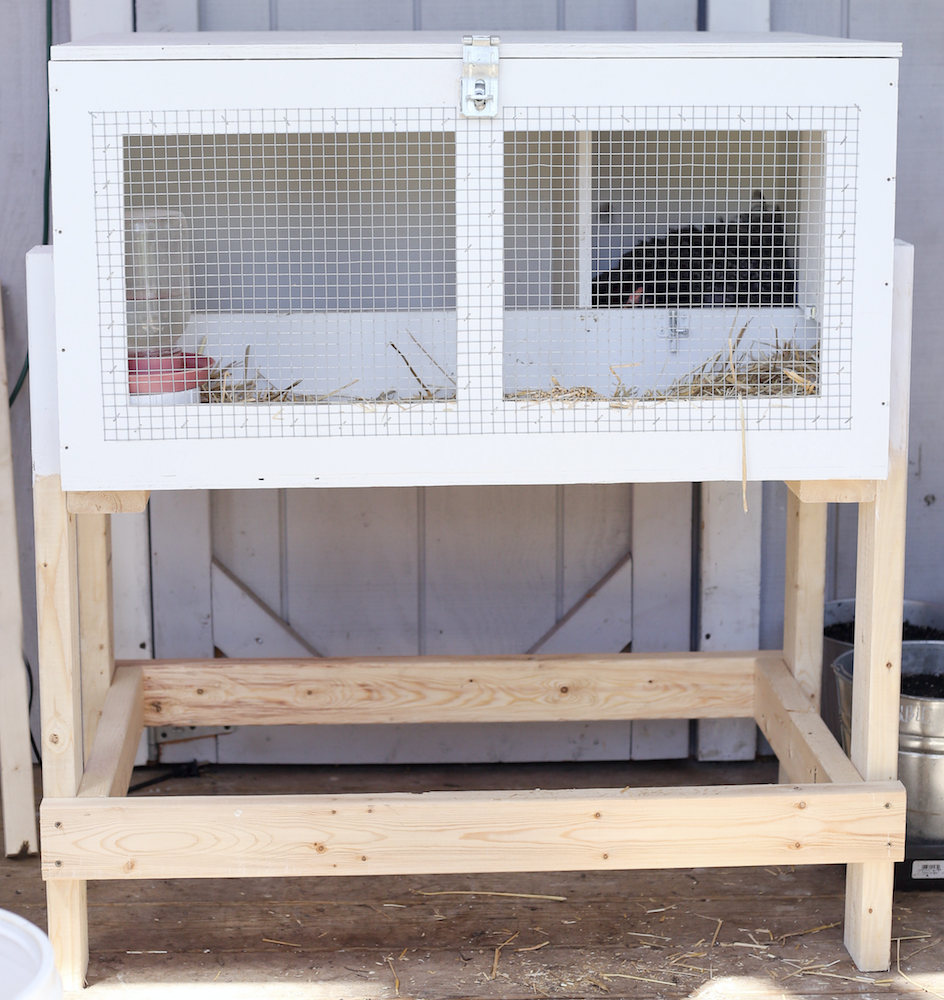
What is the best place for a broody hen to hatch chicks?
Your broody hen needs a quiet, secure, and safe place to brood. That place needs to have the space for:
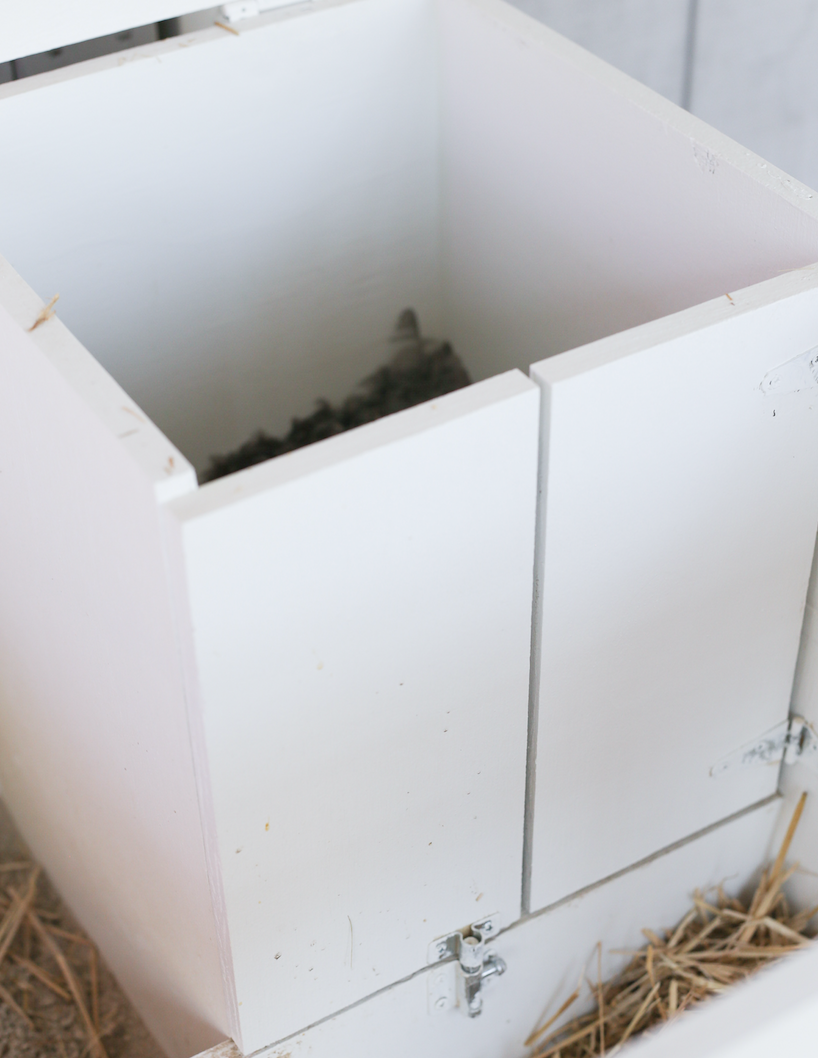
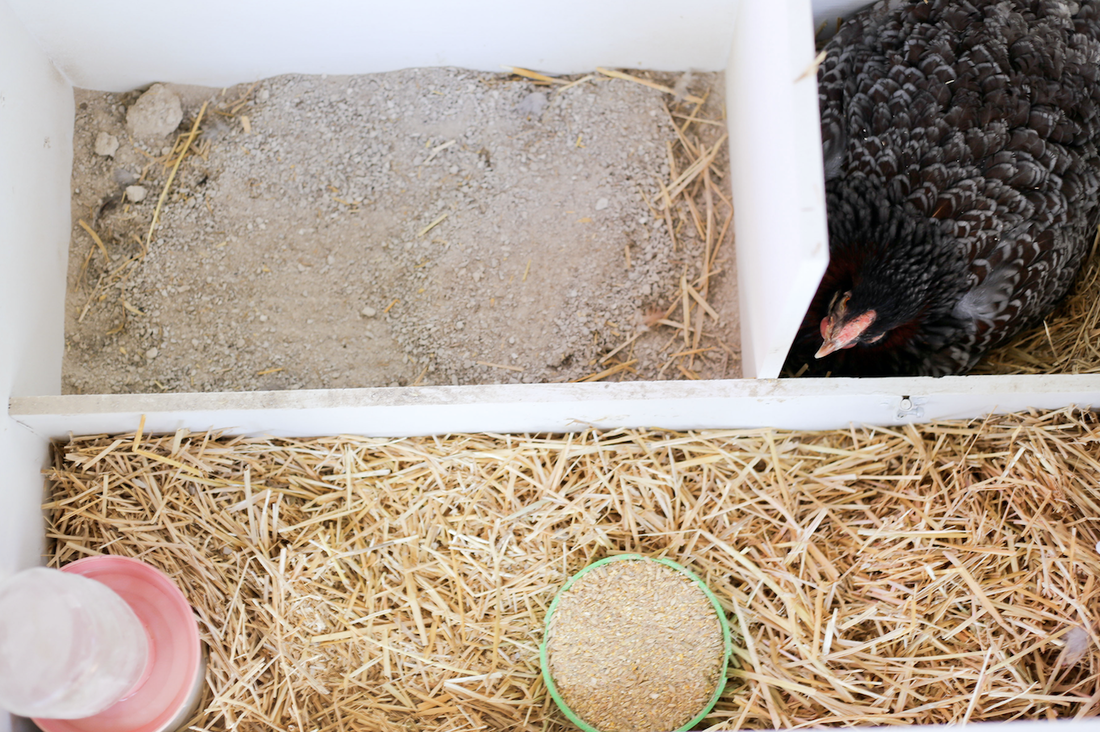
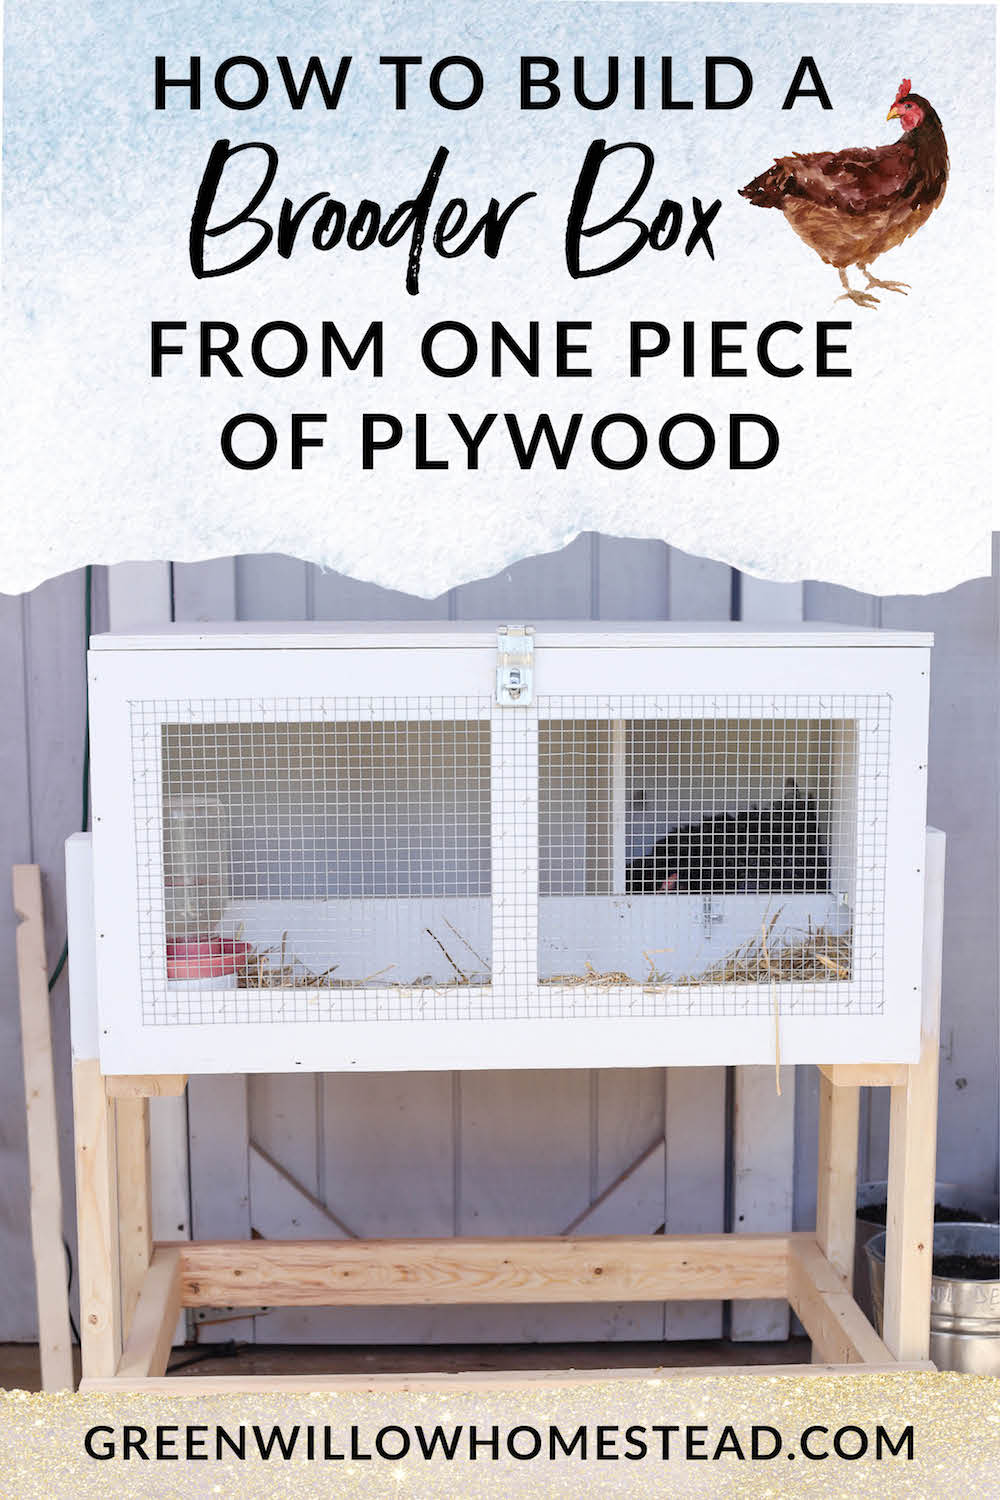
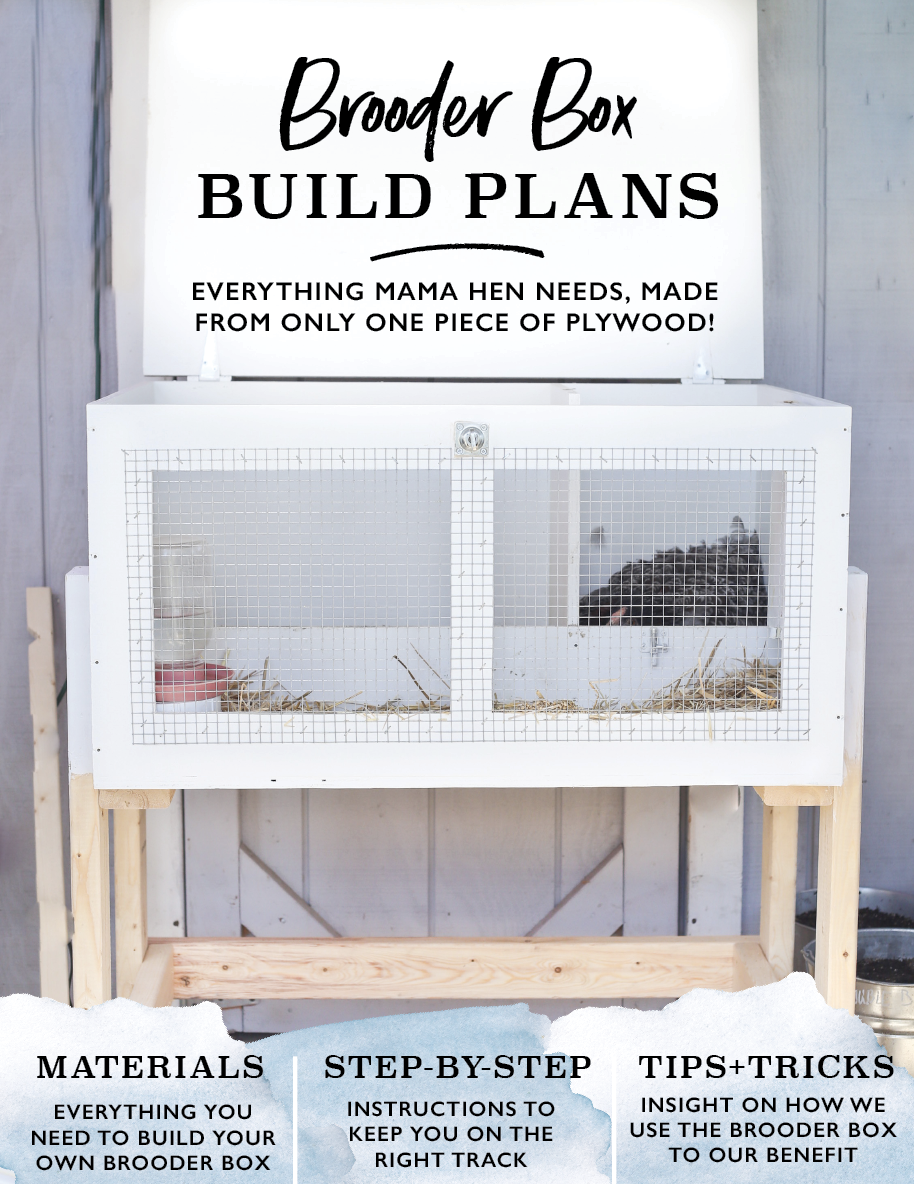
This can be as simple as a separate stall in the barn with a milk crate for her to nest in, a separate chicken tractor, or a brooder box built specifically for momma hen. We built our own brooder box (pictured above) out of one piece of plywood and you can grab the build plans at the bottom of this post! Have your brooder box or spot all set up and ready to go for your broody hen. That means prepping the dust bathing spot with crushed limestone + wood ash + Diatomaceous earth, putting fresh straw in her nesting area, and having food + water ready to go. 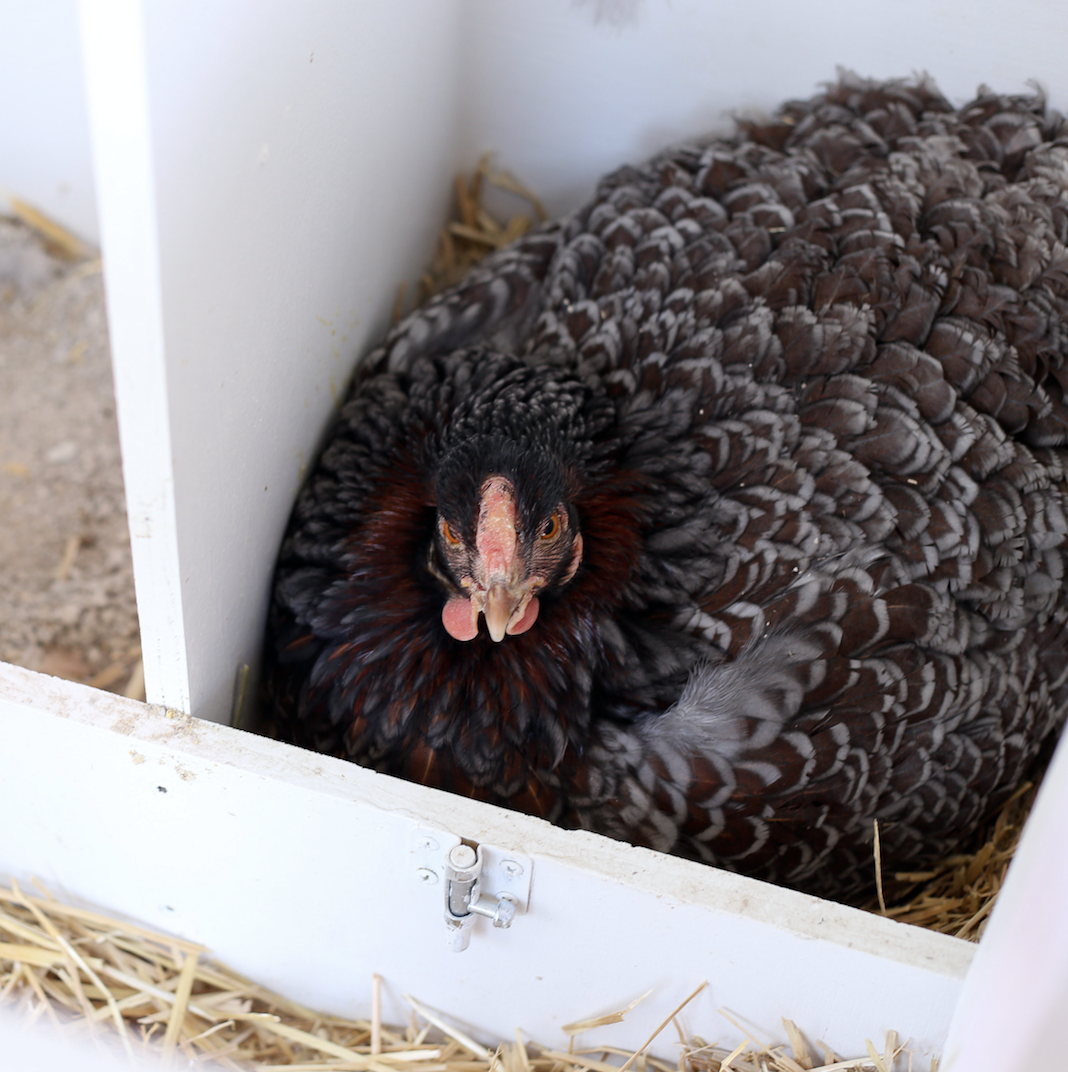
How to safely move a broody hen to a brooder box?
Okay - you’ve got your broody hen - check! She’s been consistently broody and it’s been three days - check! Now it’s time to move her to her own separate space to brood.
What to expect the first 24 hours after you move a broody hen? How to keep your broody hen on the nest using the Broody Box-In Method (pictured above)!
When broody hen wakes up in an entirely new space, chances are she is going to freak out. I mean - wouldn’t you? That’s why it's important to box your broody in for the first 12+ hours. This ensures that she remains calm, her broody determination stays strong, and she feels safe.
I know boxing in your hen sounds a bit harsh, but it’s a common practice in the chicken keeping community. Broody hens are known to sit on nests for up to 36 hours without eating, drinking, or pooping. 12 hours isn’t too much to ask to ensure that your hen doesn’t break her brood. Ways you can box in your broody hen:
You’ll want to box your hen in immediately after you move her and then check on her the following morning after 12 hours have passed (to be clear: the countdown starts as soon as you move her). After 12 hours have passed is she clucking angrily or is she calm and content? If she is clucking angrily, then let your hen get off the nest and see what her behavior is like. She may want to inspect her new spot and make sure she and her eggs are safe or … she may need to poop. Give broody hen 10 minutes to do her thing. She will most likely poop, eat, drink, dust bathe, and squawk a lot. If she hasn’t gotten back on the nest after 10 minutes have passed, then box her in again for another 12 hours. I know this sounds harsh, but your hen needs the time to calm down and get back into the “zen mode” that is broodiness. If after three box-in sessions your broody hen still has not settled down, remove her her from the brooding area and put her back with her flock for a few more days. Then try the process all over again. If she is calm and content, then all is well and you can let her go about her business in her new digs. No need to box her in any longer! 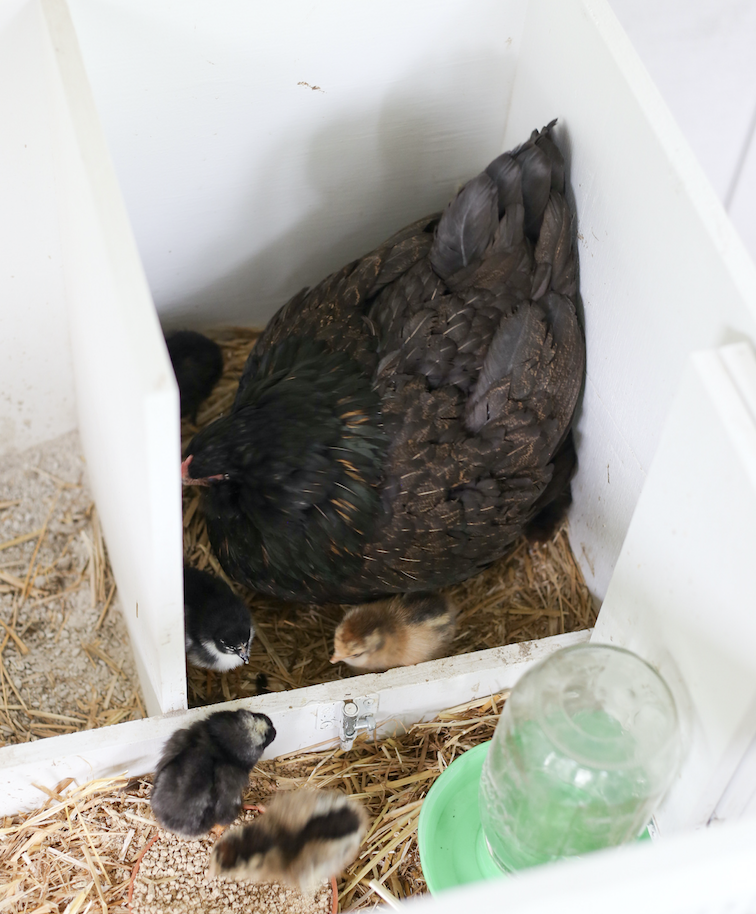
What are your hatching options with a broody hen?
The incubation period is 21 days. Mama hen is prepared to wait that long or longer to see chicks come out from underneath her bloomers so that gives you lots of options. I’ve tried all of the following options so I’ll share some tips for each.
Hatching your own fertilized eggs: I’ve had a ton of fun creating barnyard breeds on our farm. My rule of thumb is to gather eggs from the best hens mated to the best rooster. We keep our flocks separate and I’ve been able to identify my hen’s eggs by their color. We typically hatch out the eggs from our Olive Egger rooster to our Wyandotte hens. The results have been extremely hardy barnyard breeds. We only breed the most docile and caring roosters to our most productive and healthy hens. At the spring equinox, begin gathering your best eggs for hatching. Only keep the cleanest and most well-formed eggs. Stay away from extra large or small sizes for hatching eggs. Obviously don’t keep cracked eggs. Hatching eggs need to be kept at room temperature and out of the sun. Have a labeled carton on hand for storing and stock eggs from left to right so you can swap out older eggs for new eggs. Keep swapping eggs for the freshest ones possible until your broody hen is ready to go after her 12 hour broody-box-in period. Once your broody hen is settled in, at night swap out the decoy eggs and place up to 12 eggs underneath her (depending on your hen’s butt size - yeah I said it). Hatch eggs from an NPIP certified hatchery: I think it’s best to wait and order eggs once you know for sure your hen is settled into her broody box. That way the eggs will be as fresh as possible and you know your broody won’t spook. Follow the same directions as above for swapping out the decoy eggs for the hatching eggs. Remember, mama hen is willing to wait 21+ days to see chicks so it's not a big deal if she sits on decoy eggs for a few days before you swap them. To learn why you should support small ethical hatcheries over the mega hatcheries, click here! 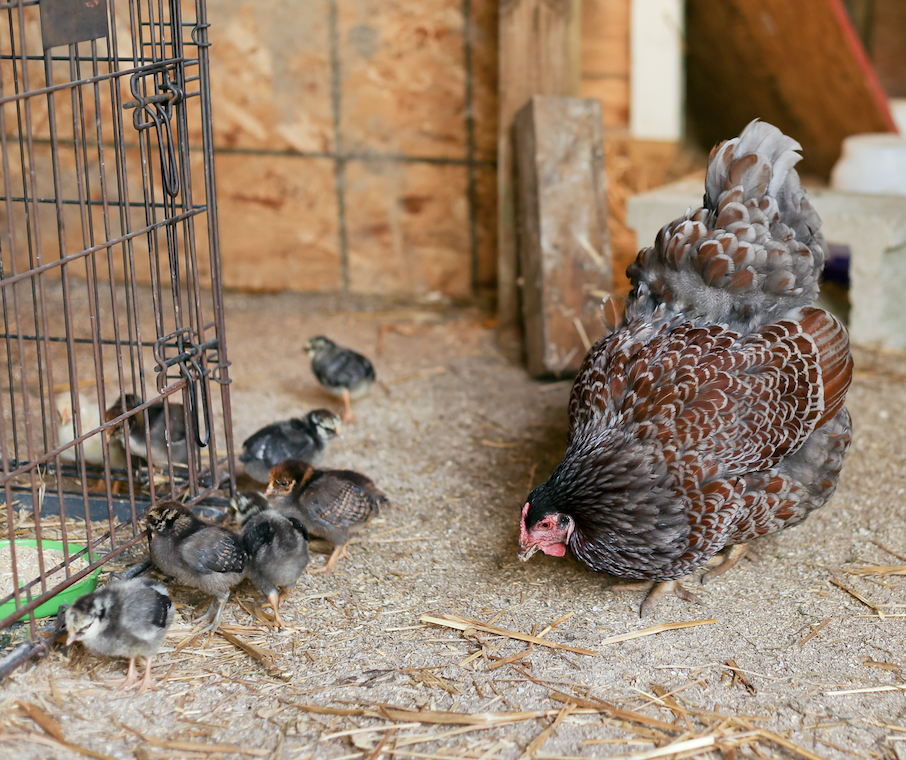
Latching day-old chicks onto a broody hen: This option requires proper timing. While your hen can’t do calculus, her body clock can count. She is not going to accept chicks unless 21 days have passed. I’ve successfully latched up to three clutches of chicks onto broody hens and waiting until the 21 day mark is key.
The other crucial thing to do when latching chicks is to do it at night when it’s completely dark. Remember, broody hen is in zombie mode and is much more likely to believe her chicks hatched overnight. Be sure to swap out all the decoy eggs and replace each one with a chick. Then check first thing in the morning (I’m talking as soon as the sun peeks over the horizon) to make sure everything is hunky dory between mama hen and her new babies. Signs that latching chicks is going well:
Signs that things are not going well with latched chicks:
How to care for your broody hen while she sits on eggs?
I will be honest and say I am an overbearing chicken mama. I will dote on my hens and give them all kinds of attention and the same goes for my broody hens. Luckily you can simplify broody hen care down to:
Dust Bathing: Have a designated spot in the broody area for your hen. You can use a litter box pan and fill it with gravel and Diatomaceous Earth. You can also purchase our Brooder Box Build Plans that comes with a built-in dust bathing spot (pictured above!). Food: Because broody hen is not laying eggs, I like to switch over to chick feed because the protein content is higher than layer feed and will keep mama hen well fed. It also isn't a shock to mama when the chicks arrive and suddenly there's a different kind of food for them! Always keep the feed stocked for your broody because she will only get off the nest once per day and you want food at the ready for her when she does. Water: I use a chick waterer for broody hens while they are in our brooder box. I like to add a few drops of apple cider vinegar to help mama hen's immune system while she broods. Provide fresh water for your broody every day. Treats: I like to give crushed hardboiled eggs and scratch grains to my broody hens to keep their weight up (broody hens naturally lose a lot of weight while they brood). Having scratch grains readily available is a great call to keep your hen healthy. Broody poop removal: These poops are no joke. Every chicken owner who has dealt with a broody hen knows them because you can smell them for miles. A broody hen will only poop once per day - which is a lot of poop at once considering chickens poop about 15 time per day. Be sure to clean them up immediately to keep flies away and your brooder spot clean. Fresh Straw: I like using straw as my go to for brooder bedding because it's soft, compostable, and readily available. Chicks can have respiratory issues with pine shavings and even mistake the shavings for food when they arrive, so I like to steer clear of them. I replace fresh straw if the water accidentally gets knocked over or there was a very messy poop. Peace and quiet! Mama hen needs to feel safe and secure. That means no flock mates distracting her, no loud noises, and a space that she can "look out" of. Mama hen wants her back, sides, and above her head to feel secure and then be able to look out straight in front of her so she knows what's coming. This is a primal need that is your responsibility to fill. It's also why our Brooder Box design has look out windows in the front, with mama hen safely secured on the remaining sides in a nesting box. Speaking of our Brooder Box...
In my next post, learn how you can support and care for your broody hen and her new clutch of chicks.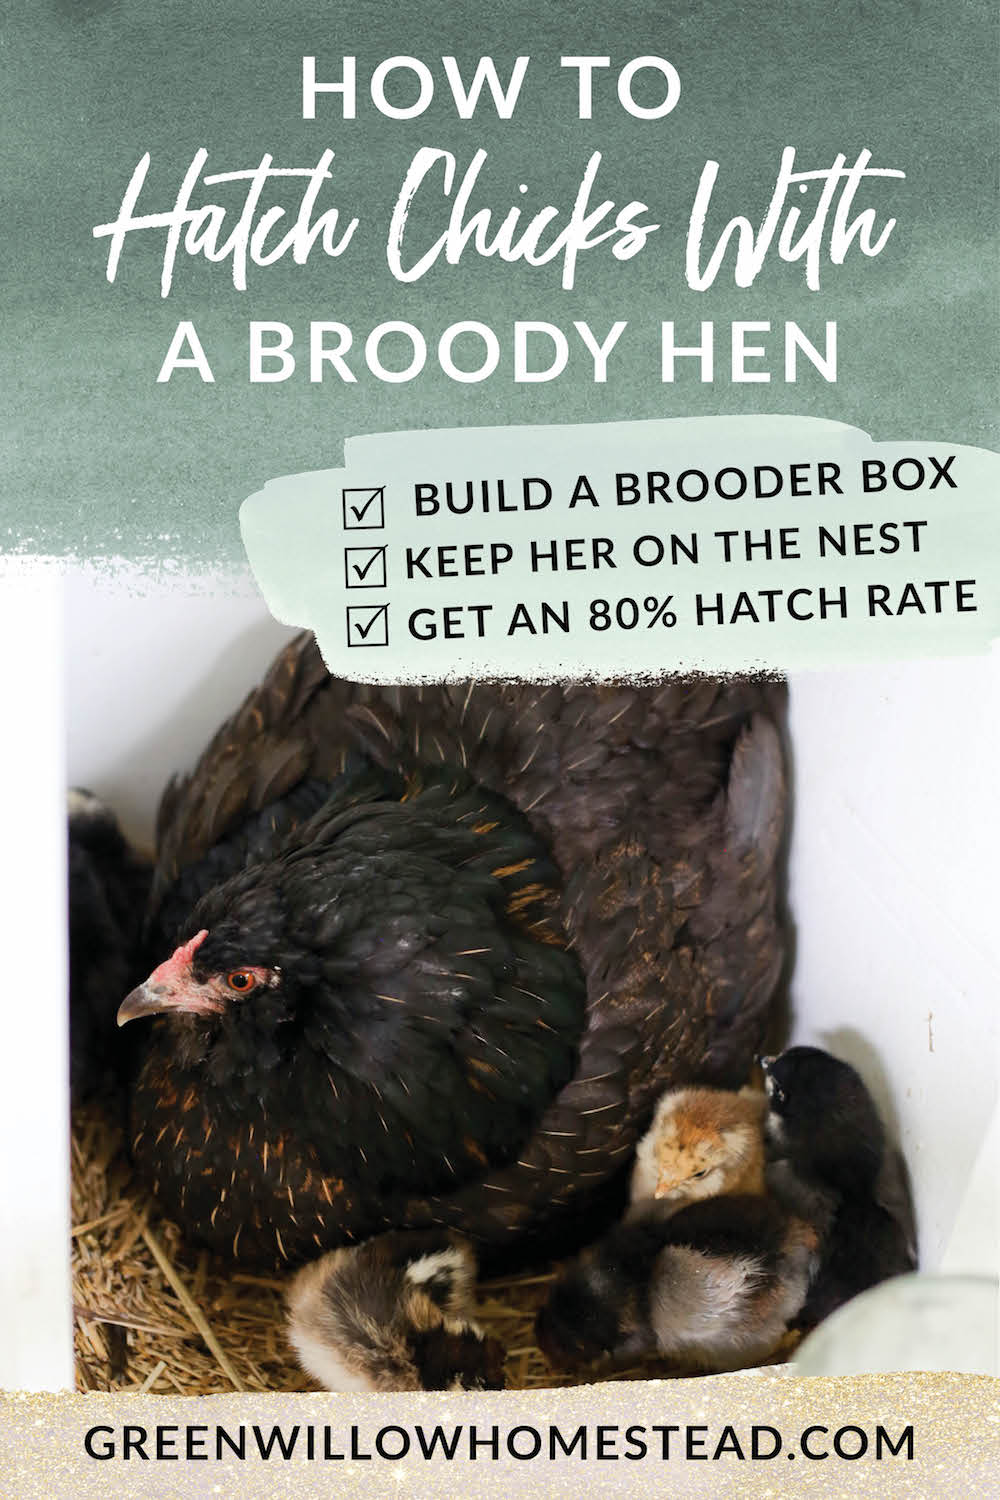
9 Comments
8/19/2020 09:11:41 am
found your this post while searching for some related information on blog 8/19/2020 09:12:59 am
..Its a good post..keep posting and update the information
Hi Kelsey. Great information, thank you.
Kelsey
1/25/2022 08:51:01 am
Hi Katie!
Karen
5/30/2022 07:21:34 pm
Hi Kelsey , I was wondering once the chick‘s hatch how long do you keep mama in her babies in the brooder box? Or old do the chicks need to be before putting them back in with the main flock ty
Kelsey
5/31/2022 09:55:02 am
Hi Karen! I usually keep them in the brooder box for the first week with mama and then slowly transition them out (by day they get to be out and about with mama and by night putting them back in with mama). It depends on your setup really. We let our free range with the rest of our hens with mama starting at week 2 during. the day. Mama hen will protect them from the other hens in your flock. Mama will eventually move on around 2 - 3 months depending. From that point on the chicks have been slowly introduced to the flock with mama as their protecter. :)
Anne
9/7/2022 09:55:05 pm
Can I put this brooder coop in my run where other chickens are. It’s covered. Should I make them their own run off the brooder so baby chick is safe from rooster and chickens. When can baby chick go out with others I don’t free range daily only once and awhile. How can I heat this in winter.
ingrid
3/17/2023 12:48:51 pm
Great idea, I have been wondering how to get chicken hen to brood a clutch of quail eggs. Anyone have success with this, or trying to get quail hens to go broody? Thanks. Leave a Reply. |

Meet Kelsey,Thanks for stopping by Green Willow Homestead! From chicken rearing to composting, we've got our hands full and we love sharing what we've learned along the way. Follow along as we turn the 80 acres we call home into a farm that serves its community and a homestead that nourishes us throughout the seasons. 
Grab the EbookListen in!
FREE Guide!
Tune in to our YouTube ChannelInspirationsCategories
All
Favorite Books of 20241. Erosion
2. Braiding Sweetgrass 3. As Long As Grass Grows 4. The Small Scale Poultry Flock 5. The Zero Waste Solution Archives
April 2024
|
FOLLOW KELSEY ON INSTAGRAM!
|
|
As an Amazon Associate I earn from qualifying purchases. |
|