
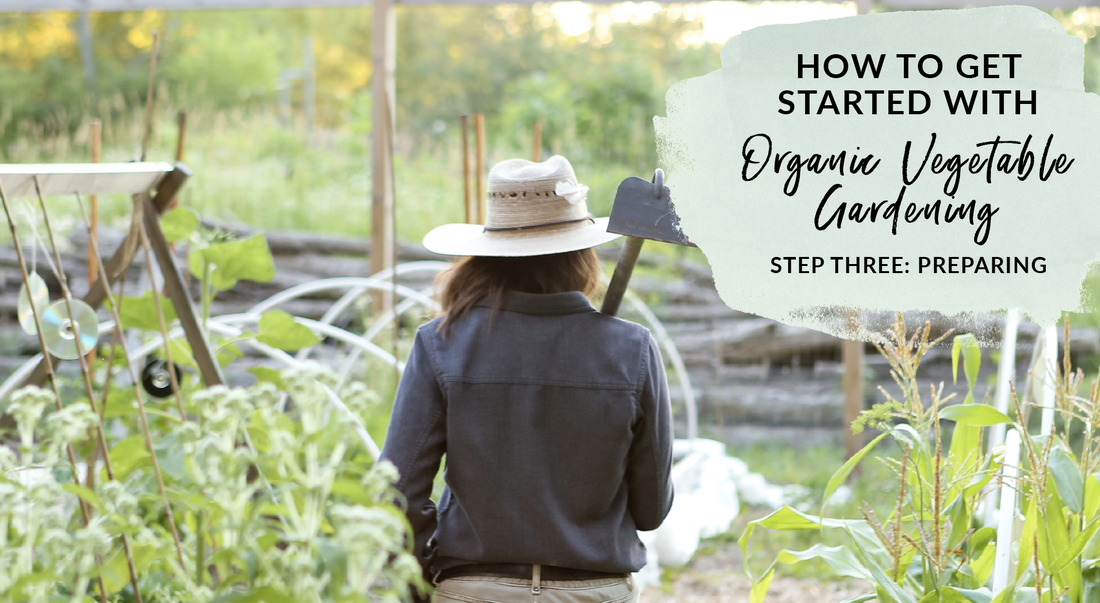
A vital step in cultivating a successful organic garden is preparing. Preparing to me means figuring out where the garden will go, if the soil is in good shape for veggie growing, and what you need to build the basic structure of the garden. Preparing here we come!
To start at the very beginning in this garden blogging series, head over to this blog post.
Figuring out where to put a vegetable garden comes down to three very important factors - getting the most amount of sunlight every day, the quality of the soil, and how convenient is the spot.
Factoring in Sun Exposure
The Green Willow Homestead Verdict!
Take a day to track the path of the sun over your proposed garden spot. Opt for a sunny day and observe hourly. Take notes! If you have a huge tree to the south of your soon-to-be garden spot, when does shade start to creep into your growing area? Finding a spot that has no tall shrubs or trees directly to the south of your garden (for those of us in the northern hemisphere) is imperative. Otherwise, you could lose precious hours of late afternoon sun.
You will need at least 8 hours of direct sunlight to grow heat loving produce like tomatoes and peppers. In southeastern Wisconsin I've found 9 or 10 hours to be even better for sun worshipping vegetables. If you don't have a spot like this in your yard, don't fret! You can still grow produce like lettuce, herbs, and root vegetables on just 6 hours of direct sunlight. Planting on a north/south row orientation provides the most amount of sun to your plants. Think about it, the sun travels from east to west every day, having your vegetables laid out perpendicularly to that ensures even sunlight and less shade. Keep this tip in mind as you plan out your garden beds. Another tip is to avoid a low point in your backyard, say at the bottom of a slope. The reason being cold air travels downslope and collects in low lying pockets. This can be a death sentence for plants early or late in the season as frosts encroach. 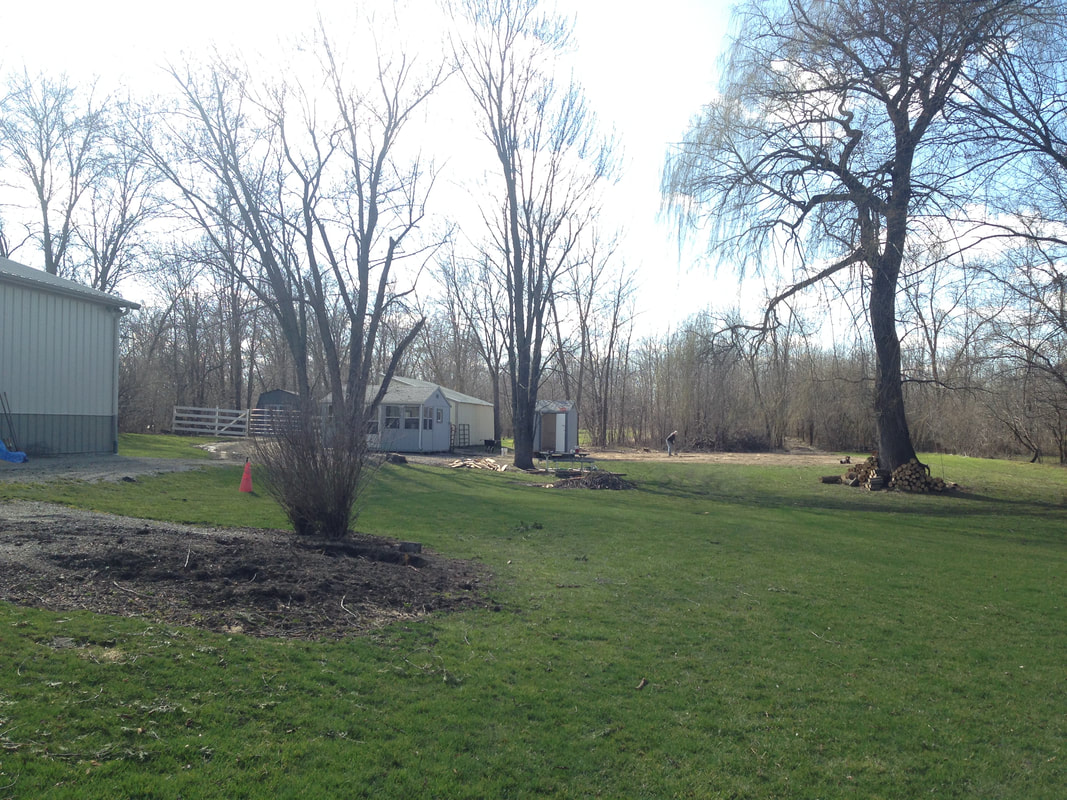
For a while, we were thinking we would put it in the back corner of our property, but it would be a TREK to get gardening tools back there every day. The soil and sun were perfect, but convenience trumped both of those factors. Having a garden close to your back door or a garden shed is so much easier.
In the backyard, we had a 70’ x 60’ open plot of land (see above) that got ample sunlight from sunrise to sundown and was 100 feet from our back door. Unfortunately, it was covered with an undeterminable amount of gravel (thank you frozen Wisconsin tundra). So in this case, soil is something we were willing to work with. Using our neighbor’s bobcat, we dug up the top layer of gravel and added 12 raised beds with topsoil instead. The spot is incredibly level now thanks to the previous owner’s attempts to put in an ice rink. Having a level surface allows rainwater not to pool in one spot causing plants’ roots to rot, or run off and leave your plants thirsty. By bringing in a layer of topsoil in raised beds we are able to start with a blank slate. There are three factors to starting your garden out with great soil - drainage, pH, and soil texture. Soil Drainage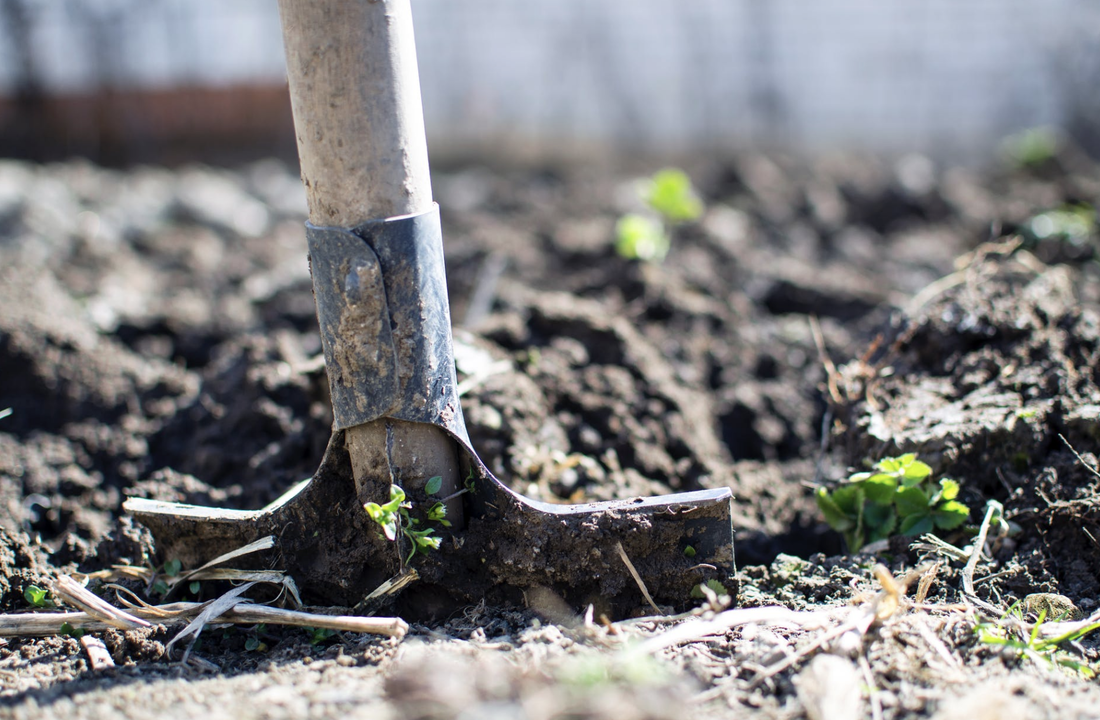
Soil drainage is something you can easily observe without any fancy tools or tests. All you need is:
2. Fill the hole with the gallon of water and let it sit overnight. By letting the water saturate the soil for one day, you are able to get a more accurate reading the following day. 3. The next day lay your broomstick across the hole horizontally, then fill the hole up with a gallon of water, and set the yardstick inside the hole vertically and rest it up against the broomstick. 4. From there just measure the drainage every hour. Ideal soil drainage is 2” every hour, which keeps most roots from being wet long enough to rot. If your drainage is less than that, you are going to have to make some amendments to the soil in order to improve its drainage. Topping off the soil with 2” - 4” of organic matter like leaves, mulches, and compost can help poor draining soils. The other alternative is to build raised beds and fill them in with purchased topsoil. This all boils down to your budget and how much work you are willing to put in. Soil pH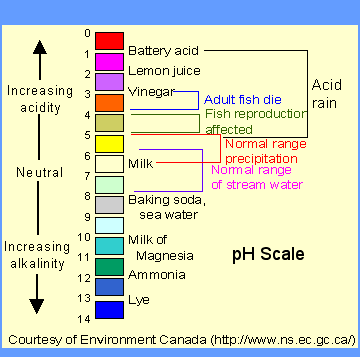
The next factor in getting prime garden soil is pH. Soil pH is a measurement of the acidity or alkalinity of the soil. Remember those cool colored test strips from biology class? I do! On the pH scale, a measurement of 7.0 is neutral, which is a great place to be for nearly all plants. Below 7.0 is considered acidic, and above 7.0 is considered alkaline.
Why is soil pH important? Soil pH affects the nutrient availability for your plants. In soils that are alkaline (over 7.8pH) iron, phosphorus, and zinc deficiencies are serious problems. In soils that are acidic (under 6.5pH), calcium and magnesium are much less available to your plants. This can make for some spindly lettuce and lethargic green beans, directly affecting your harvest yield! There is an extremely simple, albeit rudimentary, way to test the pH of your soil. All you need is:
2. Separate the soil sample equally between the two glass cups. 3. In the first cup of soil pour 1/2 cup of vinegar. If it fizzes then you have alkaline soil with a pH between 7 and 8. 4. If it doesn’t fizz, add distilled water to the second sample of soil until it is muddy. 5. Then add 1/2 cup baking soda. If it fizzes then you have acidic soil, with a pH between 5 and 6. 6. If your soil doesn’t react at all then you have soil with a pH of 7, lucky duck!! If you want to create a more hospitable environment for your veggies, the easiest thing to do is to add lots of organic matter. This means a healthy blend of pine needles, mulch, compost, and animal manure (hey chickens I’m looking at you!). What this does is increase the nitrogen in the environment, which decreases the pH over time by increasing the bacterial population. It’s best to do this a season in advance so you give your soil time to break it all down. This method can lower your soil pH by half a point, which could be all you need. If you want to go full-fledged Bill Nye on your soil, you can get a soil test kit and follow the more intense and quick methods of changing soil pH organically at this article. Soil Texture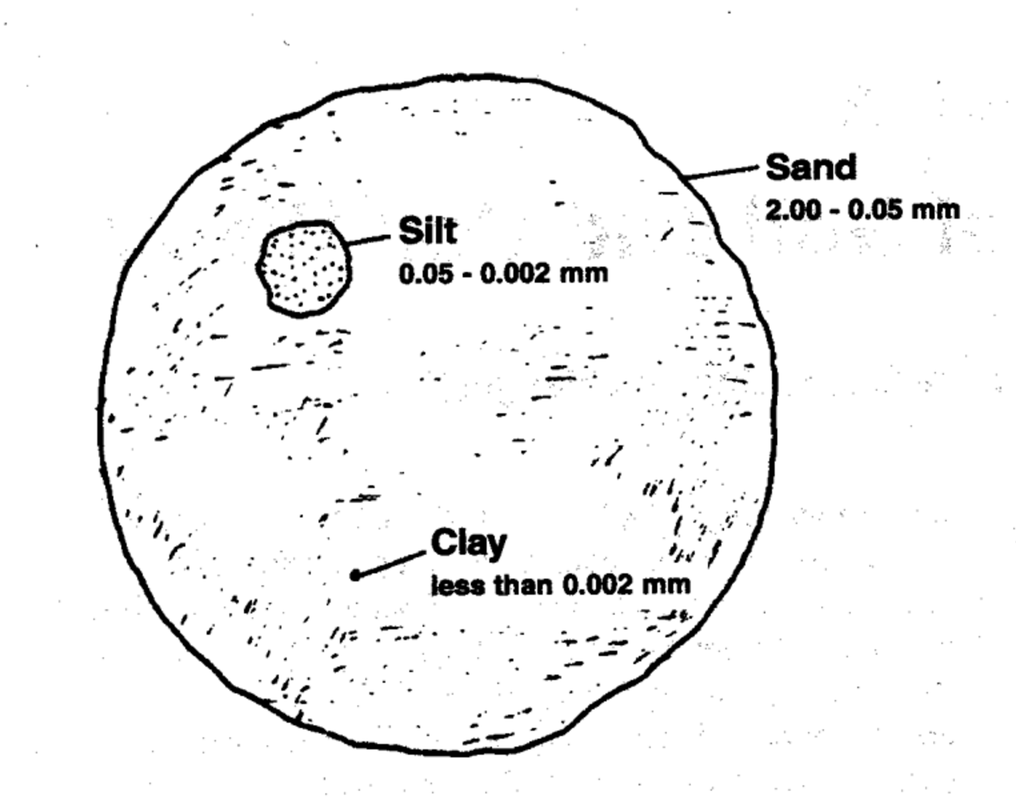
The final thing is your soil’s texture. Texture refers to the size of the particles that make up your soil. Unfortunately, texture isn’t something that is very flexible when it comes to working with your garden. What you do have control over is selecting the proper plants that do well in the specific state your soil is in. By planting vegetables that prefer the state your soil is in, you make it easier on your expectations and your veggies!
The three leading ladies of soil texture are sand, silt, and clay. Sand is the larger of the three and feels gritty, like, sand between your toes gritty. Then there is silt, which is more moderate in size, and has a smooth texture. The smallest of the three is clay, which feels tacky and sticky. The best texture for garden soil is loamy soil, which has a soft cake-like texture. Loamy soil has a texture made up of 40% sand, 40% silt and 20% clay.
So now you need to find out what texture your soil is! There is this amazing resource called the USDA Web Soil Survey, which has a national database on soils across the USA. You can use the Web Soil Survey Database to find your address and see the soil texture of where you live. It’s amazing! Be sure to follow their directions on that first page so you use it properly, it is a bit picky and not the most intuitive system. Here is a picture of the land around our property.
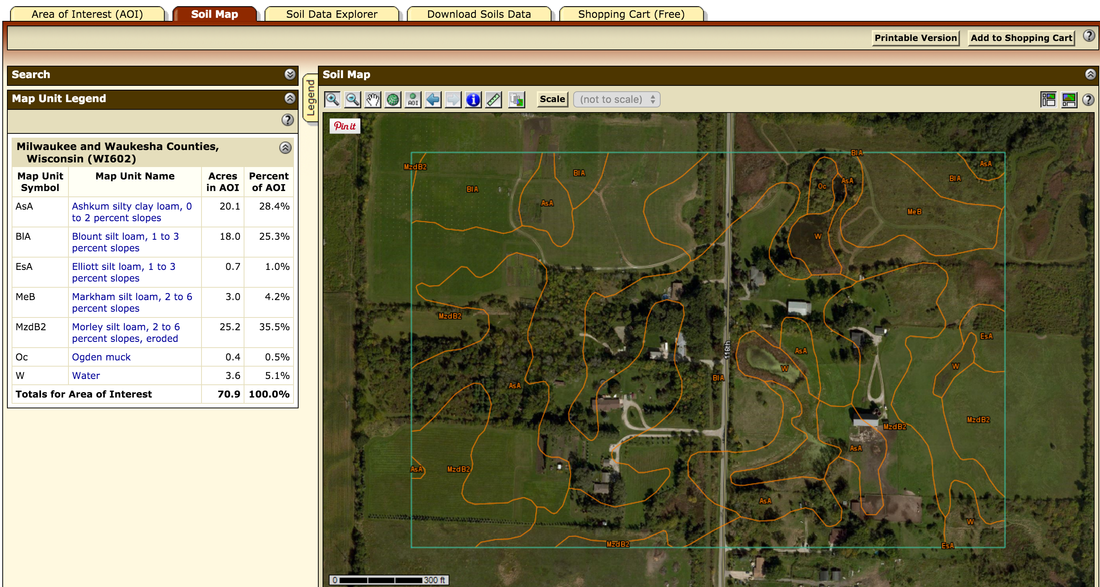
Where I plan on putting the garden the WSS tells me that the soil is a Blount silt loam texture. I googled this term and found a ton of info on this soil. Mostly that is isn’t the best draining soil, it’s tillable soil, and biggest use is for corn, soy, and small grain crop.
Do the same for your soil and see how it stacks up! Again, if the texture of your soil isn’t conducive to growing veggies at all, there is always the option of adding in your own topsoil. The issue is that topsoil can be extremely expensive. Paul and I ordered organic compost and soil to our raised garden beds and it was about $400! So you can see how advantageous it is to work with your soil and make cost-effective amendments. Again, the basic remedy for poor soil texture is to add organic material such as compost, manure, and peat moss. We'll dive into that next! Prepping Your Garden Site
Alright, now that we’re through talking about the importance of sun exposure and soil quality, let’s discuss preparing the area for gardening. If you are looking to build your own raised beds from scratch, hop on over to this blog post to learn how we did it for $37.50 per bed.
Many people in urban or suburban areas opt to truck or bring in bagged garden soil for their raised beds. If this is in your budget - great! If not, I've got a good solution to keep your wallet in check. It's an investment of time, but it saves you money. It's called lasagna gardening. In order to build up healthy soil in raised beds, you can layer lots of organic matter. Here's how the layers shake out:
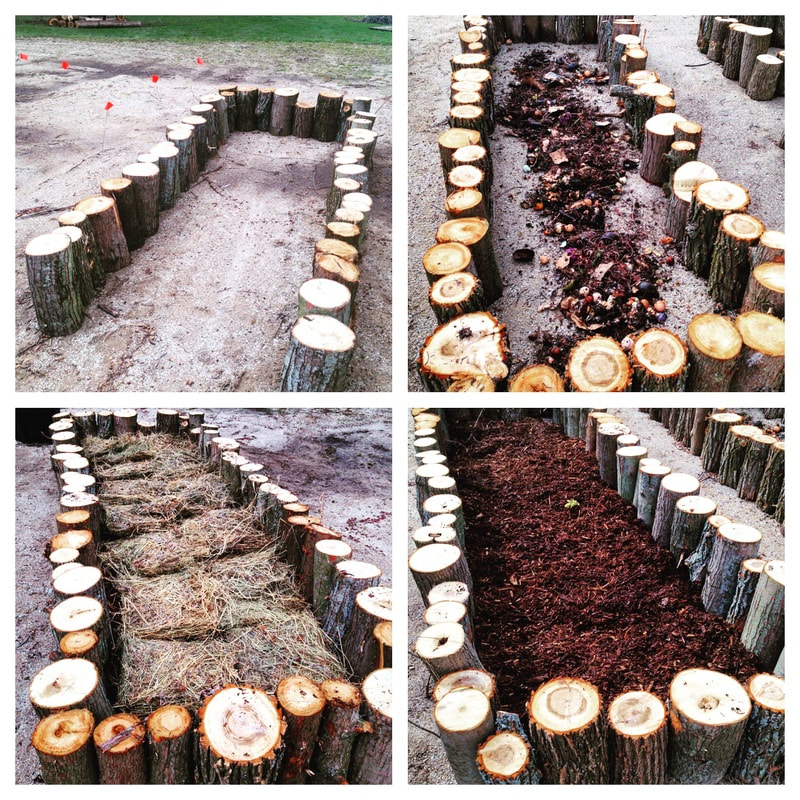
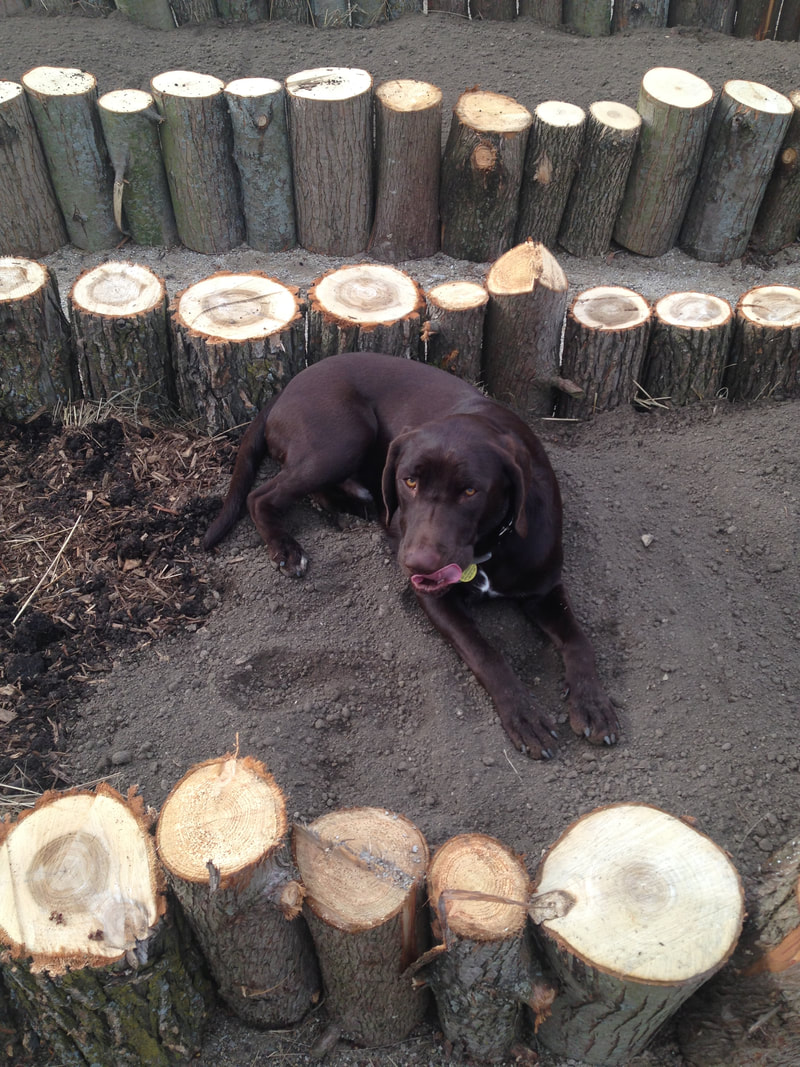
As you can see, we had switched up the layers a bit and added food scraps to our composted manure layer. Having wood chips as the base layer was a much better decision our second time around. They held tons of water throughout the growing season, and in turn, encouraged our vegetables' roots to penetrate deeper into the soil. You can even considering throwing in a dog while your at it!
Just kidding. This method saved us a ton of money, $950 to be exact. Since we put in 12 raised beds, that would have been a huge amount of cubic feet to fill!
If you plan on breaking earth without any raised beds, the best way to kill grass is the autumn prior to your growing season. You can do this without the use of any herbicides if you simply prepare! Here are the steps:
As for boundaries and barriers to wildlife, below is an example of our garden set up. Remember, we are on five acres - by no means do you need to create a garden fortress like this!
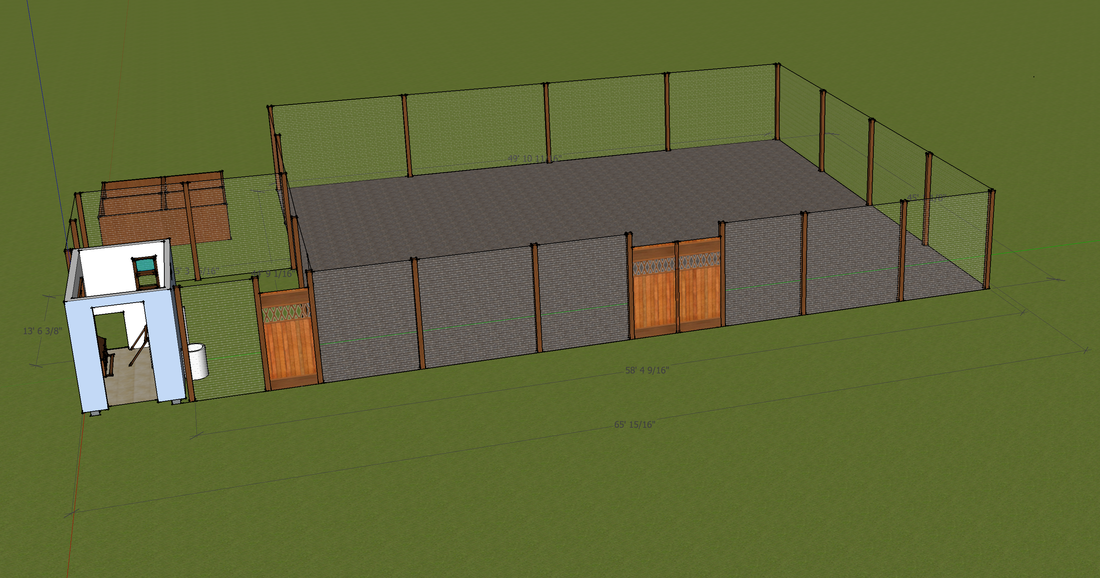
To check out how we made it happen and learn how to fence in your own organic garden, click here to read all about it.
The next post in our series covers everything you need to know to get started with planting your organic garden. My favorite part of gardening (well ... second to harvesting and eating)!
References
2 Comments
Dad
3/6/2016 07:54:58 am
Very Impressive Plan. Can't wait to give you a Hand. {almost rhymes)
Kelsey
3/7/2016 06:24:26 am
I can't wait either! Leave a Reply. |

Meet Kelsey,Thanks for stopping by Green Willow Homestead! From chicken rearing to composting, we've got our hands full and we love sharing what we've learned along the way. Follow along as we turn the 80 acres we call home into a farm that serves its community and a homestead that nourishes us throughout the seasons. 
Grab the EbookListen in!
FREE Guide!
Tune in to our YouTube ChannelInspirationsCategories
All
Favorite Books of 20241. Erosion
2. Braiding Sweetgrass 3. As Long As Grass Grows 4. The Small Scale Poultry Flock 5. The Zero Waste Solution Archives
April 2024
|
FOLLOW KELSEY ON INSTAGRAM!
|
|
As an Amazon Associate I earn from qualifying purchases. |
|