
 In this next post, we are going to cover how to plant your first organic vegetable garden and all the wonderful green thumb activities that fall under that umbrella. I’ll go over how to start seeds indoors, proper acclimation periods for your baby seedlings, and when to transplant or direct sow in your organic garden. To jump to the beginning of my organic vegetable gardening blog series, click here. Okay! First, let’s quick chat about where is best to purchase your seeds. My Favorite Seed Companies And Why If you are sitting here reading these organic gardening posts, chances are you have a [strong] opinion on GMO seeds. Genetically modified seeds are rampant in agriculture, mainly in our corn and soy, but they are also starting to pop up in our apples, beets, and squash too. I will be transparent and say I take a firm stance against the business behind GMO seeds, not necessarily the health risks. To me, the fact that a non-GMO farmer in Quebec was sued by Monsanto because their neighboring field’s GMO seeds accidentally pollinating his non-GMO seeds and that farmer lost the suit is absolutely ludicrous. This sets a precedent over what we as humans are entitled to “own.” In my heart, I don’t think it’s justified to patent life. I don’t think it’s fair to force second and third world countries to buy into your GMO seed for fear of losing out on international business, then force them to buy all the chemicals you made that are supposedly vital to harvesting that GMO seed. Companies like Monsanto enter foreign farming communities that have done perfectly fine farming on their own for hundreds of years and essentially force them into a contract to do business their way or the highway. It makes my heart hurt. Personally, I laugh in the face of an entire industry that claims it can do better than nature, whose actions reveal they think they know better than evolution. I’d rather use the tools nature has generously given us (i.e. composting, vertical layering, and mulching) to reap a bounty that doesn’t rip apart our environment. Luckily, there is an entire counter-industry to the GMO conglomerate, heirloom seed companies. Heirlooms are seed varieties that are open-pollinated, meaning the seeds they produce are viable and very much similar to their parents. In some cases, these heirloom varieties have been around for over a hundred years! The entire heirloom seed industry is built on sharing. Sharing seeds, sharing information, and sharing their bounty in the garden. Many gardeners, myself included, claim heirlooms are more delicious and hardy than hybrids or GMO seeds. My favorite companies to purchase heirloom seeds from are: The sheer amount of variety these companies have is stunning. There is always something lovely, delicious, and robust to plant when you purchase from them. Happy seed shopping! There’s No Shame In Starting Small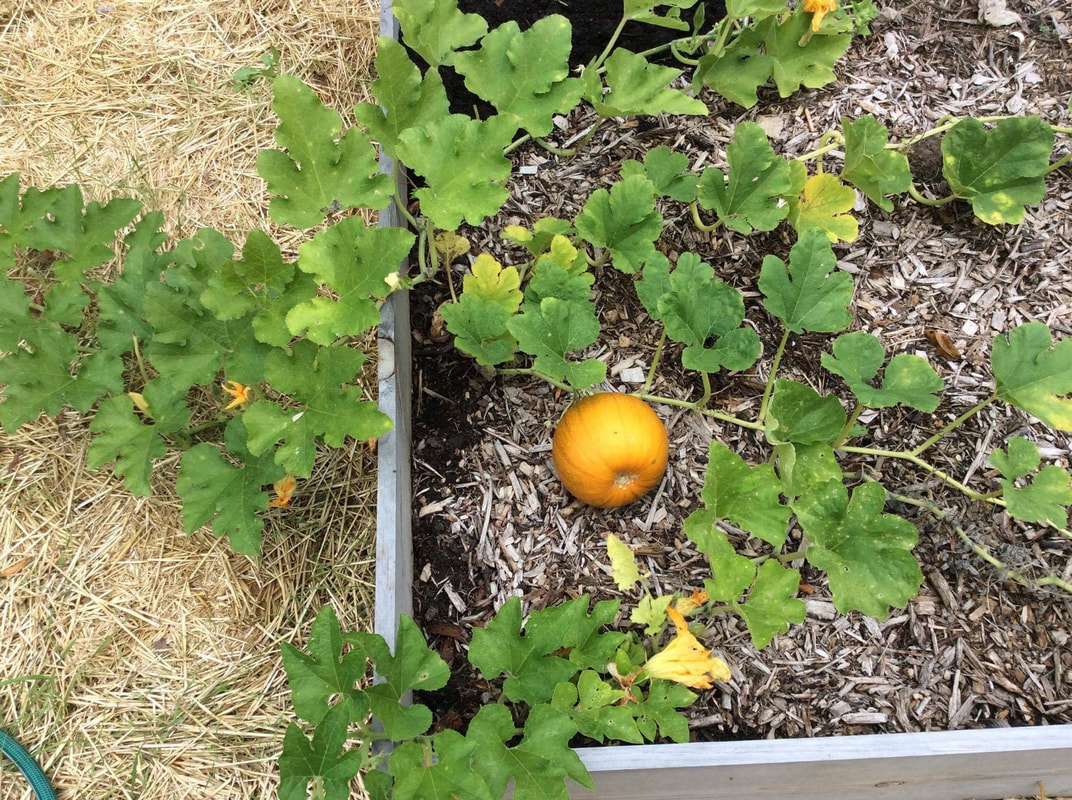 While here on Green Willow Homestead we went for 12 raised garden beds our first year, that doesn’t mean you have to too! Starting off on a smaller scale is perfectly fine as you cut your teeth on planting your organic garden. When planting cheaters (AKA store-bought seedlings) of larger plants like tomatoes, peppers, and squash - purchase at least three of a certain variety in case you lose one or two. Again, it’s nice to have back up when you make mistakes! How To Start Organic Vegetable Seeds Yourself The option of starting your own seeds is rife with choices. The pile of seed catalogs I accrue over the winter is a testament to that! Unlike falling victim to the four varieties of tomatoes a big box garden center offers, when you start seeds yourself, the number of different tomatoes you can try is upwards of 3,000. Last growing season I started eight different varieties of tomatoes from seed, this year that number will jump to 12. Starting seeds can feel overwhelming if you have never done it before, but the process is actually straightforward once you understand a growing plant’s basic needs. Let’s dive in! In order to germinate, the majority of seeds need a dark, warm, moist place to unfurl their verdant splendor. Once germinated, seeds need ample light, yummy food, enough room for their roots, and adequate moisture to grow. When we don’t give seedlings these things at the right time, they die. These are the first principles you must carry with you when starting seeds. Your setup and supplies have a large effect on your success rate, so I want to share with you how we do it on Green Willow Homestead. Our way isn’t necessarily the best way, it just works for us, so steal what you find useful and keep those first principles in mind as you get started. Please note: The links below are affiliate links, meaning at no additional cost to you, I will earn a commission if you end up clicking and purchasing an item. I worked hard to find my trusted favorites and I want to share them with you so you don't have to deal with all the crappy junk I had to go through. Nuff said. Beginner Gardener Supplies:
Starting Seeds IndoorsIn my home, we repurposed an unused china cabinet into a growing station using bathroom light housing fixtures (see below). You can also purchase a large hanging grow lamp. The grow lights we use are a combination of regular daylight LED bulbs and some actual grow light bulbs. You will want to position your grow lights no more than 2 inches away from the surface of the soil. Otherwise, your seedlings will grow long weak stems (AKA they become "leggy") which cannot support the weight of their true leaves. Once your leaves are less than an inch from the light bulbs, move your lamps up another two inches. 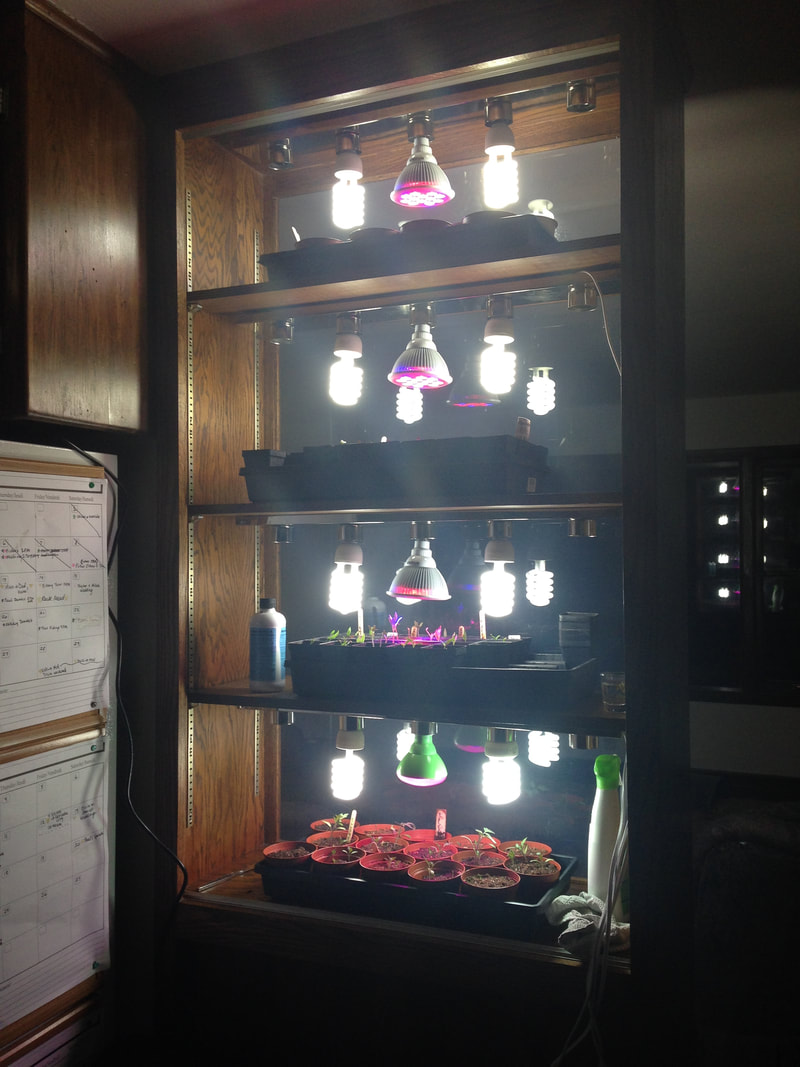 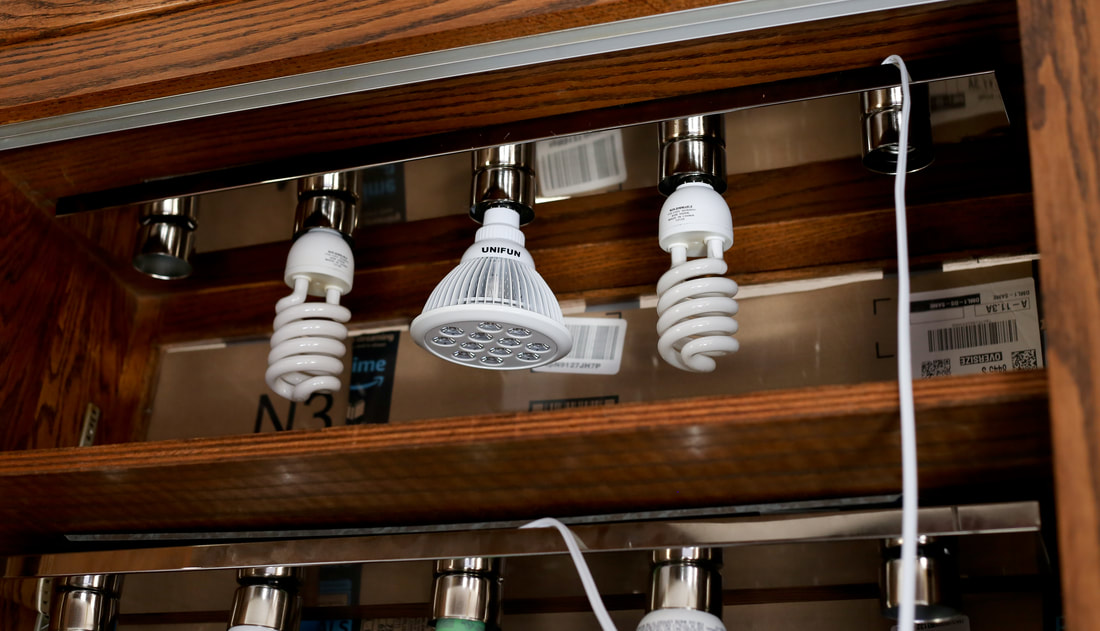 Mid-March I like to set up a big planting table outside, or in our garage if it’s a little too windy. I take two sawhorses and lay a big piece of wood across them, then cover it all with a tarp to keep things dry and clean. An old card table or workbench will do just fine too. 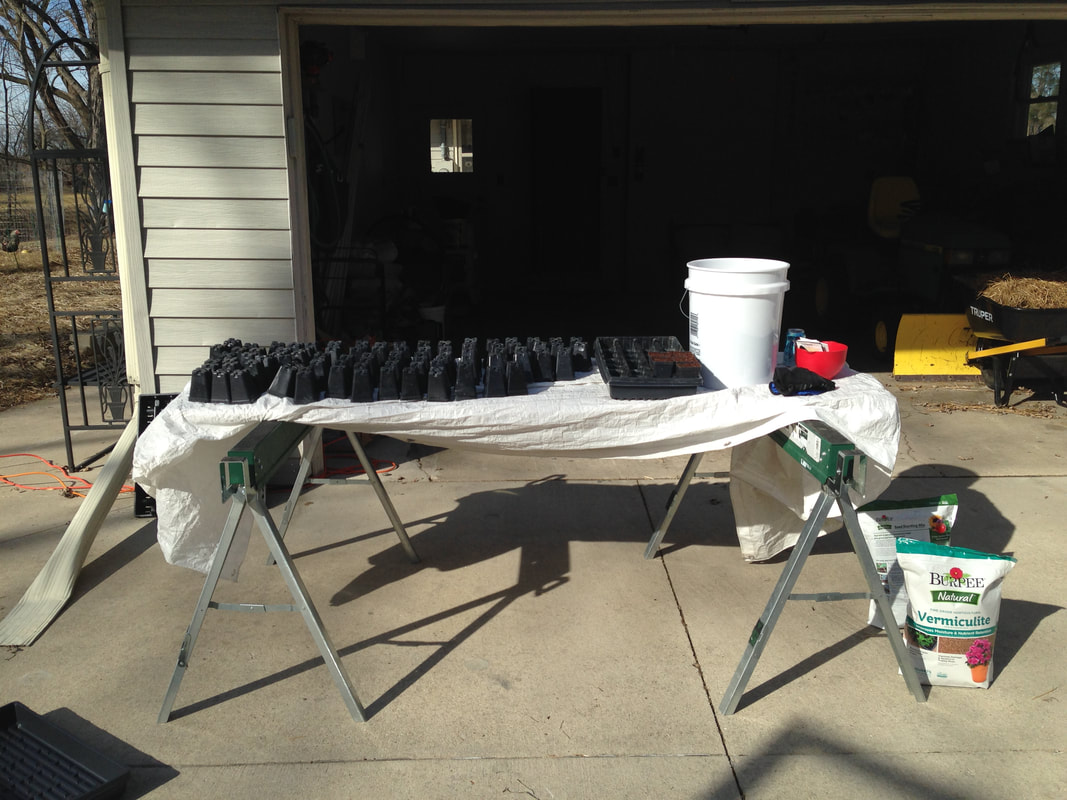 Since I was using seed trays and pots from last growing season, I disinfected them in a big utility sink filled with hot water and a ½ cup of bleach for ten minutes. This is an extremely important step when reusing planting materials, otherwise, you run the risk of spreading some unwelcome bacteria and disease to your baby seedlings. Once their bath was done, I rinsed everything in cold water and laid it out in the sun to dry. Next, I dump all my organic seed starting mix into a five-gallon bucket. It’s much easier to scoop the mix out of a five-gallon bucket versus wrestling with the small soil bags. From there, I lay out my clean seed trays and pots. It is extremely important that you moisten your seed starting mix before you plant in it. I like to moisten my seed starting mix right in the five gallon bucket, then fill my seed pots with the moistened mix. The consistency should be like cooked oatmeal - not mud but also not too dry. 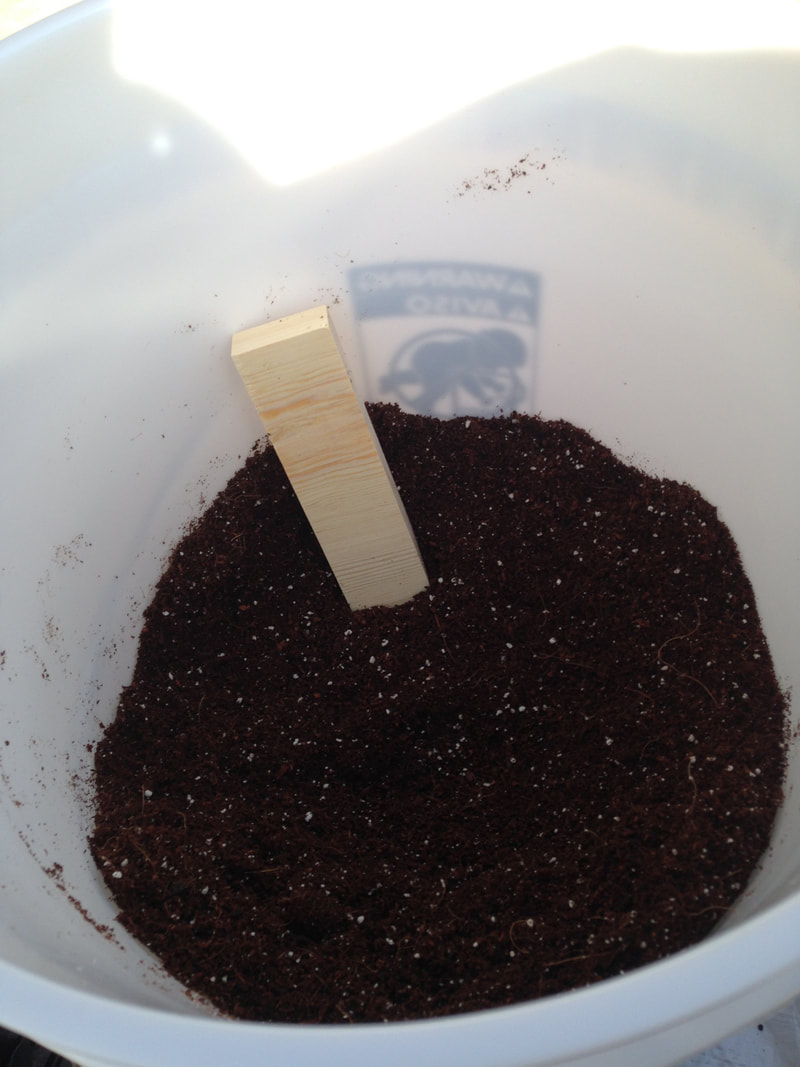 Once all your seed pots are filled with seed starting mix, get out your wooden popsicle sticks and marker. Now is the time to label your pots, pre-seeding. This can also be accomplished by labeling a piece of duct tape on each pot. The point is to mark clearly for yourself what is going to be planted in what pot because you won’t remember what tomato is what when they are only three inches tall - believe me! 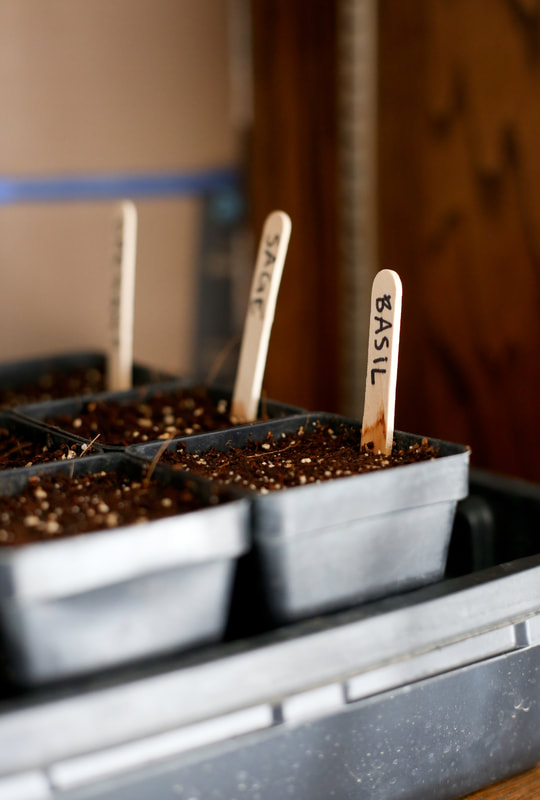 Now you get to plant your seeds. Yippee! Planting seeds are as easy as following the directions on the seed packet. If the seed packet doesn’t give any specific info (like the depth of planting) just do a quick Google search. When planting seeds, I use a very intricate technique. I mean, this is some highly skilled info coming your way. Prepare yourself. 1. I pour out a small pile of seeds into the palm of my left hand. 2. Then, using the thumb and pointer finger of my right hand, I pick up one seed, basically making an “OK” sign with my right hand. 3. Next, using the middle finger of my right hand I create an indentation in the seed starting mix to the preferred planting depth of the seed in question and drop the seed into the indentation. 4. Finally, here’s the kicker folks, I use my already-dirty middle finger to pull the soil over the planted seed. This way, your seed grabbing fingers, the thumb and pointer finger, never get dirty or wet while planting, which makes grabbing seeds much much MUCH easier (did I say it was easier?). See the photos below for a step by step example. 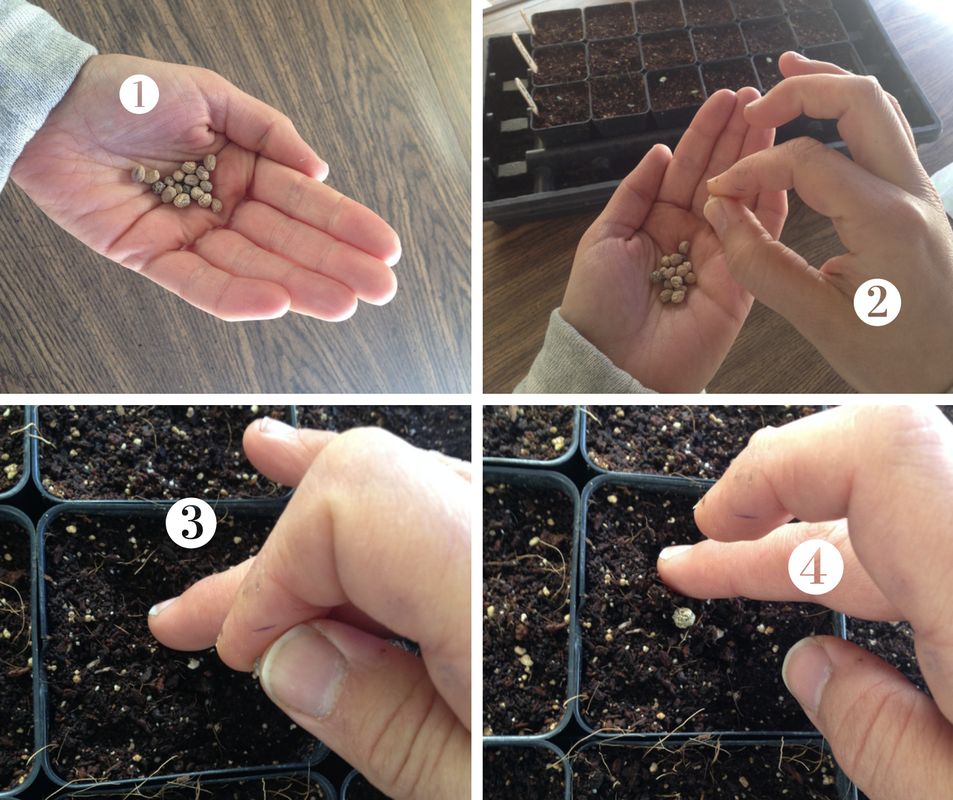 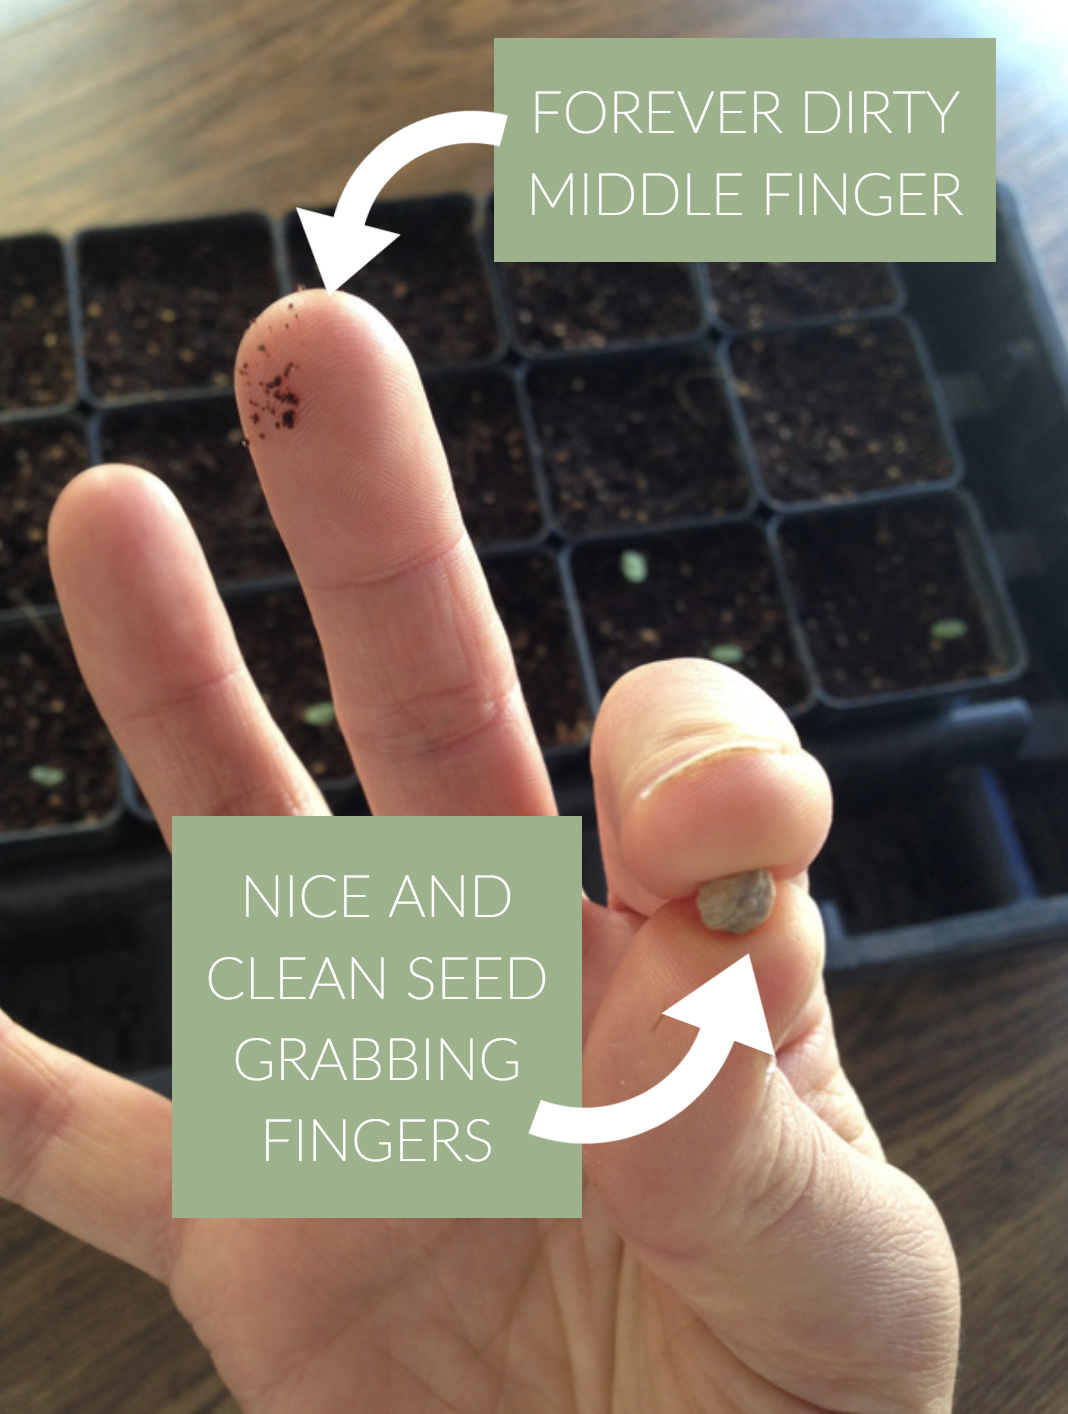 Once all your seeds are planted, bring your trays inside and put them in your designated growing spot. For heat-loving plants like basil and tomatoes, set them on top a seed mat that will keep the soil at the right warm temperature. Then turn on your grow lights. Finally, to keep moisture at an all-time high for germination, cut open old plastic shopping bags so they lay flat and cover the tops of your seed trays. This seals in water and prevents evaporation during the germination period. I’ve had extremely good germination rates using the plastic bag method. 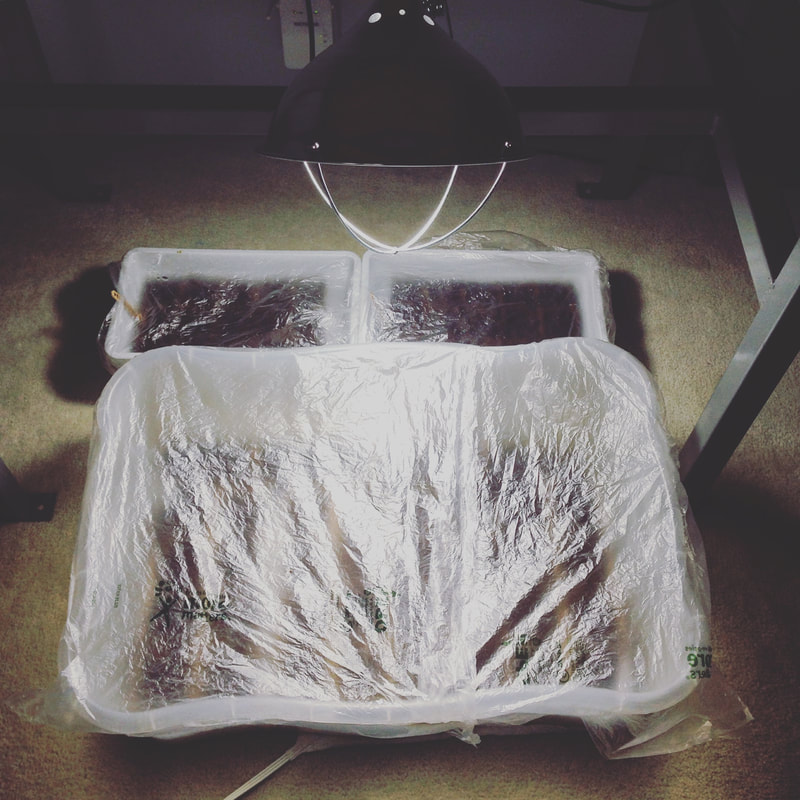 In three days, pull back the plastic bags to check moisture content. Touch your finger gently to the surface of the soil. If it’s dry, use a spray bottle filled with water and mist the surface of the soil heavily. You can also take an old plastic milk jug and make some holes in the top with a screwdriver (see below) and use that as a cheap watering can. Replace the plastic bags and check in another three days. Once those three days are up, remove the plastic completely. 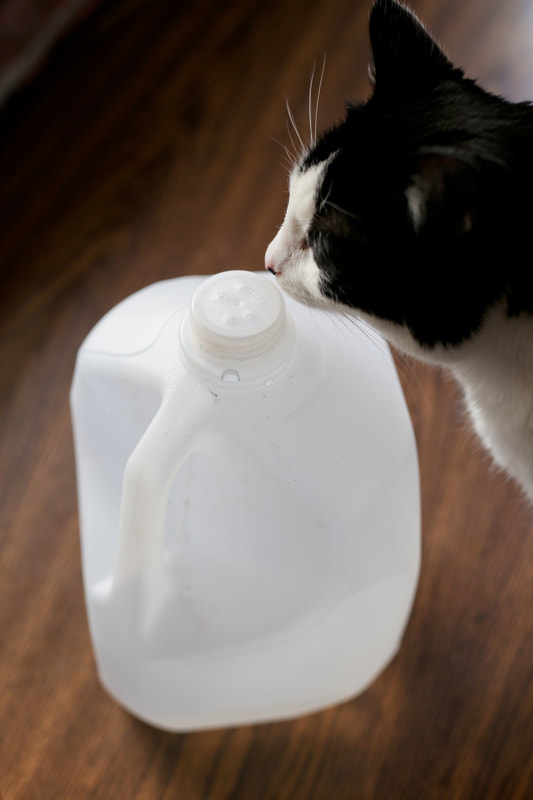 Most seed starting mixes have about two weeks worth of plant food before you have to start fertilizing. I recommend Neptunes Fish and Seaweed Emulsion for fertilizing organic seedlings. Combine 1 tbsp of Neptune's into 4 cups of water and pour gently over your seedlings or into the bed of the seedling tray. At two weeks time, the plant’s roots are going downwards in search of food and water, so simply filling up the bottom of the seed tray is suitable for feeding. Be sure to mark your calendar so you remember to start feeding your baby plants at the right time. How To Pot Up Your Seedlings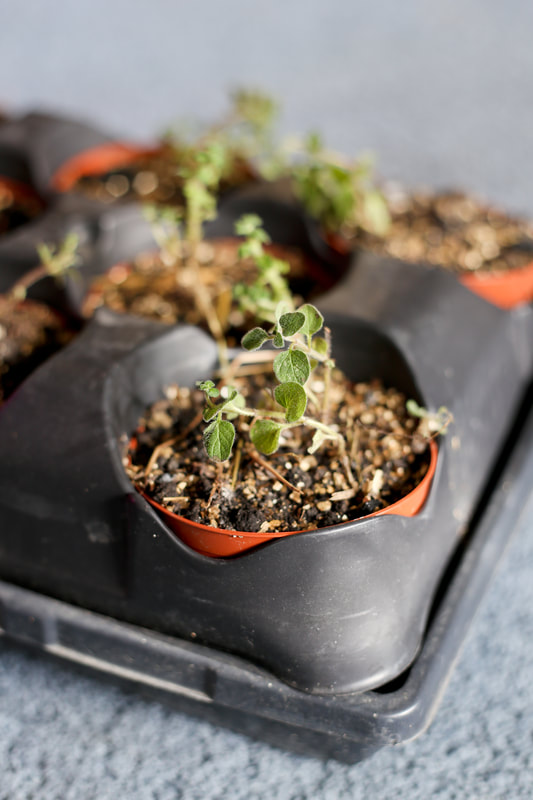 If you live in a four-season climate, there will come a time where your seedlings, mainly tomatoes and peppers, will outgrow their seed starting pots before you can plant them in the ground. Every plant is a little different in terms exact timing, but the best way to know is when your seedling fully develops at least one or two sets of true leaves. What are true leaves? When a seedling pops out of the soil, the first set of leaves are called cotyledons. These are not actual leaves, rather they are a part of the seed and are a source of food for the seedling. When the true leaves emerge, that’s when photosynthesis actually starts. True leaves look like how the actual plant’s mature leaves will look. With tomato and pepper transplants, I recommend waiting until two sets of true leaves appear (for a total of four true leaves) before you pot up your seedlings. 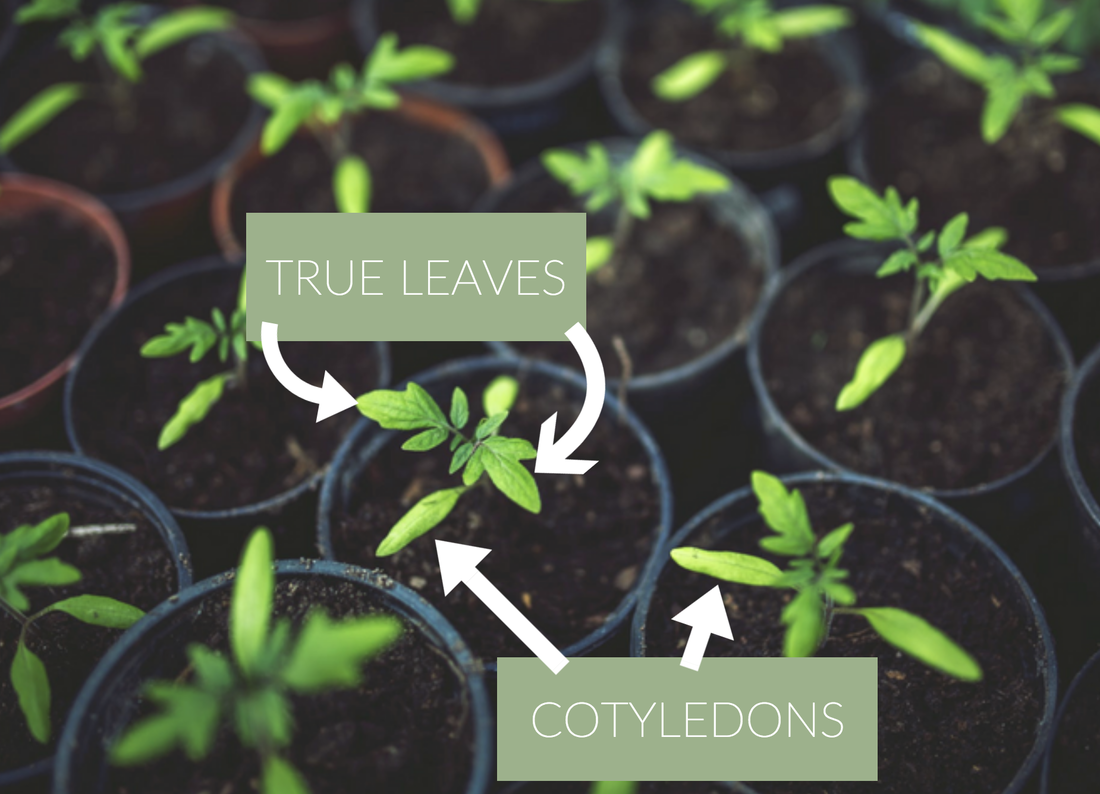 With squash, cucumbers, melons, and pumpkins, you will need to wait until just one set of true leaves appears before you pot up or transplant them to the garden. What you need for potting up seedlings:
Again, I like to set up a temporary workspace outside or in the garage because this process is MESSY. Fill up your five-gallon bucket with your potting soil. Bring your pots and seed trays out onto your workspace. 1. Water your seedlings heavily and give them at least five minutes before you start removing them from their original seed pots. By watering the seedlings before transplanting, the roots are much less prone to drying out during the potting up process. 2. While you wait, prepare your pots. I like to fill them ¾ of the way up with potting soil. Once they are filled it’s time to pot up! 3. Handle your seedlings with care by not touching the stems. A damaged stem is a death sentence for a growing plant. I like to lift the seed pot insert out of the seed tray and apply pressure by squeezing the opposite sides of the pot with my thumb and forefinger. This loosens the soil from the side of the seed pot insert. 4. From there, flip the insert upside down and gently shake the seedling, soil and roots and all, into the palm of your hand. 5. Take one of the pots with soil and make an indentation into the soil using your pointer and middle finger. 6. Gently place the seedling into the hole in the soil and add some extra soil up and around the stem. Pro Tip: Tomato seedlings benefit immensely when you plant them up to their true leaves (you plat the stem in the soil). The buried stem will grow more roots, meaning more opportunity for water and nutrient uptake. I will plant tomato seedlings up to one or two inches deeper to encourage additional root growth. 7. Once all your seedlings are potted up, give them another spritz of water and place them back at your growing station under the lights. No fertilizing yet! The transplants may look a little sad the first two days, but they will perk up eventually. Fertilize one week after potting up. How To Acclimate Your Seedlings To The Outdoors Prior To Transplanting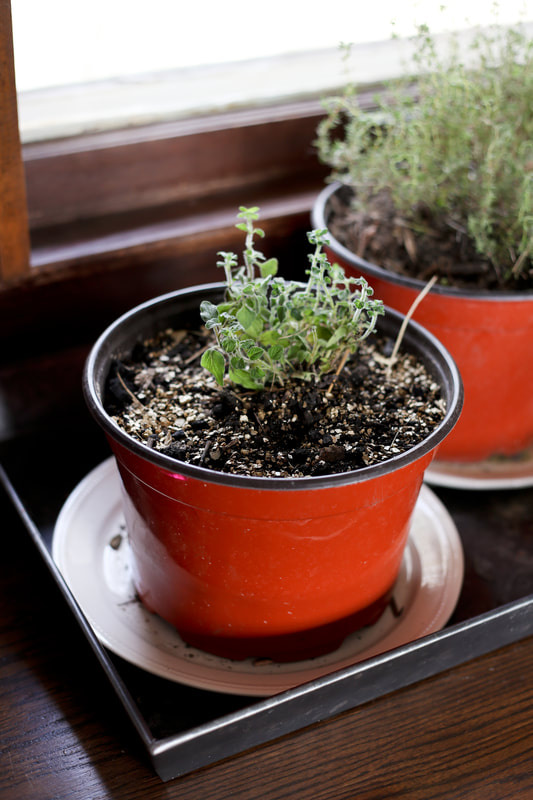 The whole point of starting seeds indoors is to get them outdoors when the weather is warm enough with a great head start. It would be nearly impossible to directly sow tomato seeds outdoors for us in growing zone 5b. There just isn’t enough warm days to get tomatoes to grow to the point of fruiting here in Wisconsin if we didn’t start them ahead of time. Here’s the thing, your seedlings are accustomed to an indoor environment, which is very different from outside. Wind, temperature changes, and precipitation are all new things to your seedlings. You have to introduce them to the outdoors slowly, and that’s what the acclimation period is for. For cold crops like cabbage, I start setting those seedlings outdoors on sunny days above freezing in early April. I start with a small window of outdoor time, say two hours, and work my way up to longer periods outdoors day by day. I always bring them back inside for the night though. I’ll do this for at least a week before they go into my garden beds in early April. For heat-loving crops like tomatoes, I start setting those seedlings outdoors mid-May. I’ll acclimate tomatoes for at least a week and a half before they go in the garden. Plants will go into shock when transplanted into the garden if you don’t acclimate them, so do not skip this step! Otherwise, all your hard seed-starting work will be for nothing. Starting With Store-Bought Seedlings So let’s say you are a little overwhelmed at this point with all this planting knowledge - I don’t blame you! That’s why it’s important to start small and have back up in case plants die. My first year of gardening I bought all my tomatoes as cheaters from Stein’s when my own tomato seedlings became too leggy and died. There is absolutely no shame in starting with store-bought seedlings. Yes, I may call them cheaters, but I am only joking. Cheat if that’s what gets you started with an organic garden! The varieties of plants you can get as store-bought seedlings depends on where you go. I had trouble finding organic varieties of tomatoes and peppers at Menards, Home Depot, and Lowes. That’s why it’s nice to find a local nursery. Here in Milwaukee, we have Bluemels and Stein’s. Stein’s isn’t all that small but it has lots of organic seedlings, so if you have one near you go check it out! Typically, the plants that you would get as store-bought seedlings are:
These are the types of plants where it helps to have both a head start and entrust a professional to raise them perfectly for you. Keep in mind, if the seedlings are housed inside, you will need to acclimate these seedlings to the outdoors. Plants like summer squash, winter squash, peas, beans, lettuce, and cucumbers are easy to start from seed. Save those for direct sowing in the garden. Which brings us to our next topic of planting... How To Plant In Your Organic Garden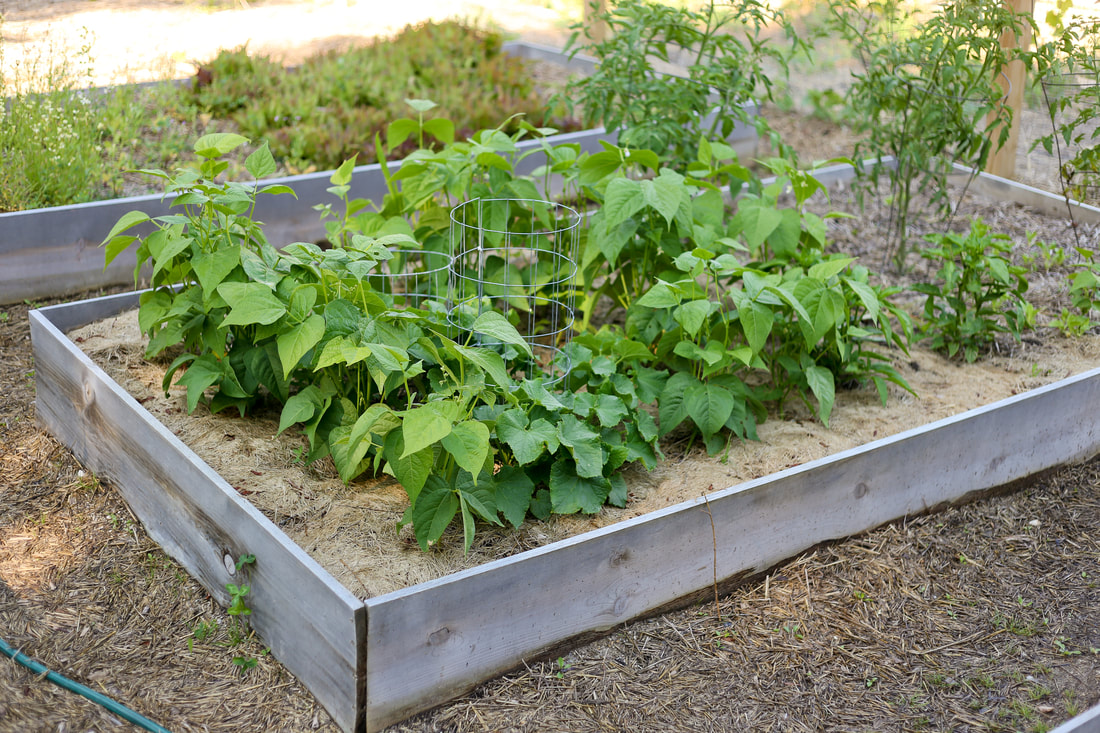 When you plant a seed right in your garden that’s called direct sowing. When you take a plant that was growing in one place (a pot) and and plant it in another place (your garden) that's called "-transplanting. The timing of both direct sowing and transplanting is crucial to your success rate, so let’s go over the factors you need to keep in mind as you go about planting directly into your garden. First and foremost, soil temperature is the most important factor when direct sowing seeds. If it’s March 30th and you are in growing zone 5b, there’s no way in heck that cucumber seed is going to germinate. That’s because your soil’s temperature is way too cold to kick off sprouting. Your seed packet will most likely tell you what temperature range it needs to germinate, but if not then just Google it. Soil temperature can also be determined by purchasing a soil thermometer or by consulting a soil temp website for your area. How To Direct Sow Your Seeds 1. Before you set out to direct sow or transplant in your garden, take a look at the weather forecast. Here in southeastern Wisconsin, our average last frost date is April 15th. On that day I will take a look at the forecast for the next ten days to check for snow, monsoons, or a cold snap. I like to see lows in the mid-40s for a good chunk of the week before I jump into planting. The same thinking goes for the rest of the growing season. If it’s late-May and I’m ready to plant cucumber seeds or transplant my tomato seedlings, I’ll check the forecast and be sure we aren’t going to get pummeled with rain or a random cold snap for the following seven days post-planting. Be kind to your seeds and plants and take a moment to check the weather! 2. From there, direct sowing is as easy as following the instructions on your seed packet. Heed all planting depth advice and take plant spacing with a grain of salt. I like to crowd certain plants just a bit because I know our soil health is fantastic. For root crops like carrots and beets though, I definitely follow the spacing rules. How To Transplant Your Seedlings 1. Give the seedling a big drink of water and wait for five minutes before you start. 2. While you wait, dig a hole that is twice as big as the pot the seedling is growing in. 3. Turn the pot upside down and squeeze the pots' walls to dislodge the roots and soil with one hand and gently cup the plant with the other. Remember, don't grab by the stem! 4. Handle the plant gently by the root system as you place it in the hole. 5. Finally, back-fill the hole with soil and gently tamp it down. Refrain from fertilizing for up to a week. 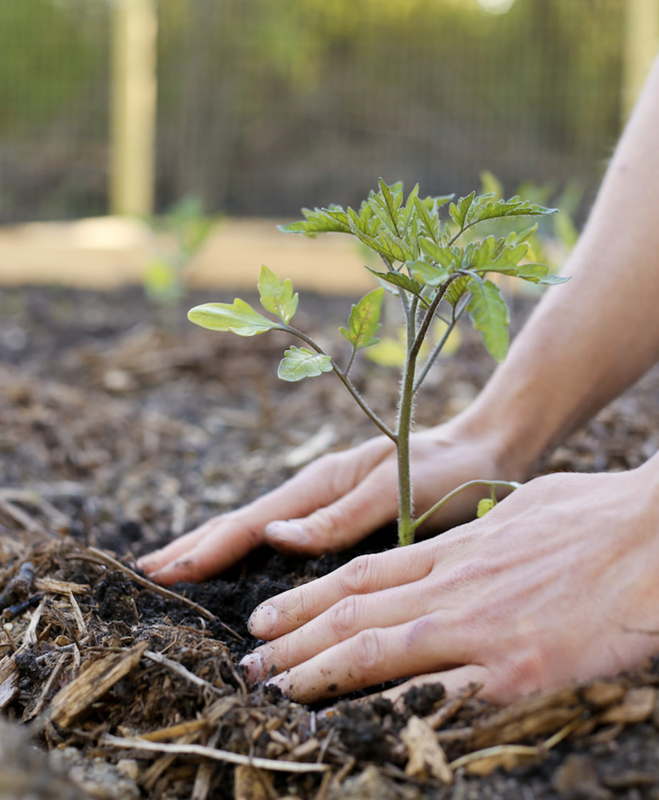 That's everything you need to keep in mind when planting your garden! If you are curious about how you can get started with organic vegetable gardening, start here. The next post in this series on organic vegetable gardening covers everything you need to know in order to provide for your garden. We go over fertilizing, watering, weeding, and mulching. 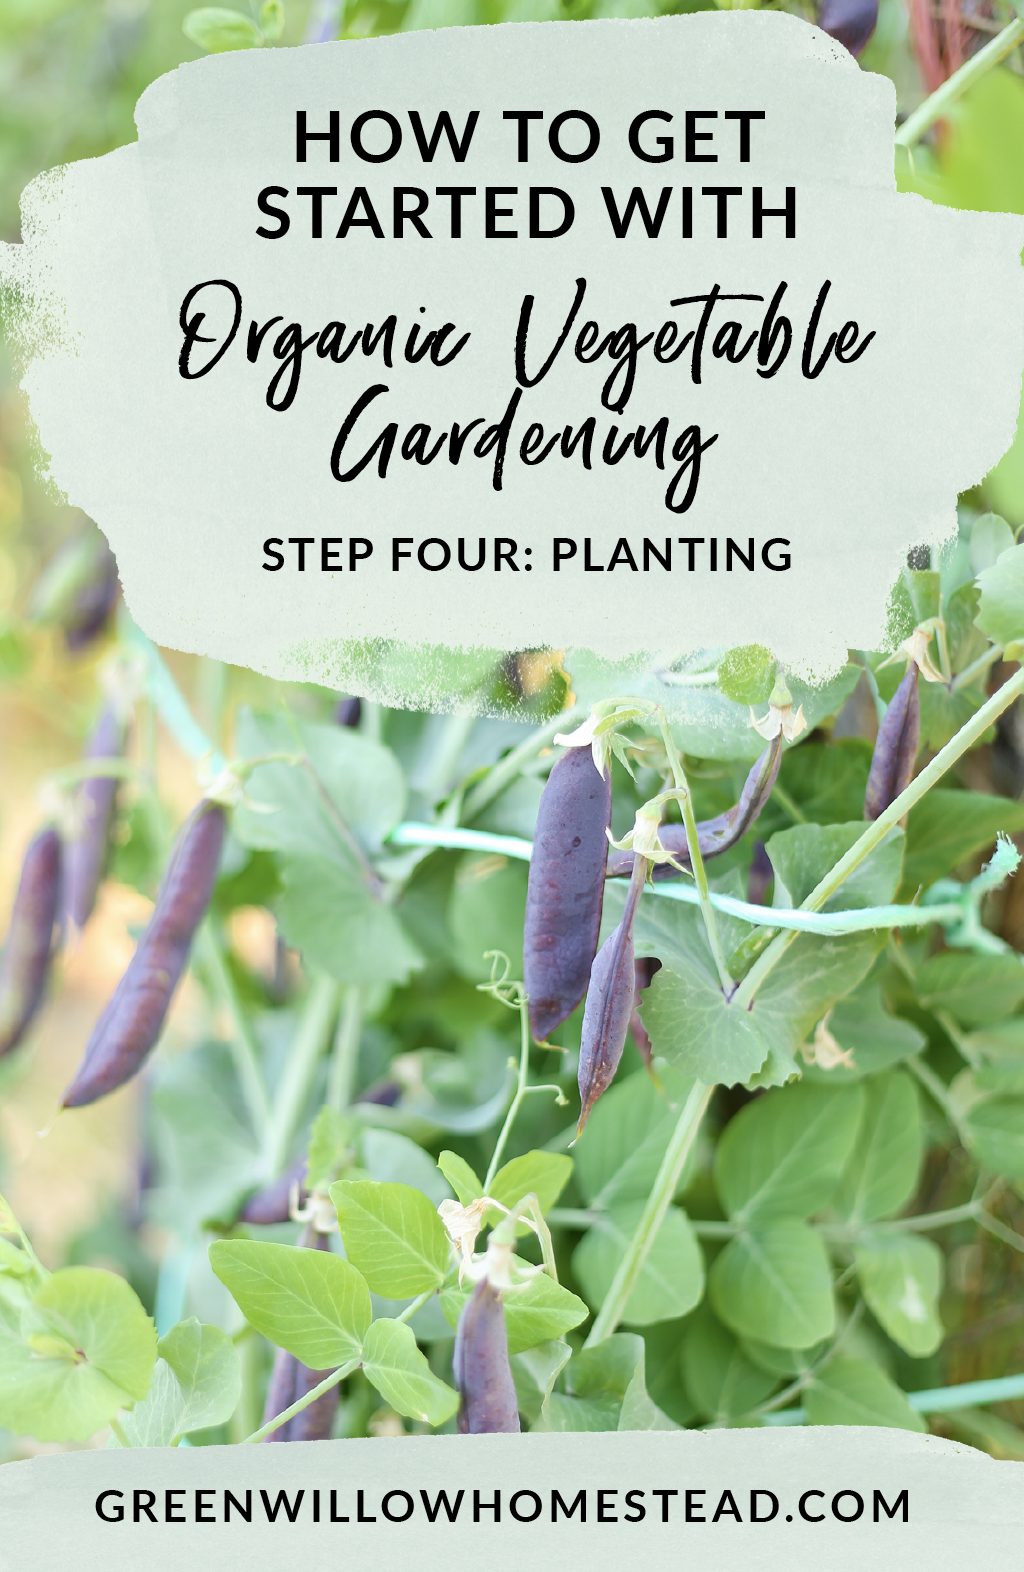
11 Comments
7/7/2022 07:09:13 am
Great post! This will surely help everyone who's just getting started with planting some fruits and vegetables at their home. 7/7/2022 07:20:06 am
Nice article! With this as a guideline, everyone who needs help will be able to do what's right and avoid mistakes. 6/24/2024 01:42:56 am
This is helpful and interesting, thanks for sharing! Your insights on using heirloom seeds and the practical advice for starting seeds indoors are incredibly valuable. Leave a Reply. |

Meet Kelsey,Thanks for stopping by Green Willow Homestead! From chicken rearing to composting, we've got our hands full and we love sharing what we've learned along the way. Follow along as we turn the 80 acres we call home into a farm that serves its community and a homestead that nourishes us throughout the seasons. 
Grab the EbookListen in!
FREE Guide!
Tune in to our YouTube ChannelInspirationsCategories
All
Favorite Books of 20241. Erosion
2. Braiding Sweetgrass 3. As Long As Grass Grows 4. The Small Scale Poultry Flock 5. The Zero Waste Solution Archives
April 2024
|
FOLLOW KELSEY ON INSTAGRAM!
|
|
As an Amazon Associate I earn from qualifying purchases. |
|