
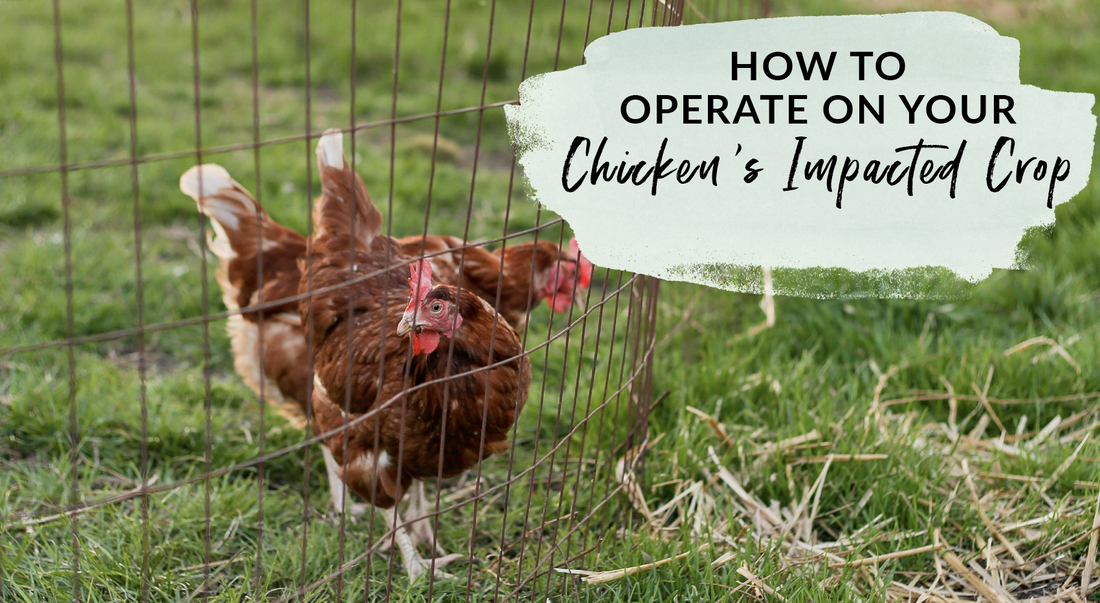
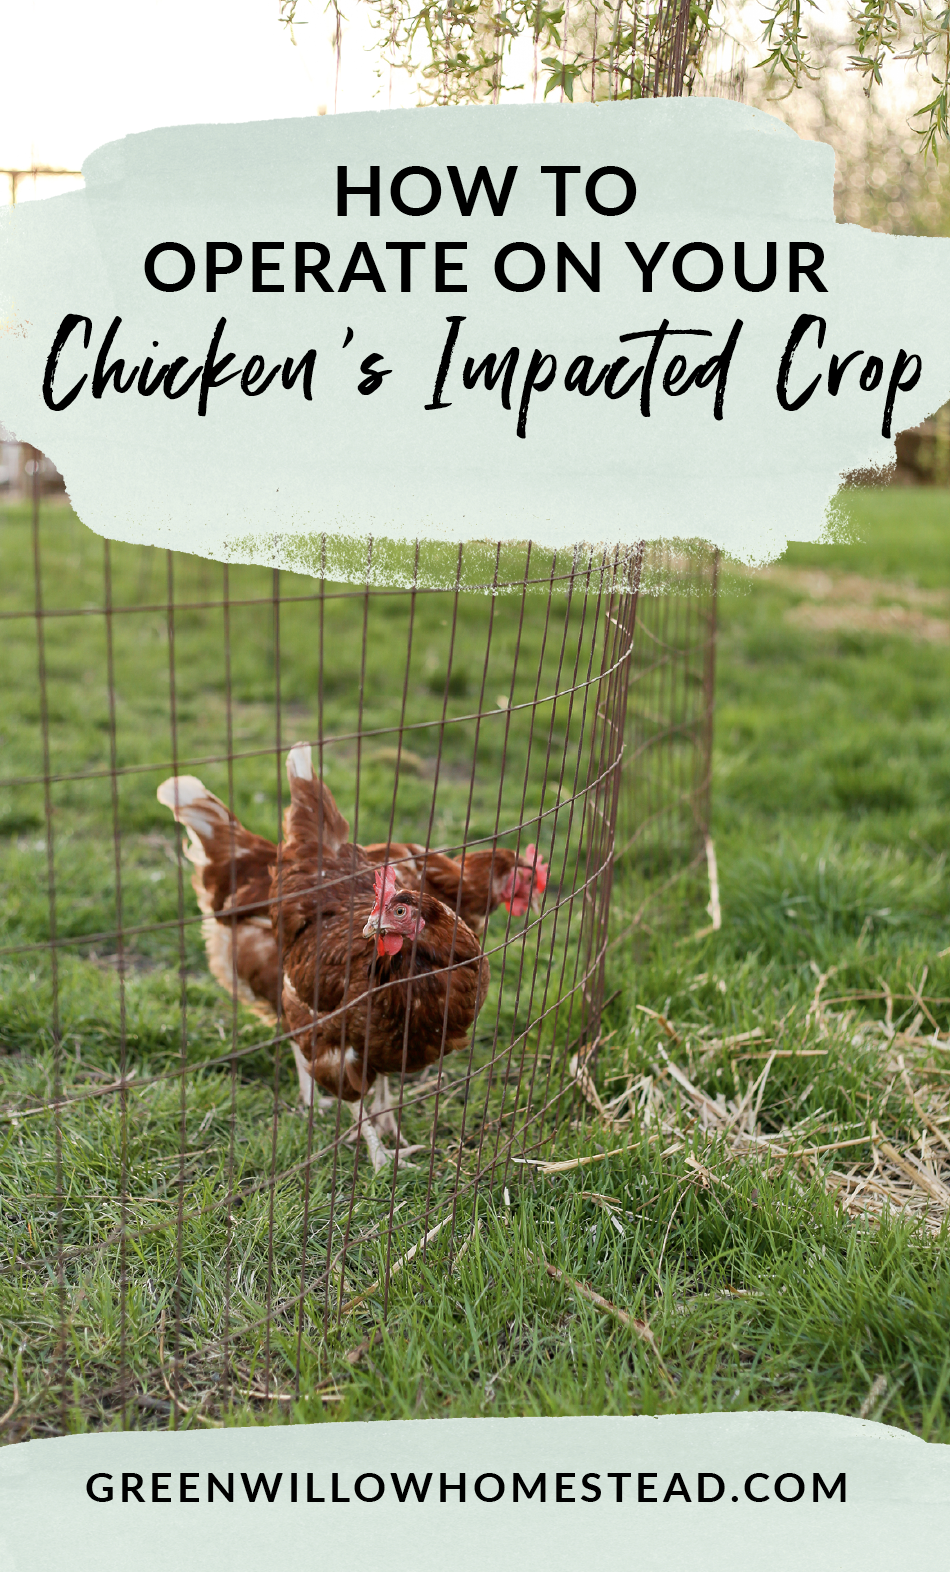
One of the worst feelings as a chicken owner is when you have a sick bird and you are at a loss on how to help them. An impacted crop in a chicken can be a death sentence if you don’t have the right knowledge or tools to fix the issue. Here on Green Willow Homestead, we’ve had two hens who have suffered from an impacted crop. Thanks to the encouraging words from an avian vet, some YouTube research, and my own grit - we were able to save one of the two through operating on them ourselves. In this post, I want to teach you about what an impacted crop is, the options you have to fix it, and how to successfully perform surgery on your hen in order to save her life.
Please note: The links below are affiliate links, meaning at no additional cost to you, I will earn a commission if you end up clicking and purchasing an item. I worked hard to find my trusted favorites and I want to share them with you so you don't have to deal with all the crappy junk I had to go through. Nuff said.
Disclaimer: You must consult with a veterinarian before using the information provided in this post. I am not a veterinarian and the information contained in this post should not be seen as professional veterinary advice. If you use or rely on the information in this blog post, you do so at your own risk.
What is an impacted crop?
An impacted crop is when your chicken’s crop, or stomach, becomes filled with a mass they cannot digest. The crop can be filled with hay or straw, baling twine, rocks, wood chips, basically anything the hen eats that cannot pass through her digestive system.
What are the signs or symptoms of an impacted crop in a chicken?
Impacted crop is a spring issue for chicken owners. I wish I knew why, but all my research and own experience has proven this correct. So keep your eyes peeled on your girls at this time.
The best way to tell if your chicken’s crop is impacted is by feeling her crop first thing in the morning. If the crop has not emptied overnight and is still a hard semi-malleable mass, she has an impacted crop. The size of impaction can vary. With the two hens we had with impacted crops, one was the size of a baseball and extremely malleable, while the other was the size of a large softball and was a hard as a rock. I hate to be the bearer of bad news, but when the mass is the size of a softball it’s best to cull the bird. We learned this with our second hen, Princess Snowball. The reason being the crop has expanded so much so that the hen will inevitably deal with pendulous crop issues for the rest of her life. Pendulous crop is when the crop hangs too low on the anatomy of the bird, keeping it from emptying properly. The bird eats and eats, thinking it’s stomach isn’t full and can wind back up with impacted crop or sour crop (where the food ferments in her crop). Princess Snowball had two months post-surgery where we would put a crop bra on her at night to hold up her oversized crop, but to no avail. I learned my lesson on this one. Fixing impacted crop is only for the baseball and golf ball sized impactions. The size of the mass can vary widely, but remember to check first thing in the morning to be sure it hasn’t passed. Once the crop is plugged up, the pH of the chamber changes, causing strange yeasty smells to emanate from your hen’s mouth. Pick up your hen and massage her crop, if a beer-like smell burps up, then she also has sour crop. Keep in mind, sour crop can happen without their crop being impacted. When a crop is impacted though, the hen will most likely develop sour crop because the mass is preventing proper digestion. Another sign of an impacted crop is your hen’s behavior. We noticed our first hen was dong a strange dance with her chest and neck, as if she was trying to swallow and couldn’t. Hens will also stretch their necks and “yawn” their beaks. They are trying to encourage their crop to pass the mass, but because of the indigestible material, the crop is unable to. How do you fix or cure an impacted crop?
There are a few options available to you to fix your chicken’s impacted crop, but from my experience thus far there is only one way to truly cure the problem. Surgery. Before you resort to surgery though, feel free to try these first few options. I Remember, the more you wait to cure the impacted crop, the more days go by where your hen doesn’t receive proper nutrition because her crop isn’t emptying correctly.
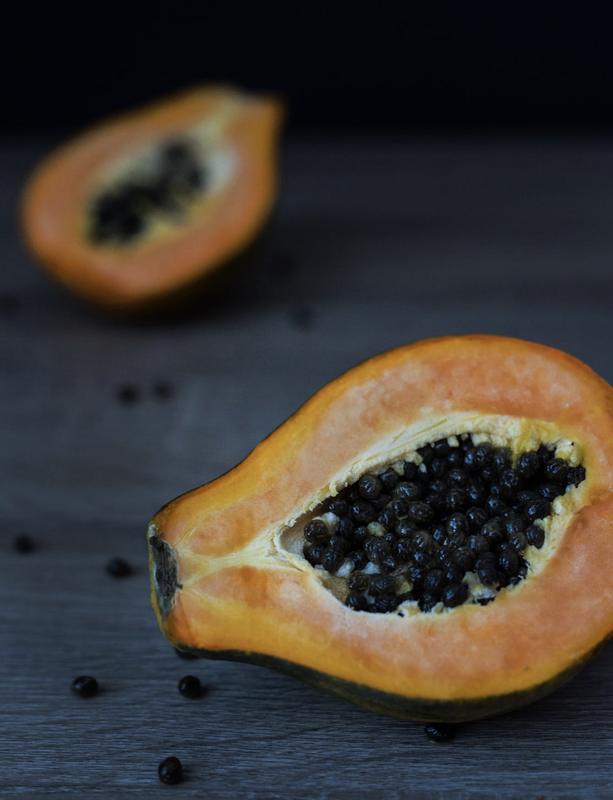
Papaya
Papaya contains an enzyme that helps break up a fibrous mass. Angora rabbits are given papaya to help pass serious fur balls. We fed our first chicken, Beyoncé (I know we’ve got some stellar names over here), fresh papaya to see if it would help. The malleable mass went from a silly putty-like texture to absolute goo. It was extremely promising after days of trying various strange concoctions and nothing working. Unfortunately, the papaya was then digested by her crop and we were still left with the impaction
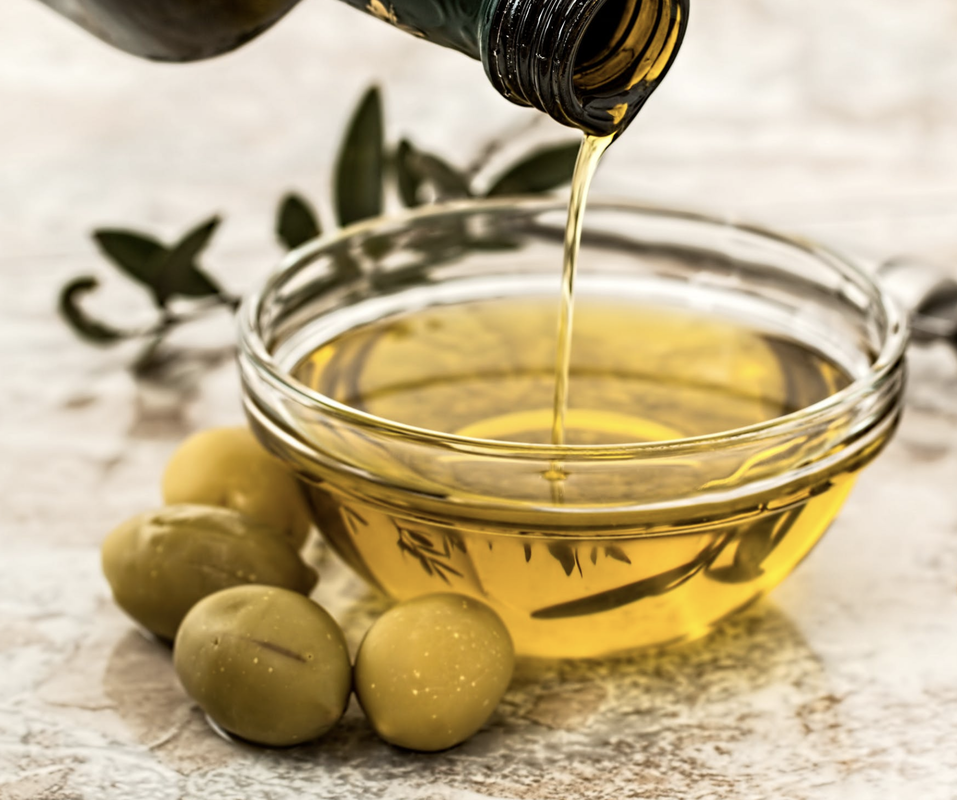
Magnesium Citrate and Mineral Oil or Olive Oil
The thinking goes if you can first relax then lube up the digestive system, anything can pass. This is similar to what humans do for a gallbladder stone cleanse (which does actually work!). This solution is only possible if the impaction is no bigger than a golf ball. You will need a feeding tube that sticks onto a large syringe. Fill the syringe with 5ml of magnesium citrate, then gently feed the tube into your chicken’s stomach. The process is extremely dangerous though, as you can accidentally feed the tube into your chicken’s lungs if you aren’t careful and drown your bird.
This video is one of the best for a visual on how to properly tube feed. This link is another good option to get you off on the right foot. Tube feeding is absolutely a two person job. Don’t attempt it by yourself! Once you have the tube properly fed into your hen’s stomach, slowly depress the syringe and let the magnesium citrate enter her crop. Slowly and gently remove the feeding tube and massage your hen’s crop. After 30 minutes fill the syringe with 5ml mineral oil or olive oil and repeat the process. Massage the crop, encouraging the mass to pass. Doing Surgery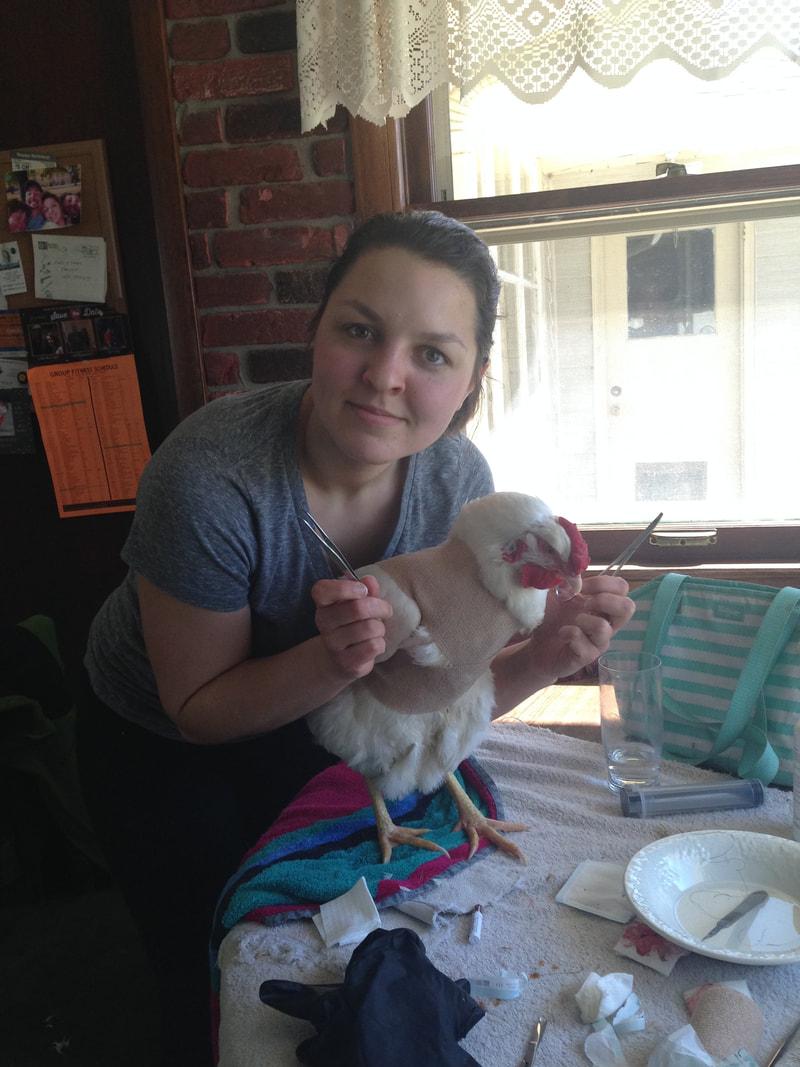
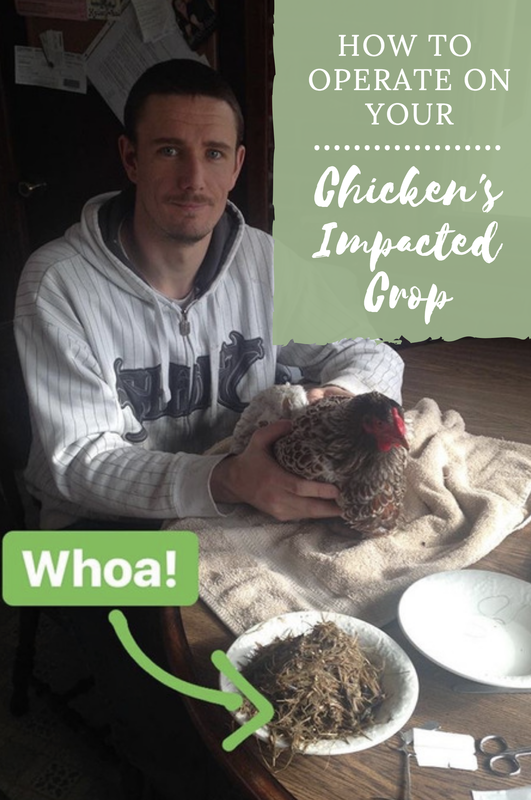
In my experience, surgery is truly the only successful solution to an impacted crop. With Beyoncé, we brought her to an avian vet to get a professional opinion. The vet was honest with me and said the surgery was simple enough to do at home. She directed me to a few videos and wished me luck. To have the vet operate, the cost of the surgery would have been well over $300. Definitely cost-prohibitive for us. So I put on my big girl pants and decided that if my hen was going to die if I didn’t try anything, it was far better to have her die while I was trying to save her life.
The surgery itself is much simpler than you would think. The crop is situated just below the skin on the left side breast of a chicken. It is extremely accessible, thus the surgery is not particularly invasive. I’m going to go over the supplies you will need to operate and then the steps of the crop operation. Operating Supplies Needed
Post-Op Supplies Needed
The Steps To Operate On Your Chicken’s Impacted Crop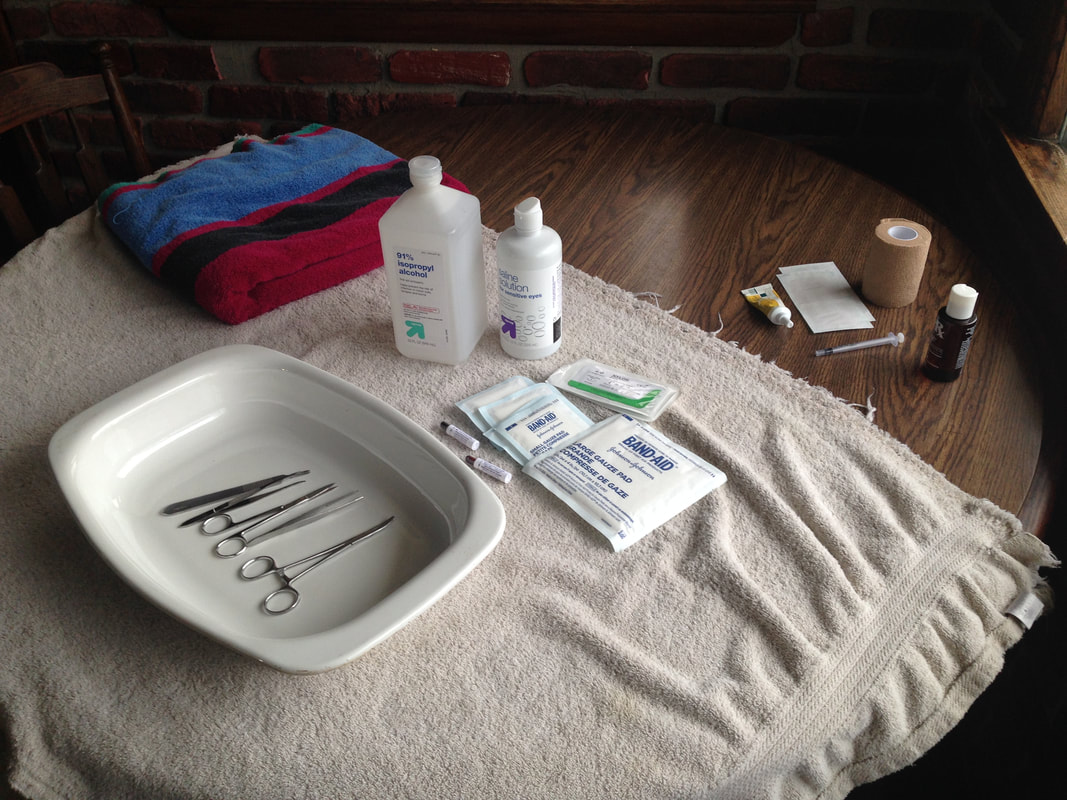
Before you operate, know that you cannot do this alone. You NEED a second person to hold down the bird and keep her eyes covered while you operate. It’s also good to have moral support as your venture into surgery!
Also, it’s best to have her recovery cage all set up. Have warm water with a drop of VetRx in it waiting for her when she returns. Make sure to have picked a spot with NO straw or shavings for her to eat. We like to put down cardboard as a floor and then replace it as she starts to poop. If you have an old dog cage or large cat crate with a wire or plastic floor, this works perfectly. Set down a clean towel for your chicken to rest on. Have your operating area all prepped for the surgery. Make sure the location gets plenty of sunlight or artificial light so you can see what you are doing. Lay out one of your large bath towels on a large table. Disinfect your scalpel, forceps, and medical tweezer using rubbing alcohol. Have your iodine, topical analgesic, saline solution, and warmed VetRx at the ready. Make sure your sutures are within reach. By prepping all of this you won’t have to prolong the surgery, and your bird’s pain, in any way.
That’s all there is to surgery! I promise you that once you do it you will realize how straightforward it really is. As long as you have a second set of hands and the right tools, the process is simple. The mental block is honestly the hardest part, but if you love your birds like I do then I know you are capable of this!
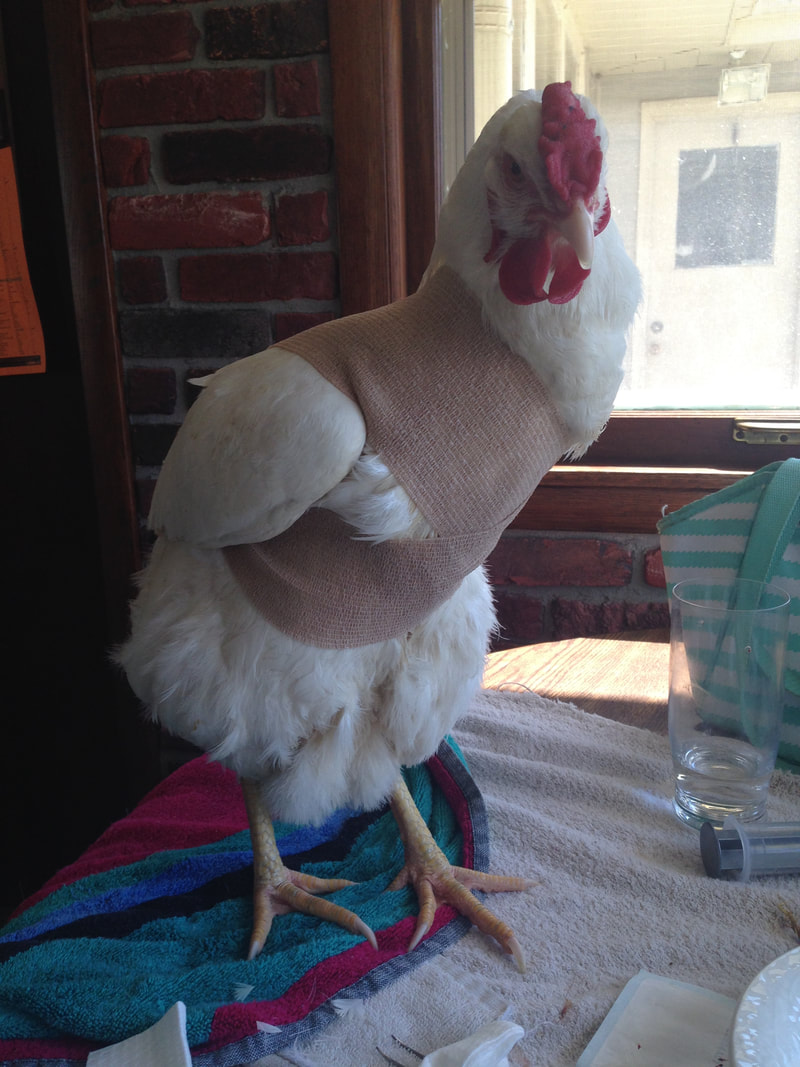
Post-Op Recovery Protocol
Caring for your bird after surgery has some nuance. You will want to provide your hen with nutrition, but not anything fibrous or hard like her typical feed.
With Beyoncé, we gave her water with a few drops of VetRX and 1/2 capsule of FishMox (amoxicillin) for the first 36 hours. With Princess Snowball we did water and VetRX for 24 hours. I would err on the side of caution and do water for 36 hours. Once that 36 hour hump is done, you can feed her extremely soft and wet foods. Start with 1 tsp of chick starter mixed into 1 tbsp of warm water so it becomes a mash. The crop empties continually throughout the day with a healthy bird, but after an impaction things can get interesting. Gently feel the crop after this first feeding and see how its performing. After 6 hours I find it’s safe to give the hen another round of chick feed in warm water. Chick feed and water is just fine for the first 3 days. From there, you can add scrambled eggs. Hens LOVE scrambled eggs - remember no shells! Switch between 1 scrambled egg and the 1tsp of chick starter feed in warm water every 6 hours. Again, be sure to monitor the crop and its performance. After two weeks, I find the hen is ready for her normal feed again. Once she lays an egg - she is ready to rejoin the flock. Now let’s talk wound management. Change the bandage every day for the first four days. Make sure the incision is clean and doesn’t smell. Dab the wound with Neosporin during the first four days as you change the bandage. Once the hen is feeling better, the vet tape won’t fly. You can leave the wrap off and opt for a medium sized sticky bandaid or let the wound air dry from that point on. Be sure to change her cardboard bedding daily so she doesn’t get manure on her wound. 
Full Recovery Monitoring
Once the hen is back with the flock, check her crop in the mornings to be sure she isn’t dealing with pendulous crop issues. If she does develop pendulous crop issues, put a crop bra on her at night. You can purchase them here or make out out of a large athletic sock (plans at this link, scroll down).
Of course, I hope you never have to deal with this issue, or have to put a bird down. However, I want fellow chicken owners to know that impacted crop can be dealt with and fixed given the right circumstances. Have you ever had a chicken with an impacted crop? Did you have to resort to surgery? Comment below and fill me in! 
Cassie Gardner
5/1/2019 11:37:50 am
We just did this to our pet chicken this morning! I plan on going 36 hours with just water but when I start food would it be bad if I gave her plain yogurt also with the chick feed soaked in water? Or should we just stick with only water soaked chick feed?
Kelsey
5/1/2019 11:47:21 am
I hope she is doing okay - you are such a great chicken momma! I would stick to chick feed soaked in water first. Sometimes the yogurt's good bacteria can be a bit much for their digestion! Please keep me posted on how she is doing!!
Cassie Gardner
5/1/2019 07:54:38 pm
So 36 hours of just water? Could I add raw honey or would she be ok with only water? I feel so bad for her right now, I worry if shes comfortable or if shes hurting etc.
Fred VanOlphen
11/6/2019 07:45:11 pm
Thanks so much for this great article. I hope I never have to use it. I don't count myself an expert by any means but so far I've had luck just trying herbal remedies. I believe
Kelsey
11/14/2019 08:34:01 am
Hi Frank - thank you so much for this info!! I will definitely keep this in mind the next time this problem crops up (haha pun intended).
Kathryn
2/22/2020 06:44:08 am
So you gave the chicken an enema of milk thistle, Epsom salt, and OLE? Just trying to be clear so I know! Thank you!
Lisa A Doyle
1/17/2020 06:40:11 pm
Thank you so much for posting this tutorial! We just operated on our chicken and removed a baseball size ball of hay out of her crop! We are having a hard time keeping the bandage on her.... any suggestions? Thank you again ! You gave us the courage to do the surgery and is was a success
Jaricia Heddings
1/31/2020 02:09:24 pm
Hi! Never done this before but may have a hen that will need it done. What did you use for sutures? Where did you get sutures? You mentioned suture the crop first then suture the skin. Do the sutures stay in the skin?
Lisa Doyle
1/31/2020 03:58:45 pm
Hello we got the absorbable sutures and surgical tools on amazon. You need sew the crop together first and then the outside skin. so basically two separate layers. My hen is doing great full recovery!!!
Jaricia Heddings
2/1/2020 04:42:40 pm
Lisa, thank you. I was abit overwhelmed with thinking I may have to do this. Later after getting my head on straight I see Kelsey shared the links on the article. I'm thankful Kelsey shared this article. The vets here charge $1000 for the crop impaction surgery. That's more than spaying a dog or cat! Thank you Kelsey and Lisa.
Kelsey
2/2/2020 07:22:15 am
I’m glad I could provide some guidance! Jaricia, I took my chicken to the vet and was told the same thing, but she wasn't even going to operate...just flush out the crop from the top. That's crazy. To quote my husband, "Do you know how many chickens we could buy for that money?" We're going to have to try this ourselves as soon as the sutures and scalpels get here.
Kat
7/12/2020 12:46:34 pm
So... I followed your instructions to clean out my hen's crop yesterday. Thank you for your thorough instructions! It was amazing how much stuff came out. She is acting fine today, but she won't drink any water at all. I have to feed her with a dropper. Any suggestions? Also, I am really afraid that I didn't get everything. She is still doing that yawn thing. Maybe it's just the wound and/or swelling, but her crop is not completely flat. I will open her again if I have to, but how long should I wait? Any suggestions are greatly appreciated! Thank you.
Kelsey
7/13/2020 06:52:59 am
Hi Kat! Congrats on getting through the surgery. Give your hen some time to heal. She may be drinking when you aren't present. You can add a little molasses to her water to help with electrolytes. I would refrain from opening her back up and give it two weeks. Her crop needs time to heal!
Kat
7/17/2020 02:24:48 pm
Hi again Kelsey, Thank you for your reply! Chloe is still hanging in there, and I've put her with the rest of the hens. She has not gained one ounce since the surgery almost a week ago (she weighs 2lbs 4 oz, when she should weigh at least 4.5lbs). When I watch her, she pecks around but barely eats, and she avoids drinking altogether. Her crop still feels like a hard ball. It think some things are moving through, but not everything. I guess I'll wait another week and see what happens. The vet had given me antibiotic for sour crop, and that worked, and I'm still giving it to her. I don't know whether to stop or keep it up and wait to see if I have to do surgery again. Ugh...it's all so confusing, and this has been going on for so long. :(
Jen
8/18/2020 03:28:35 pm
Thank you!!! For such a detailed post.. my chicken had sour crop.. I did everything and nothing worked and I knew if I didn't act quick she would not survive... So I got my niece who just became a RN to help with the surgery.. following step by step what you pointed out plus seeing other YouTube videos.. I can say my chicken is doing great..❤️🙌🏻.. thank you again 😊
Kelsey
8/19/2020 06:40:24 am
This is such wonderful news Jen! I am so glad to hear things went smoothly!
Joyce
8/25/2020 03:49:48 am
Thanks so much for the instructions. Unfortunately, your videos won't play. Must have been blocked.
Joyce
8/25/2020 05:07:22 am
Sorry.... I forgot to ask my question. So, at what point do you decide "now" is the time to do this? I've spent 2 days isolating my hen and giving water, some olive oil, only and her crop is still the size of a baseball. Thanks Kelsey, I really appreciate the post.
Kelsey
8/25/2020 06:45:08 am
Hi Joyce, you may want to try a different browser if the videos are not playing - they play on Chrome and Safari for me. If your hen's crop is the size of a baseball it's highly unlikely she will pass the mass on her own. If I was in your shoes I would operate as soon as possible.
Avery
9/17/2020 07:37:18 pm
Hi thank you so much for your advice, I just preformed surgery on my hen, she is standing so upright and keeps moving her crop around as if she is moving stuff around in her crop. We tried to give her some water but she just stood there and looked at it. I’m really worried that I did something wrong, is it normal for her to be out of it and standing so stiff and upright after surgery?
Kimberly
10/26/2020 05:14:29 pm
Could you email me the link to the crop surgery? The link for tube feeding works drone but none have the surgery pictures seem to have a link for the video.
BC
10/27/2020 03:17:51 am
I have 3 house bantam silkies, and my little silkie hen pecked a few overly large pieces of gravel on a trip out and had an impacted crop. I noticed her crop being extremely full on the first day but thought it was fine. On the second day I noticed she was lethargic and didn't poop much. She still drank water and ate papaya when I offered her (traditionally papaya is known to support good digestion in my country). On the 3rd day I noticed her crop was still very full and hard (golf ball) early in the morning and decided to separate her from the rest despite her still eating well.
Marissa H.
11/16/2020 06:13:26 pm
Performed this surgery on my girl today. I had the vet do this for about $300 but they didn’t give me great post op instructions and my Mo did it again. This time I wanted to try, with my husband as the one holding her, I performed the stinky tedious operation. We are doing the 36 hours water only then will start on softened hen food and I may try some baby food like green beans since she’s very very skinny. I had to use a different suturing video to learn that part because there wasn’t a link attached above but everything else I’ve followed. Hopefully she will make it through, she’s pretty resilient. I love my chickens like pets so loosing one hurts. Thank you for posting this and giving me the confidence and the tools to help my chickys!
Leanne
11/26/2020 03:57:52 pm
Hi I performed this on my friends chicken as it is ate some bedding and everything we tried did not work to get it not impacted. So Lucky me have access to surgical supplies and with the help of my kiddo and husband we did it. And Skipper is already hungry and wanting to eat and being her old self 24 hours after surgery. Thank you for posting this as no one does this in our area.
Raelene
12/11/2020 12:04:22 pm
Thank you so much for this blog! We are 40 hours post surgery and our little hen is doing really well so far, thank you!!
Sarah
12/16/2020 04:35:09 am
Thank you so much for this informative post... we bought 3 hens in the summer (Pecky, Egghead and Drumstick - the kids named them!) and after a couple of months Drumstick stopped laying. We checked she wasn't egg bound, then was convinced she was just broody as spent all day in her nest box. So we were acting on that and keeping her out of the nest box past 8am, when that didn't 'snap her out of it' we got a few potentially fertilised eggs from a neighbours girls and let her incubate them for 29 days. Nothing hatched but she voluntarily came out of the nest box from them on. She was visible getting smaller, her comb shrivelled down to nothing and she became lathargic and barely mobile. We were at a loss! I happened to walk by her when she had fallen and was stuck laying forward with green liquid coming from her beak. This started a new Google search, which ultimately lead me to your thread! We tried manually emptying her crop and gave her a course of daktarin to treat the yeast infection, which appeared successful as she perked right up, got her appetite back and her crop was small. But it didn't take too long before her crop started to fill back up and I could feel a hard mass. A wk of olive oil and massages didn't do the job so we decided surgery was our only option. We performed this on her last night and all went as planned. She is on her feet and perky today, the wound looks great, we've changed the dressing and applied her antiseptic cream. She's clearly desperate to eat something but we're going to hold off 36hrs as per your instructions. So grateful to have found this with such clear guidance on the equipment needed and the full process! Comments are closed.
|

Meet Kelsey,Thanks for stopping by Green Willow Homestead! From chicken rearing to composting, we've got our hands full and we love sharing what we've learned along the way. Follow along as we turn the 80 acres we call home into a farm that serves its community and a homestead that nourishes us throughout the seasons. 
Grab the EbookListen in!
FREE Guide!
Tune in to our YouTube ChannelInspirationsCategories
All
Favorite Books of 20241. Erosion
2. Braiding Sweetgrass 3. As Long As Grass Grows 4. The Small Scale Poultry Flock 5. The Zero Waste Solution Archives
April 2024
|
FOLLOW KELSEY ON INSTAGRAM!
|
|
As an Amazon Associate I earn from qualifying purchases. |
|