|
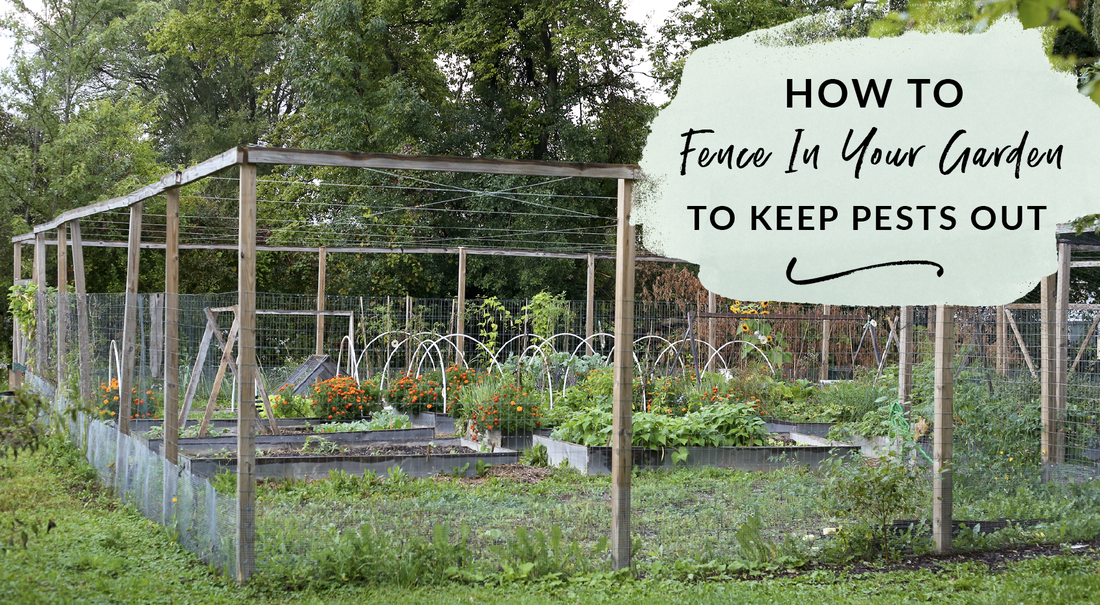
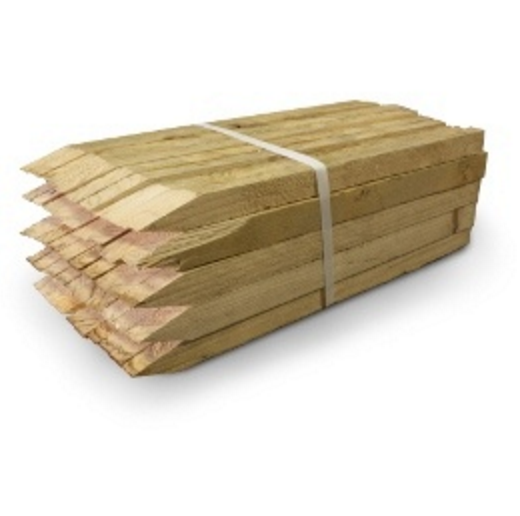
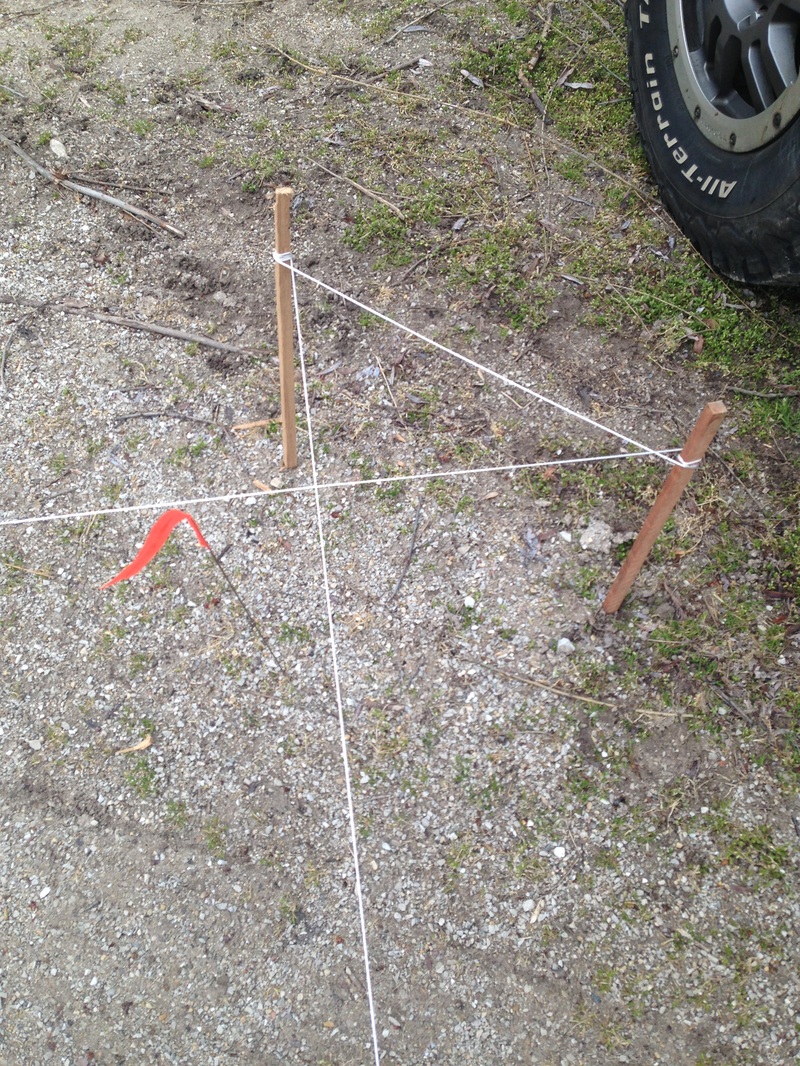
This last week my father and I put up a much needed barrier between our soon-to-be garden and hungry Wisconsin wildlife. Putting up a sturdy fence can keep munching deer, nibbling rabbits, and peckish gophers from enjoying your bounty. After observing the amount of wildlife that lives on our property through the wintertime, I concluded that a tall fence was in order. I also talked with fellow gardeners in the area and asked them what works. The general consensus was pro-fence. Keep in mind we live in a more rural area with a young forest, so if you are in the middle of the suburbs you might just need a bunny fence. Regardless, there will be lots of insight in this post on the DIY fencing building process so read on to learn more! The soil in our area is 80% clay. If I never had to see clay again in my lifetime, I would be totally fine with that. Imagine if cement and chewed bubble gum had a baby, that would be clay. Now imagine trying to dig into that 33 times over, 4' down. Yeah, no thank you nature! I know, I know, clay holds much more nutrients than sand, but still. Allow my wrists and hands one moment to complain after all this digging. My dad and I knew we needed a Bobcat-powered earth auger after about three hours of digging ourselves. Enter Sunbelt Rentals. We rented a 4' long 9" wide earth auger to sink our holes. Our neighbors very lovingly lent us their S150 Bobcat to use for the day. The total for the earth auger 24-hour rental was $188. If you were digging in this clay you would know that it was $188 well spent. If you live in an area that doesn't require this extra work - consider yourself lucky. Just rent a hand-held earth auger from Home Depot for the day to get the job done. I had to do a hefty amount of research to fully understand how a bobcat/earth auger worked, but I could have just called Sunbelt and explained our situation to them. They are the professionals you know! Sometimes I let my DIY spirit get the better of me. Sunbelt rentals was so incredibly helpful. They even walked us through hooking up the hydraulic system over the phone when we ran into a few issues. We were digging holes in no time! Below is a video on what the set up looked like with the bobcat and the auger. Prepping Your Garden for FencingYou will want to mark out your fence perimeter prior to digging. When it comes to spacing out fencing, the recommended length is no longer that 8' between posts. To get started, I used some handy dandy marking flags, a ball of 800' nylon string, a speed square, and 12 wooden stakes that were about 3' tall to mark out the perimeter. This is easiest as a two-person job, thanks boyfriend! First, we cut a notch into the top of one wooden stake, tied the end of the nylon rope into the notch to prevent slipping, and sunk the stake into the ground just past where we knew we wanted to put a corner post. Next, we strung the string taught to the opposite corner, notched another stake, wrapped the nylon around it multiple times, and sunk the stake. In order to make a perfect 90-degree angle corner, we sunk another stake kiddy corner to the first using the described method above. Then I walked to the next corner with the string, pulling it taught. Keep in mind we didn't cut the string until the very end, instead, we wrapped it around the stakes as we went through the corners (see the picture below). Then my boyfriend would take the speed square to check if the angle was at 90 degrees. Once we were square I would sink the next notched corner stake. Once we had all four corners set for the perimeter, I walked through with my marking flags and a tape measurer. Starting at each corner I would measure 8 feet and sink a marking flag. On three of the four sides, I wanted a doorway. For our front gate, I wanted it wide enough to get a truck through if needed, so we left a 10' opening there. In the back, I left a 4' opening to get to our trail. To get into the chicken run I left another 4' opening. See the picture below for our master plans. Each door is marked with a thicker line and a notch for the handle. By using the string and stakes, you are able to mark your fence posts on a perfectly straight line with the marking flags. 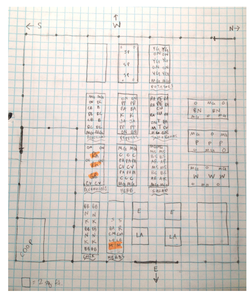 I definitely recommend getting some graph paper to map out your fencing plans. It helps keep your vision intact as you work and run into (inevitable) obstacles. Another plus is it will allow you to show and explain your plan to fellow friends and family who may be helping you. Our garden layout plans have gone through multiple changes, so be sure to use a pencil or get yourself a nice stack of graph paper! As you can see I also mapped out my vegetable garden beds using this method. Getting Your Supplies in OrderOnce we had the garden fence posts mapped out with marking flags the next step was to get supplies for the fence. To help you determine your own set of supplies for your fence there are a few things to consider. How tall do you want your fence to be? Do you need to sink your fencing material to keep gophers or mice out? What do you want to use to stabilize your fence posts? The recommended digging depth for posts is 1/3 the height of the post. You also want to be sure that you are past the frost line. The frost line, also known as freezing depth or frost depth, is the depth to which the groundwater in soil is expected to freeze. If you don't get past this point it can cause your fence posts to shift as the ground expands and compresses with the seasons. With our garden we want our fence to be 8' tall, so we need a 12' post and we have to sink it 4' deep. I recommend going at least 3' deep to get past your frost line if you live in the glorious Midwest. We knew we wanted to sink our fencing material to keep coyotes from digging under and getting into the chicken run as well as keep rabbits from digging and getting into the garden. We are going to sink our fencing material a minimum of 10", so we would have our fencing sit above ground around 5' if we get 6' tall fencing. Along the chicken run, we will double up along the bottom with a smaller mesh size to keep weasels out. After doing some research on what to use to stabilize our fence posts, I concluded that cement was a serious no-go. When you use cement, not only is it extremely messy, but as your fence posts expand and contract over the years it will create a space between the cement and post that acts like a cup. That cup will hold water without allowing it to drain away from the wood, causing it to rot faster than using crushed gravel or stone. I decided to go with 3/4" crushed limestone to save myself the mess and the headache. We also decided to add another level of stabilization by using 2x4s as joists. An added plus of the joists is that they keep the vertical posts level as you work. Joists aren't needed for any fence under 5' tall. Here was our final list:
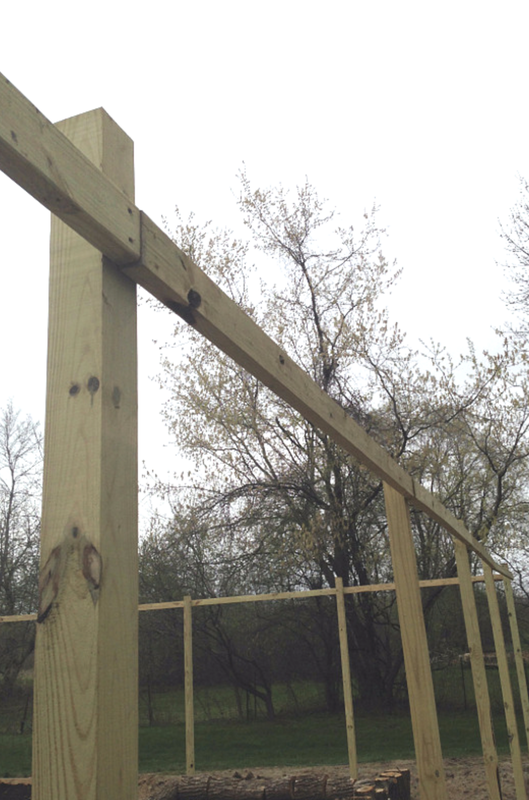
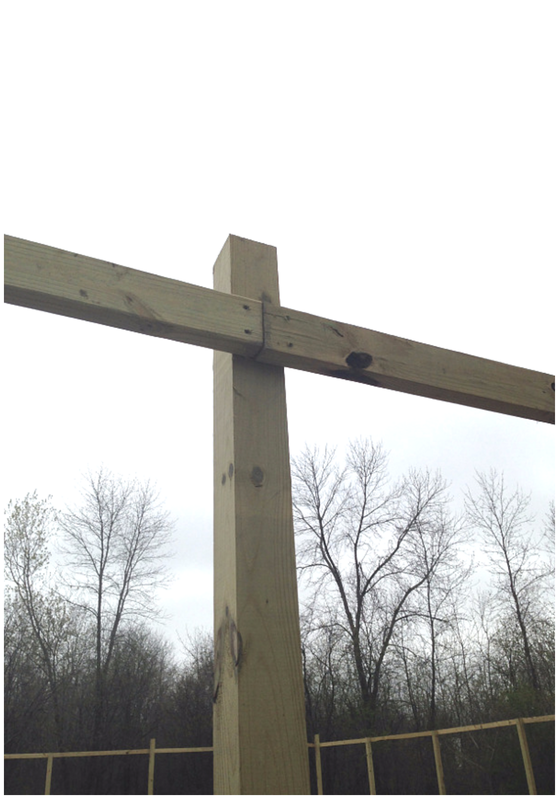
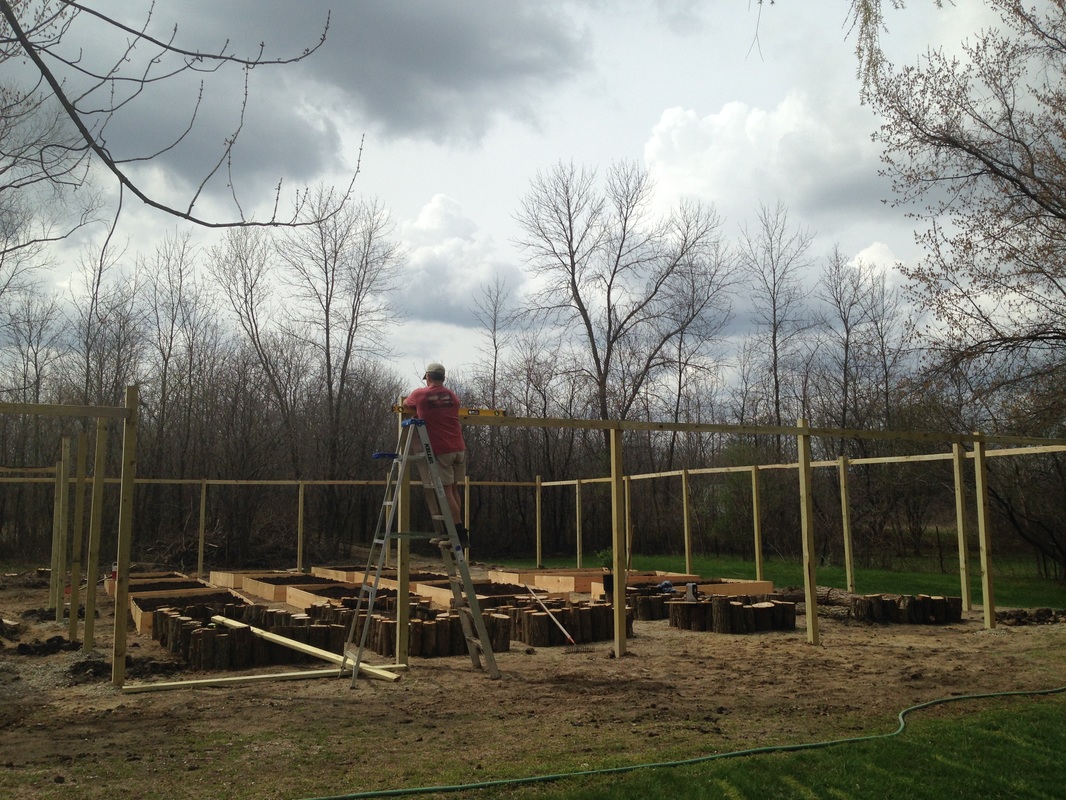
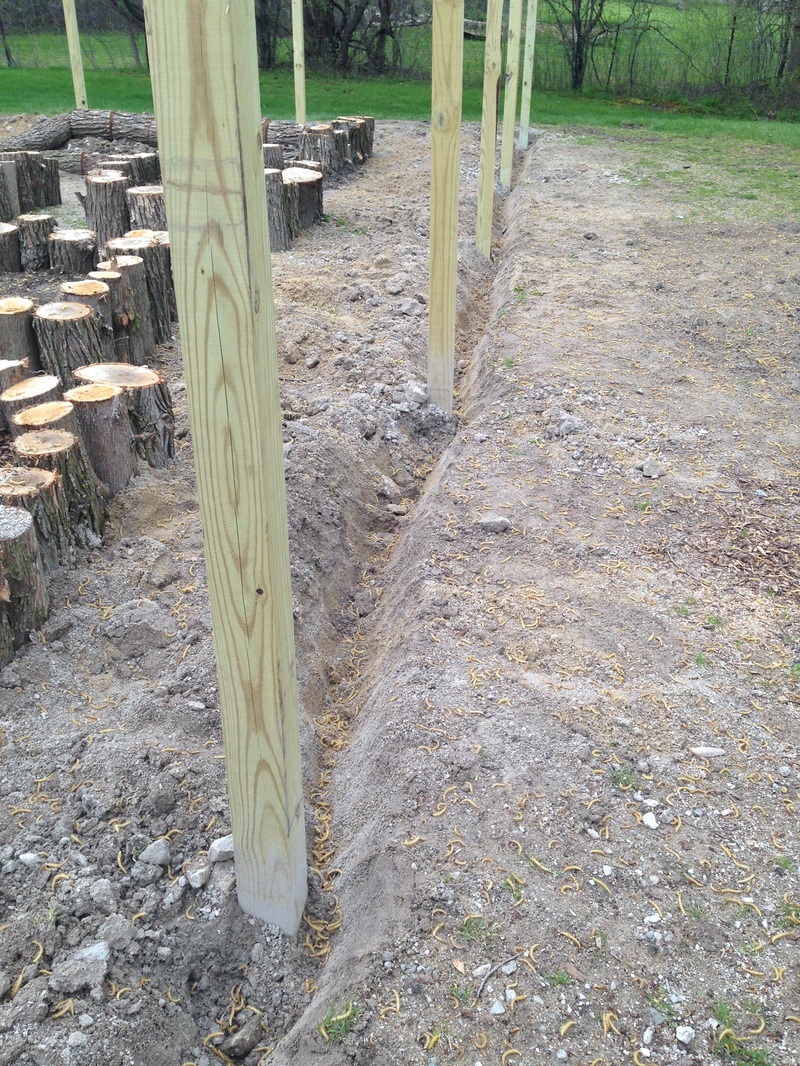
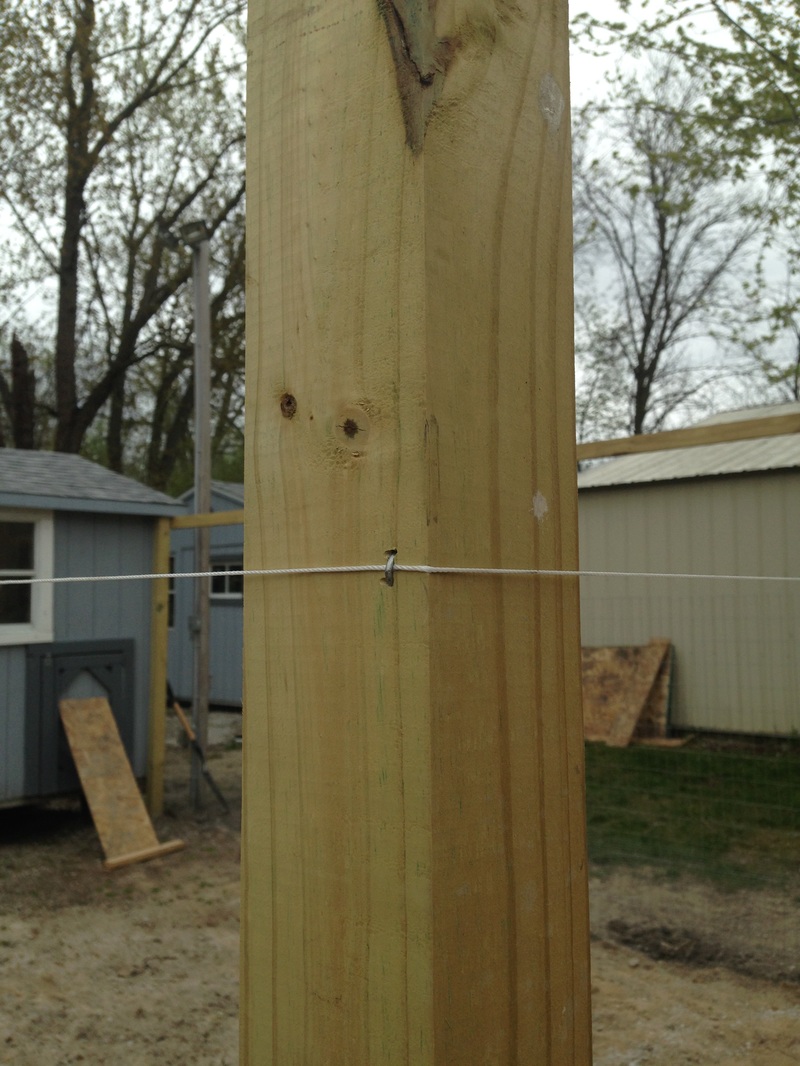
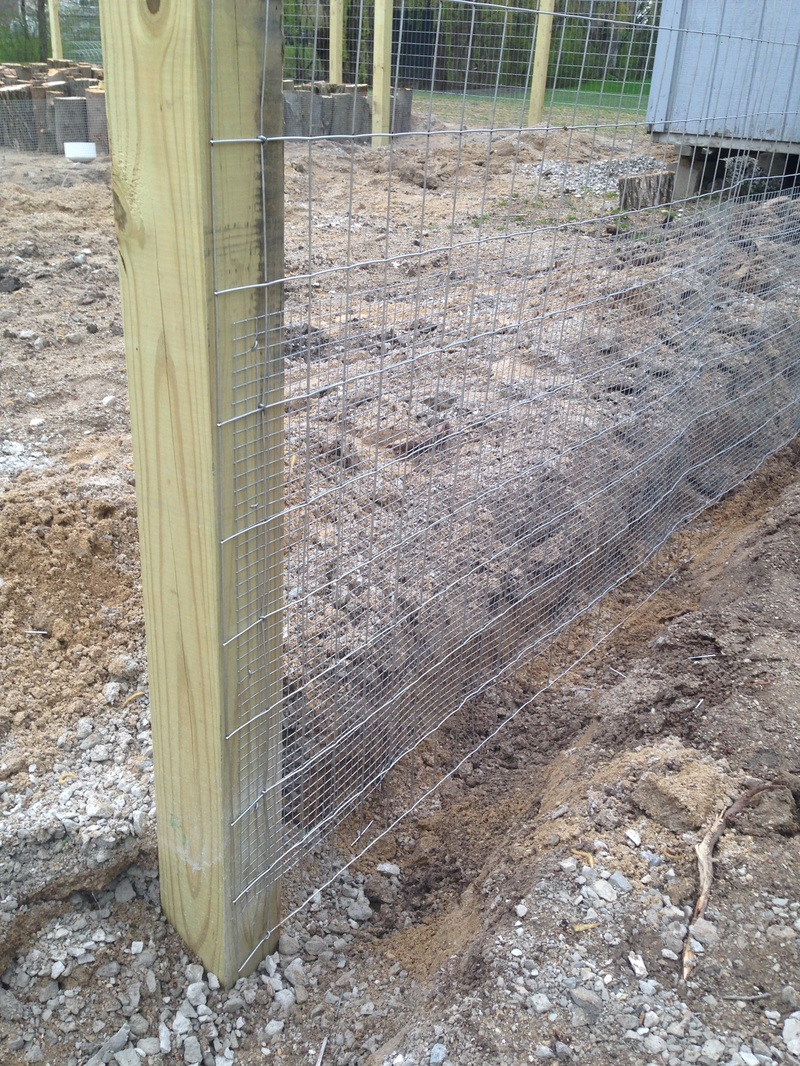
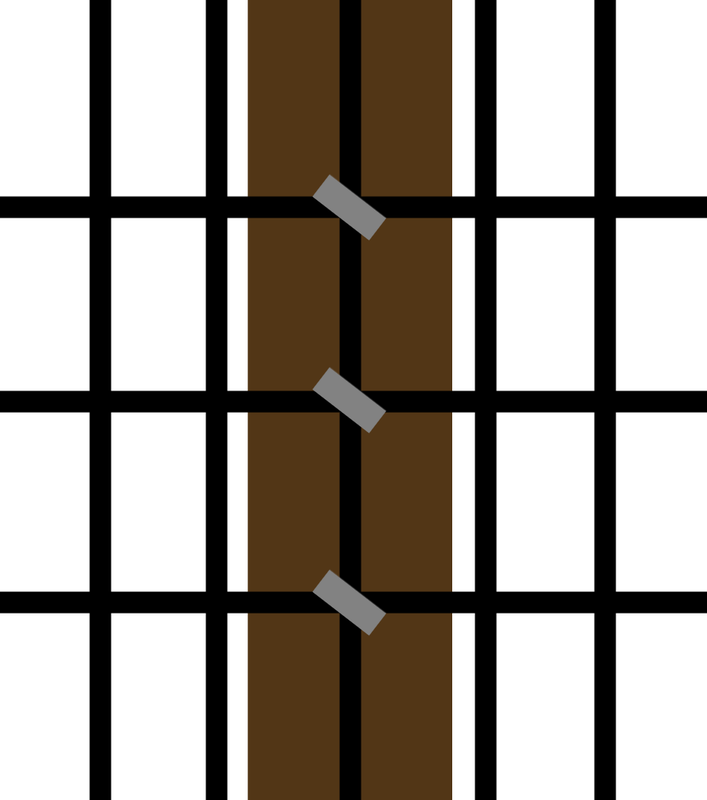
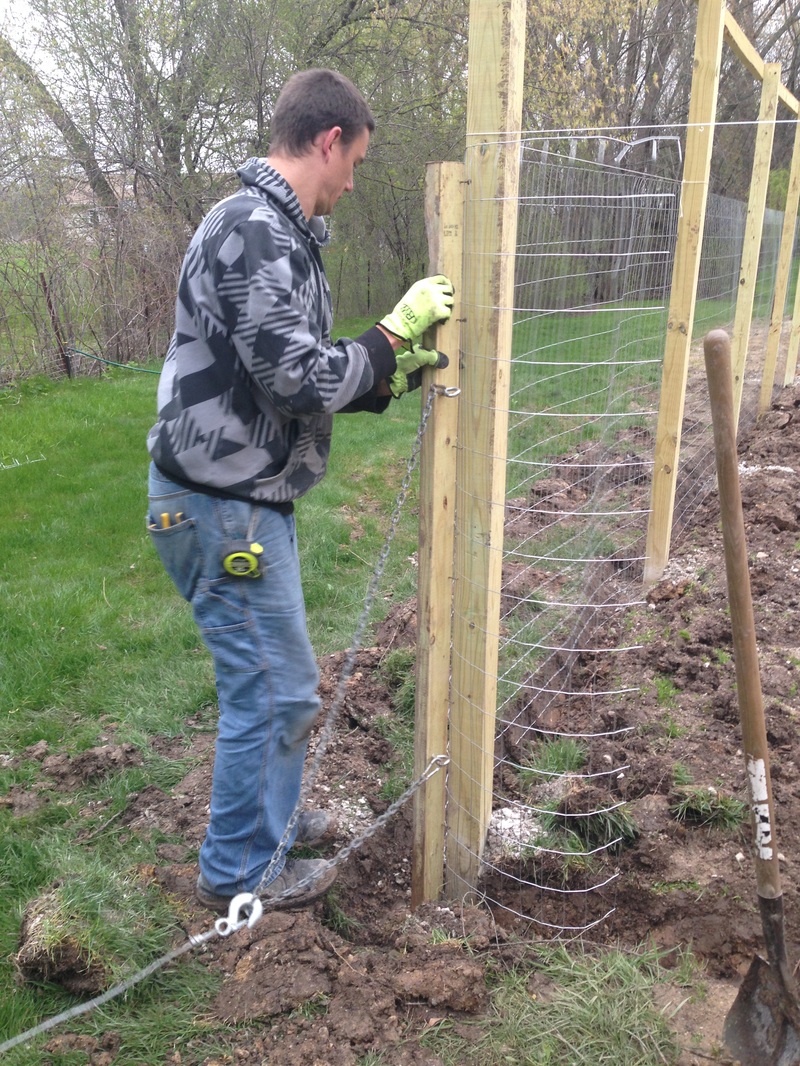
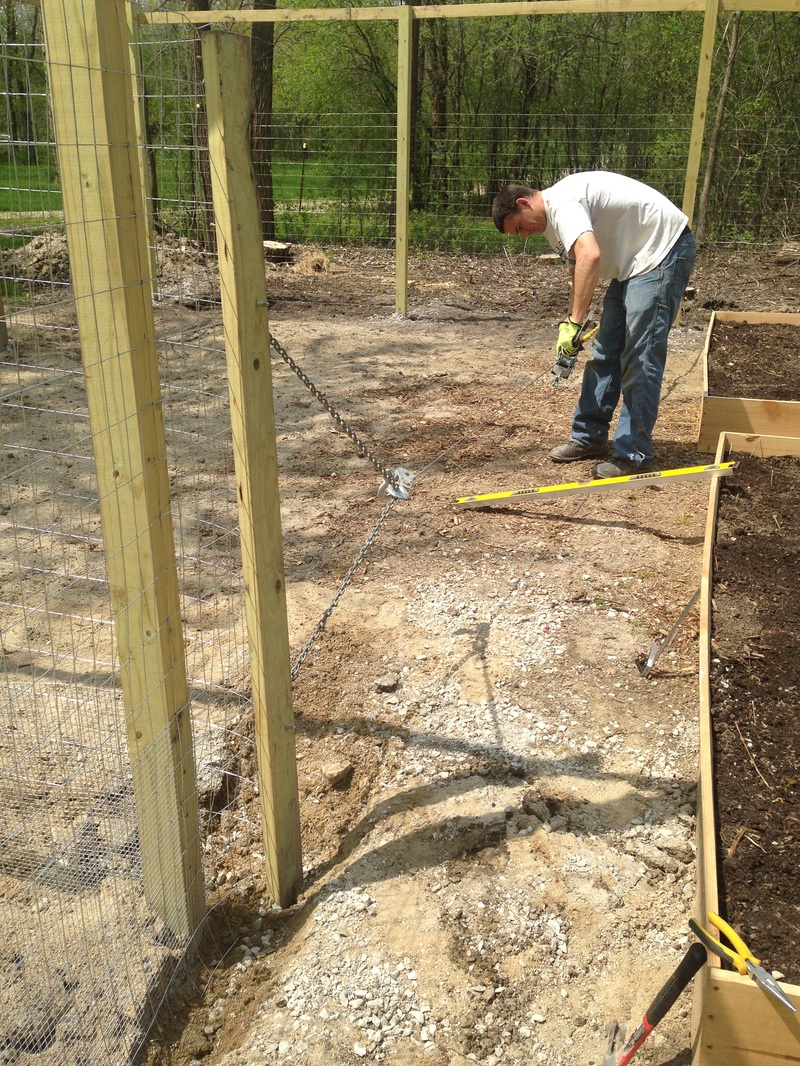
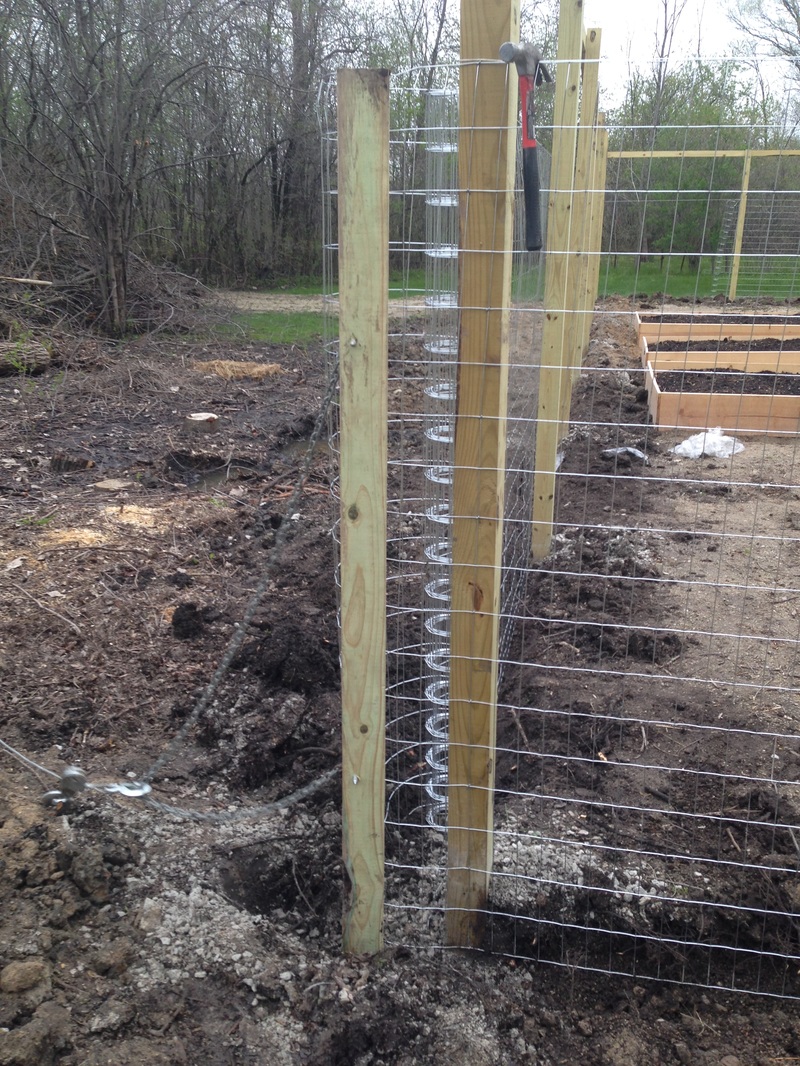
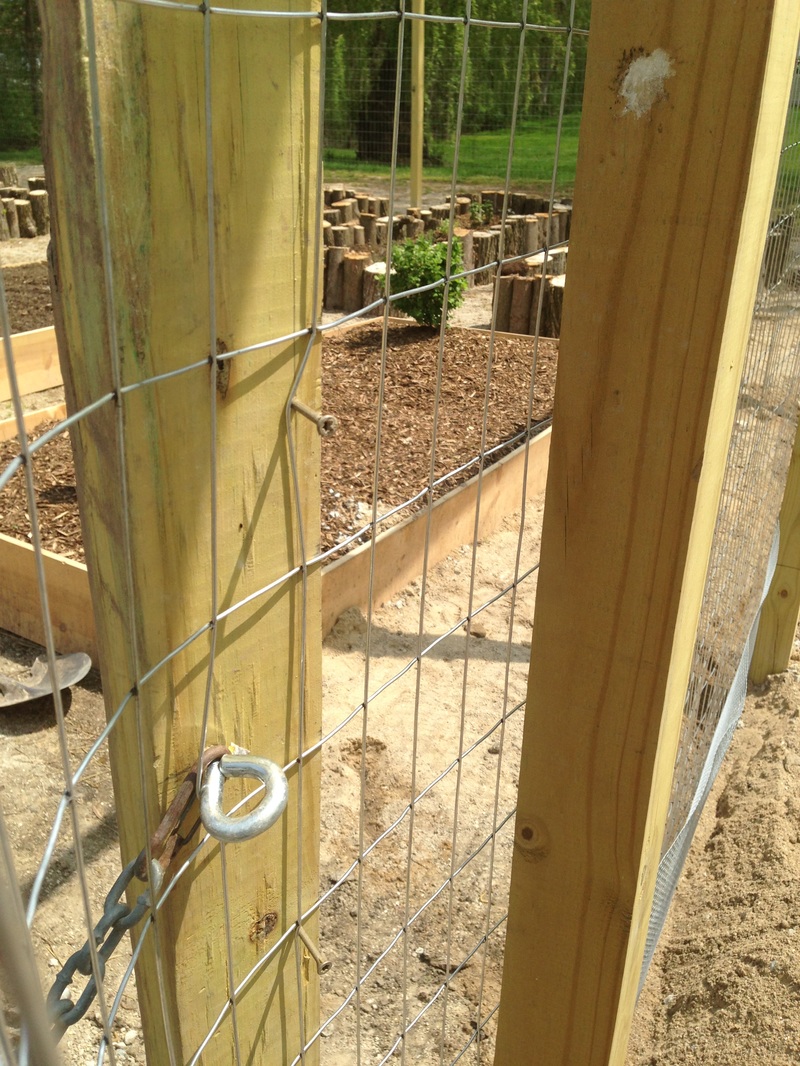
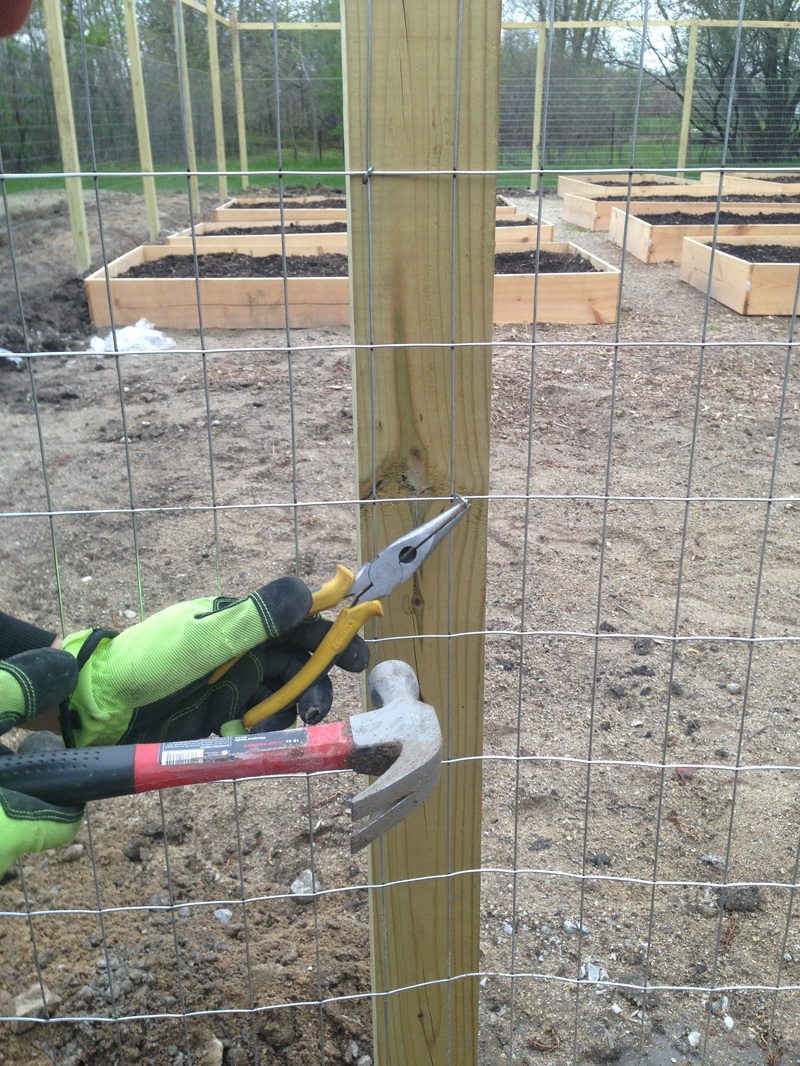
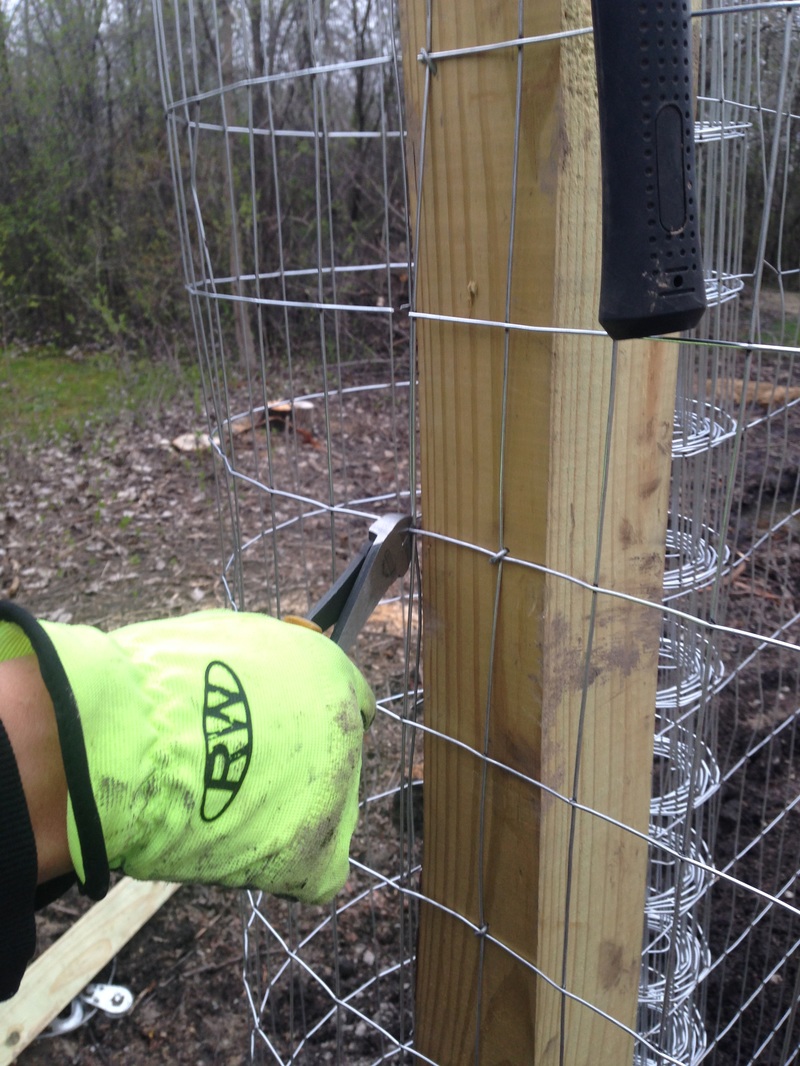
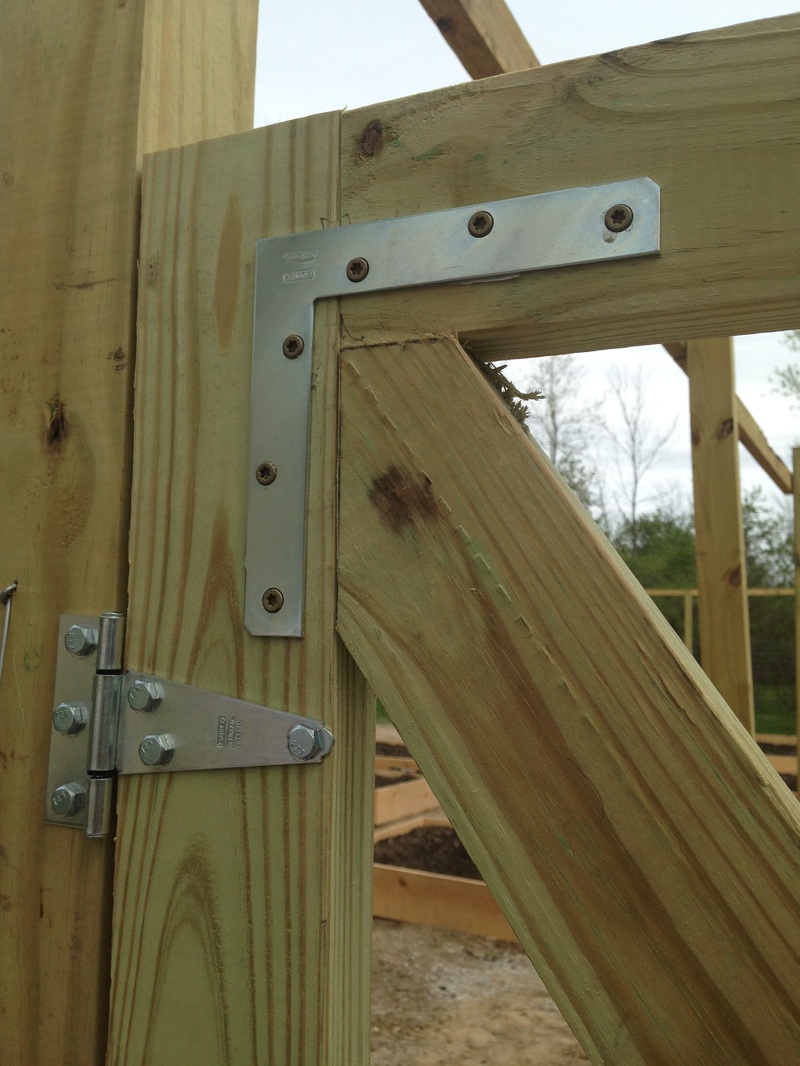
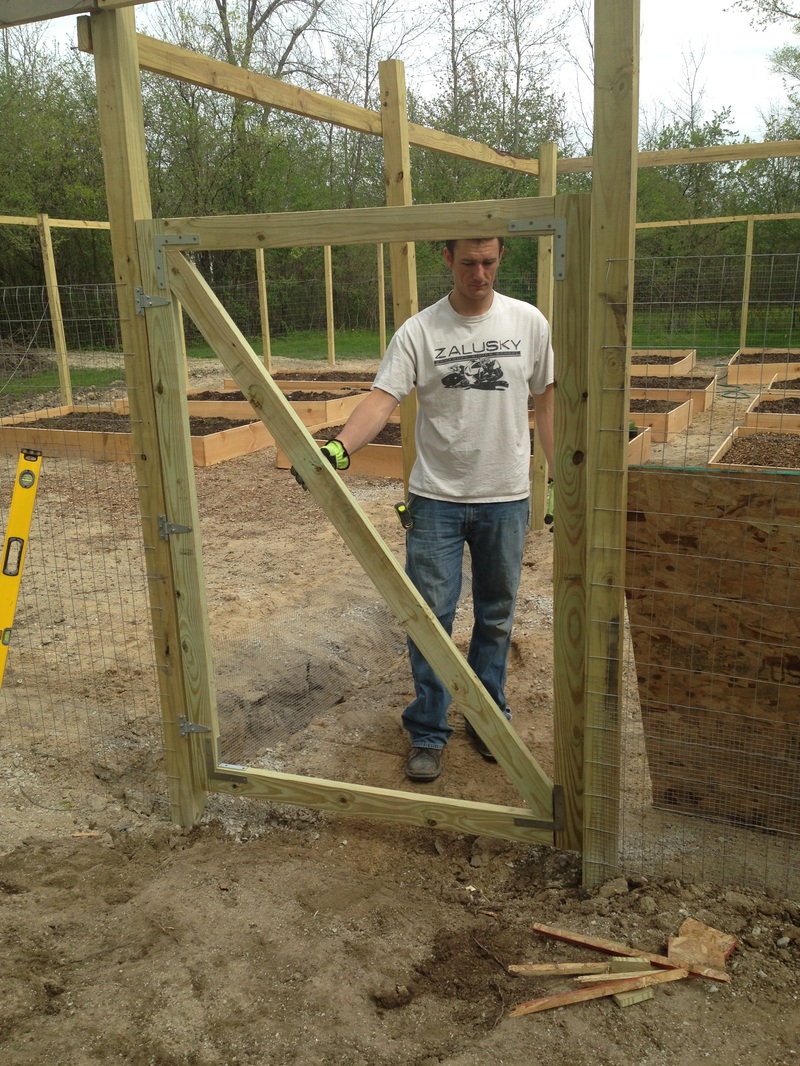
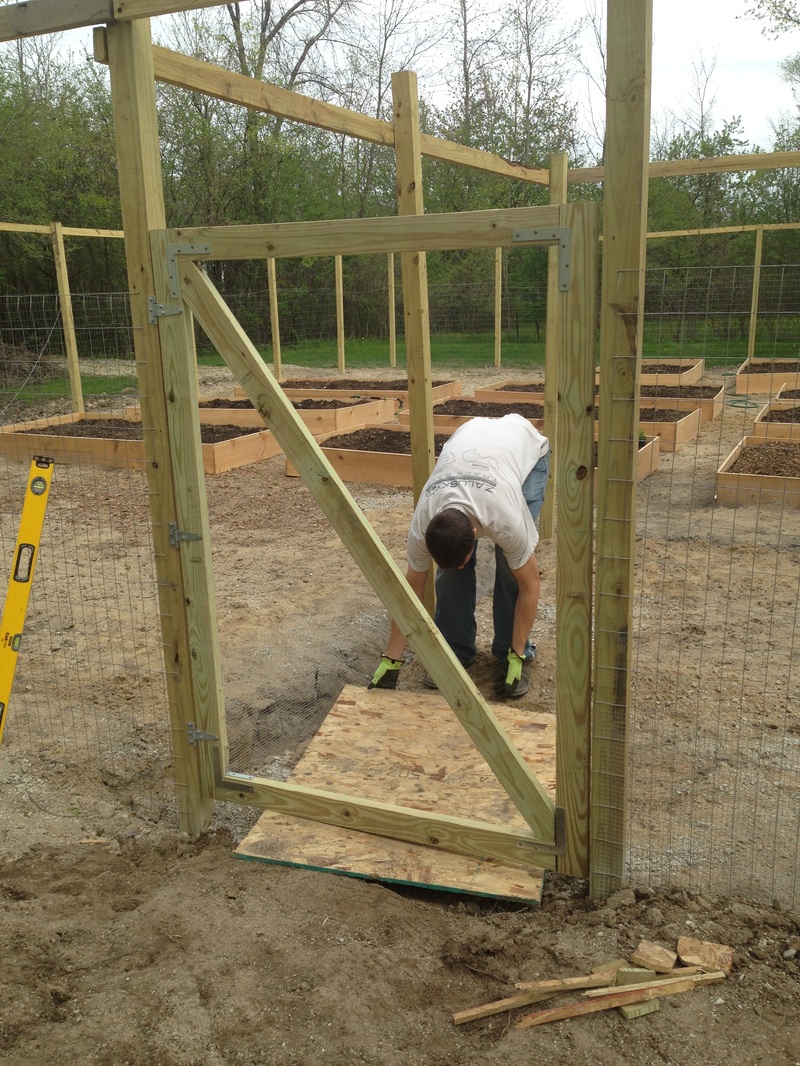
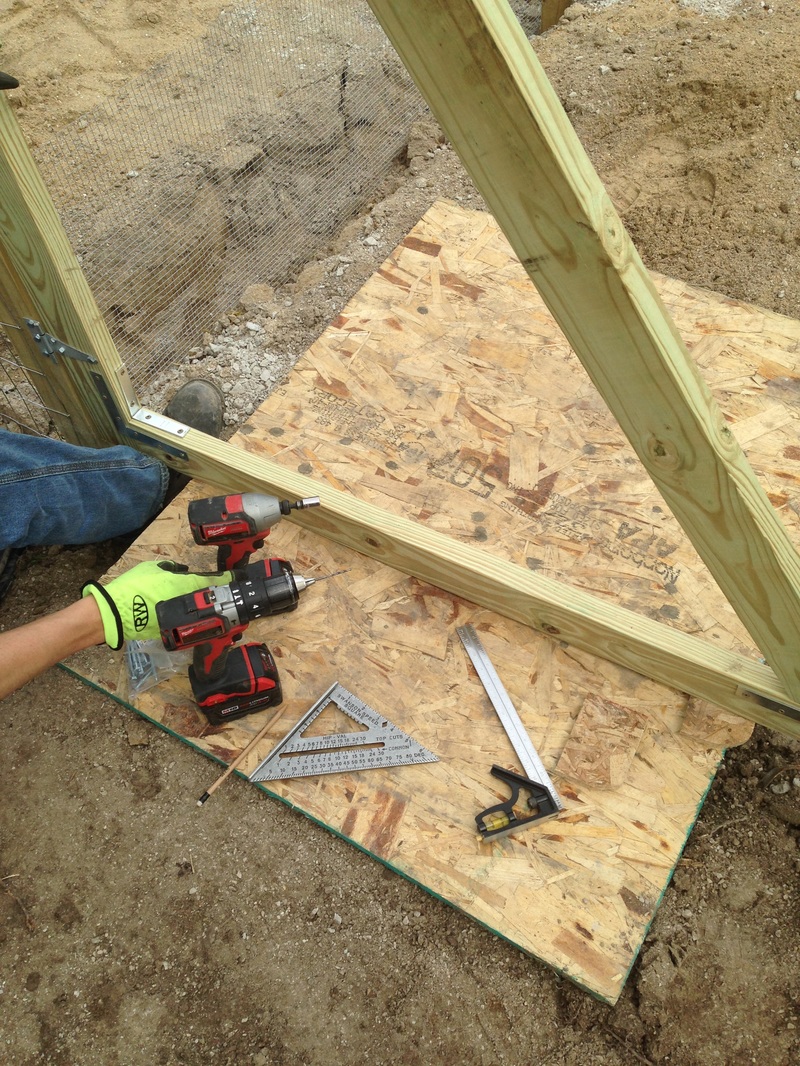
Getting the Fence Posts InWith my dad behind the bobcat, I worked as his second pair of eyes. We first removed the string and stakes, temporarily because you will need them later, and used the marking flags as our guides. Using the auger we dug down on average three times per hole. With all the clay in our soil, I had to knock it off the blade of the auger with a long wooden dowel every single time (my arms are like a Greek god's now thank you very much). We were able to get through all 33 holes in 3 hours. A total breeze compared to our headache last week with the handheld auger. Next was putting in the posts. We started in one corner and worked our way across one side at a time. My dad used a sharpie marker to mark 4' up upon each 4x4 so we knew if we were too deep or not deep enough when we placed it in the hole. If we were too deep, I would throw one or two shovel's worth of crushed limestone and we would check again. Once we close enough to 4' my dad would hold it level as I would dump a wheel barrow's worth of crushed limestone around the post. I cannot stress enough how important it is to hold the post level while you fill in around the post. Your DIY fence can go from pristine to seriously sloppy without keeping things consistently level. Now your string and stakes are going to come in handy. Pull one end of the string up to the face of your corner post so it sits flush and then sink that corner stake. Then along the opposite corner of the direction you are working in, pull the string taught and stick that stake back in the ground. This string will help you keep the outermost face of each 4x4 flush and straight with the edge. Then we placed our next post in the hole and repeated the stabilizing process. Once it was level and stabilized, we took our first joist and screwed it into the corner post at the top on one side with just one screw. Then using the level we would make sure the joist was level before sinking a screw into the next post over. Once we had a screw in on each of the joist, we would add one more screw on each end for good measure. See below for our progress! We continued this process along the perimeter. With two people working it took us about 6 hours to get all the posts sunk, leveled, stabilized with limestone, and reinforced with joists. Getting the Fencing Material UpNext on your DIY fence project is getting the fencing material up. We kicked off this phase of the project by digging along the outermost face of the 4x4s, where the fence will sit flush with the post. Some sections were easy and some were just plain miserable. Serious thanks to Paul's mom for helping me with this task! There is a corner of our garden that sits much lower than the rest. We kept working at level during this section while sinking posts and hanging joists. This means we have to build up the sand in this area, especially around the fence posts, so it sits level with the rest of the garden. Once we were about 10-12" down in the trench, we got ready to install our first side of the fencing. At this point you are going to need the come along winch, 100' roll of fencing, staples, hammer, needle nose pliers, nylon string, and wire cutters. The first thing we did was use our nylon string and a level to create a straight line where the top of the fencing material would sit. This was extremely helpful because instead of "eyeballing it" you actually are staying level and straight throughout. We measured up about 5'8" from ground level and secured the rope with a staple at each corner temporarily. Next, you are going to secure your first few staples. Have one person hold the exposed end of the fencing and the other unroll it to the opposite. Once you reach the opposite corner loop the roll around the corner to secure it temporarily. Grab your needle nose pliers, hammer, and staples. Have one person hold the end of the fencing flush with the nylon rope and the vertical side of the post while the other person sinks staples. We sunk staples every 10". You will want to sink the staples at the intersections of the wire fencing, unless you are unable to due to where the intersections might land with each post. See the diagram below. Once we had that first vertical row done, we grabbed our come along winch and secured one end to a tree, and the other end we secured to a handy-dandy DIY fencing stretcher tool. To make this tool you will need a 2x4 that is about as tall as your fence, so for us about 6'. We then sunk 8 screws in a perfectly straight line every 9". These screws will then hook the fencing and pull it evenly as we use the winch. Then we sunk two heavy duty eye hooks about 1.5' on either side of the middle of the 2x4 so that the winch pulled directly from the middle of the 2x4. Then we used 5' of chain that we secured each end to the eye hooks. This chain is what the hook of the winch will pull, which then will pull the row of fencing taught and straight. See below for a picture. I would hold the DIY fencing stretcher tool in place to make sure none of the screws came unhooked from the fencing while Paul pulled the winch tight. If you don't have a tree in range, you can also use a truck or another fence post (like we did in the pictures above). Once the fence was tight we would double check along the nylon rope to make sure the fencing was still pulled level. Then we would go along and sink staples in each fence post using a hammer and needle nose pliers. We used the pliers to hold the staple in place, then gave it a good whack with the hammer. Once we finished sinking staples on one side. We would cut the fencing flush to the edge of the post with wire cutters. Rounding corners without cutting the fencing was just too hard, so we repeated this process with every side. The DIY fencing stretcher tool would also bend the wire on the fencing a bit too much to be usable (see below), so we would clip it off and start with a fresh straight edge. We recycled all our scrap pieces if they couldn't be used later for doors. As for making the gate doors yourself, I can show some pictures, but I was not present when they were made. See below! We did make them wide enough to leave about 1/2" of clearance on either side. We used three 5" hinges hingers per door. When we hung them, we used a flat board set level on the ground, then we set the gate on top of it, checked the top of the gate to make sure it was still level, and secured our first hinge. Paul screwed it into the post as I held the gate level. From there we installed the remaining two hinges. All our hinges were placed so that the gates swing outwards. From there, we repeated the fencing process I outlined above to fence over the gates. I like using fencing instead of wood because it doesn't leave you with visual gaps to your beautiful garden.
That concludes my DIY fencing blog post! Do you have any tips or tricks for sinking your fence? Leave a comment below and fill me in!
16 Comments
6/15/2020 10:19:47 am
It's really helpful to know that you shouldn't use cement to keep your garden posts in the ground. My spouse and I are trying to get a new fence this week so that we can have a great looking yard. We need to find some contractors that can help us pick the right materials to use.
Reply
1/28/2021 09:11:06 am
It's good to know that you can rent some of the heavy equipment for around $200/day. My brother is trying to get a new fence put up around his property this month. He needs to find the right contractor that can help him do this job properly.
Reply
1/28/2021 10:13:23 am
That's good to know that you would need to drill some pretty big holes into the ground. After renting the equipment to do that and the time it would take to install the fence yourself, I feel like it might be worth it to have a pro do it for me. I'll have to consider hiring someone if I decide to fence in my yard.
Reply
7/25/2021 09:14:42 am
Really good information about fencing issue. I’ve been looking for replacing my old fence at home, trying to choose the right style and materials to suit your garden. I thought that it could be too hard to do especially for beginners but aftering reading your article, I change my mind. I would ask some friends in Rochester to help me out
Reply
9/17/2021 03:15:57 pm
Thanks for this wonderful content. This was a great explanation of building fence to keep pests out. At some points, I always appreciate that a fence company should focus upon the homeowners and their pets not on the fence technology and the workmanship. Some of my friends in new hampshire are looking to improve their garden or fence installation nashua new hampshire and keep your pets enclosed, so i would definitely pass this article for them
Reply
Michael
6/30/2022 09:18:45 am
Beautiful job and great technical description. How do you block access under gates?
Reply
Sam
7/11/2022 05:30:53 am
https://www.greenwillowhomestead.com/blog/how-to-build-a-fenced-in-garden-to-keep-pests-out
Reply
5/29/2023 08:37:14 pm
Making your fence tall enough might seem like a no-brainer, but different animals require different heights to be kept out. For the majority of the US, deer are the main reason you need a tall garden fence. My first garden fence, which was 3 feet tall (see the photo above), was my first attempt at keeping deer out. I made advantage of the fence that was already there on my land. We regularly spotted deer, but I had never seen one jump the fence, so I decided to take a chance. I was fortunate to avoid encountering any deer that tried to cross the fence during the final two years we were there.
Reply
9/14/2023 05:07:34 am
Your step-by-step instructions and accompanying images made the process of constructing a protective garden fence so much more accessible. I especially appreciated your insights on choosing the right materials and the thoughtful considerations for keeping both pests and critters at bay.
Reply
10/6/2023 09:48:59 am
It's interesting to learn about your experience building a fence to keep coyotes and other animals away from your garden. For the past few months, my mom's been trying to grow a veggie garden, but each week something eats and damages her veggies. I'll suggest we seek a professional fencing contractor because we don't have the patience or the skills to install one on our own.
Reply
2/19/2024 12:27:21 pm
It helped when you mentioned that marking flags can be used to map out your fence posts. My friend wants to add a fence to their property. I should advise her to hire an expert in fencing to ensure proper installation.
Reply
Leave a Reply. |
Meet Kelsey,Thanks for stopping by Green Willow Homestead! From chicken rearing to composting, we've got our hands full and we love sharing what we've learned along the way. Follow along as we turn the 80 acres we call home into a farm that serves its community and a homestead that nourishes us throughout the seasons. Grab the EbookListen in!FREE Guide!Tune in to our YouTube ChannelInspirationsCategories
All
Favorite Books of 20241. Erosion
2. Braiding Sweetgrass 3. As Long As Grass Grows 4. The Small Scale Poultry Flock 5. The Zero Waste Solution Archives
April 2024
|
FOLLOW KELSEY ON INSTAGRAM!
As an Amazon Associate I earn from qualifying purchases. |

